MCQ Assessment
The Assessment Module in PitchnHire allows recruiters to evaluate candidates efficiently using different assessment methods like MCQs, Tasks, and AI-based Screenings. This ensures a structured and fair hiring process while saving recruiters’ time.
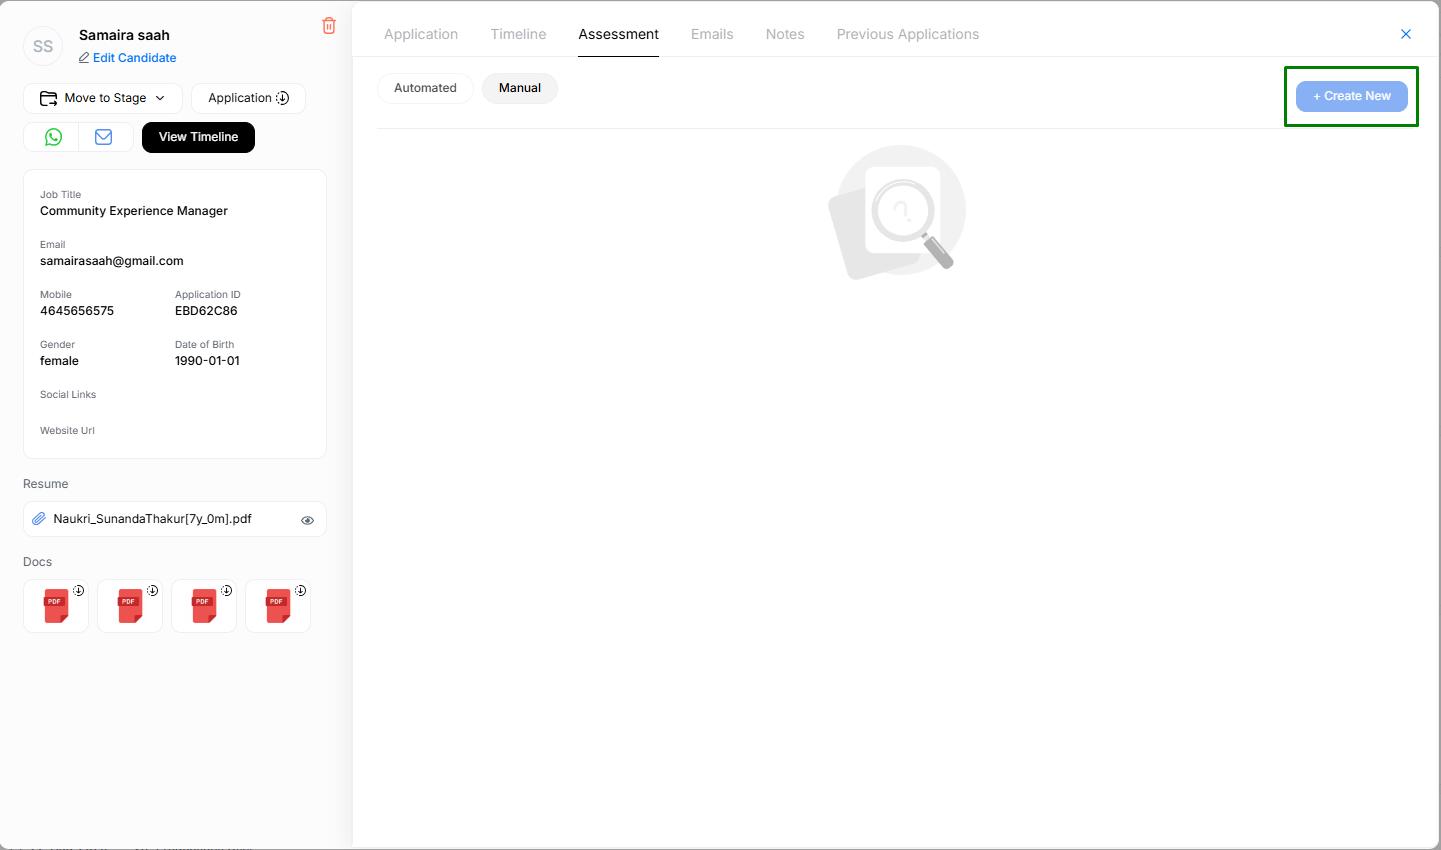
Accessing the Assessment Tab
- Open a candidate profile from the Job Application panel.
- Navigate to the Assessment tab.
- Choose either:
- Automated – System-driven assessments.
- Manual – Recruiter-initiated assessments.
When you select Manual, you will see the + Create New button. This allows recruiters to send a manual assessment to the candidate.
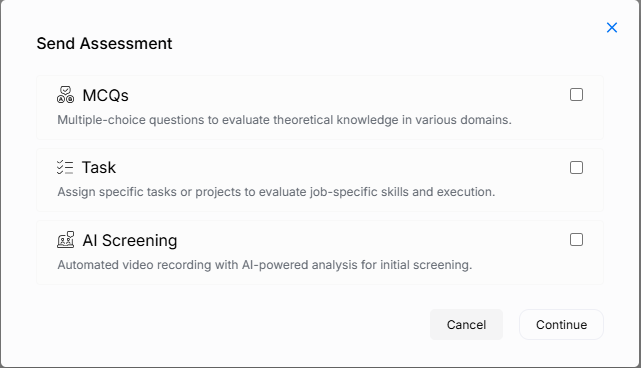
Creating a New Assessment
When you click + Create New, a popup appears with three assessment options:
- MCQs – Multiple-choice questions to evaluate theoretical knowledge in different domains.
- Task – Assign job-specific tasks or projects to test execution and problem-solving ability.
- AI Screening – Automated video recording with AI-powered analysis for behavioural and initial screening.
Choose your preferred assessment type and click Continue.
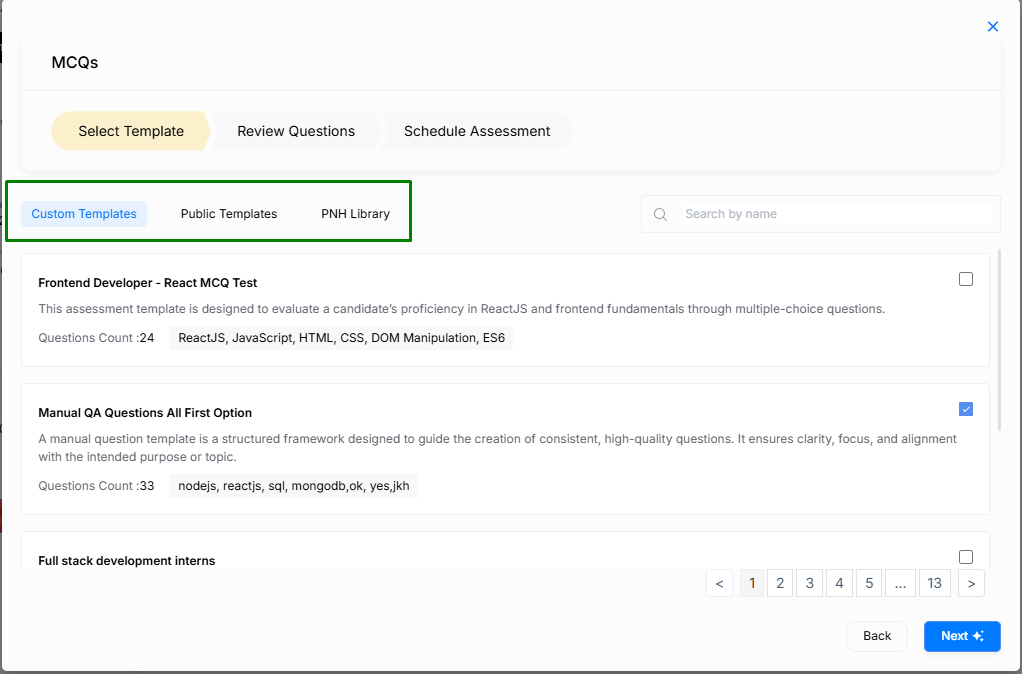
Choosing MCQ Templates
If MCQs are selected, the system offers three types of templates:
-
Custom Templates
- Created by the recruiter within the Template Manager Module.
- Useful for role-specific or organization-specific assessments.
-
Public Templates
- Shared by other recruiters within the PitchnHire community.
- While creating a template, recruiters can choose to make it Private or Public.
-
PNH Library Templates
- Pre-built templates available inside the software by default.
- Covers commonly used assessment categories.
A Search bar is provided to quickly locate templates by name.
Note: Recruiters can select one or multiple templates, but the total question count must not exceed 50.
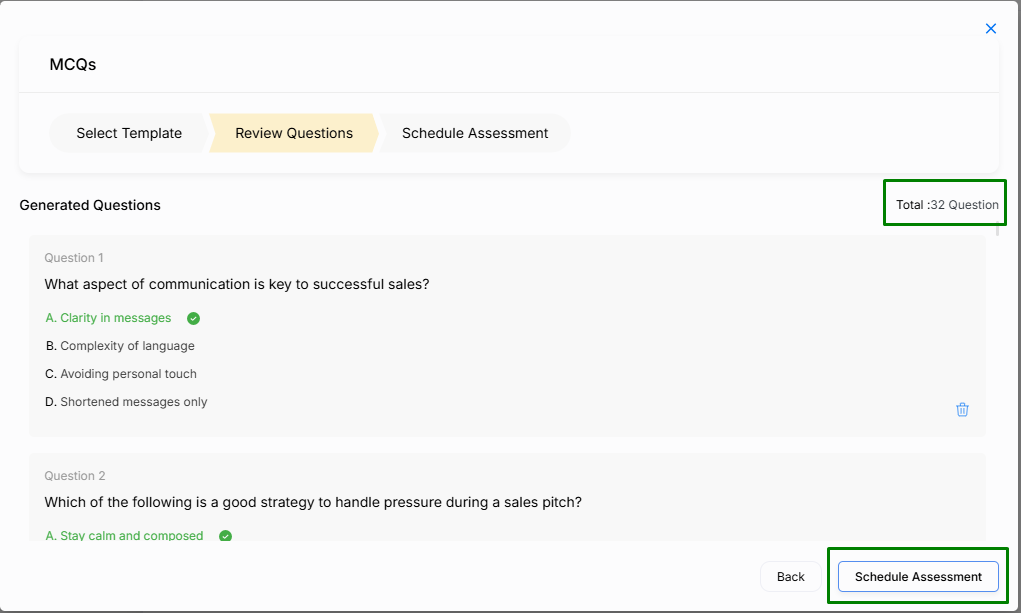
Reviewing Questions
Once templates are selected, the recruiter is taken to the Review Questions screen.
- All selected questions are listed.
- Recruiter needs to select the Total Question Count (up to 50).
- Recruiters can delete or review questions as needed.
When ready, click Schedule Assessment.
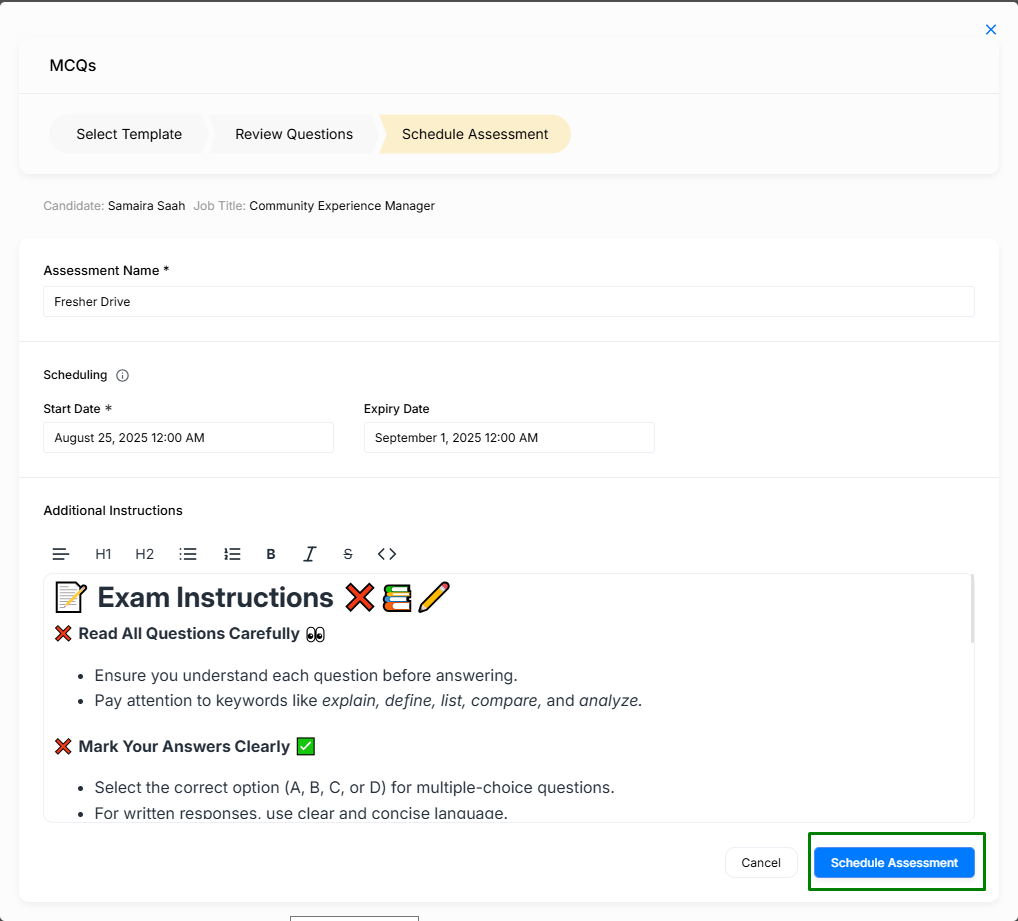
Scheduling an Assessment
In the Schedule Assessment popup:
- Assessment Name – Add a meaningful title (e.g., Fresher Drive).
- Scheduling – Set the Start Date & Time and Expiry Date & Time.
- Instructions –
- Pre-filled if instructions were defined in the template.
- Recruiters can also manually add guidelines here using the editor (e.g., Exam Instructions).
Click Schedule Assessment to finalize.
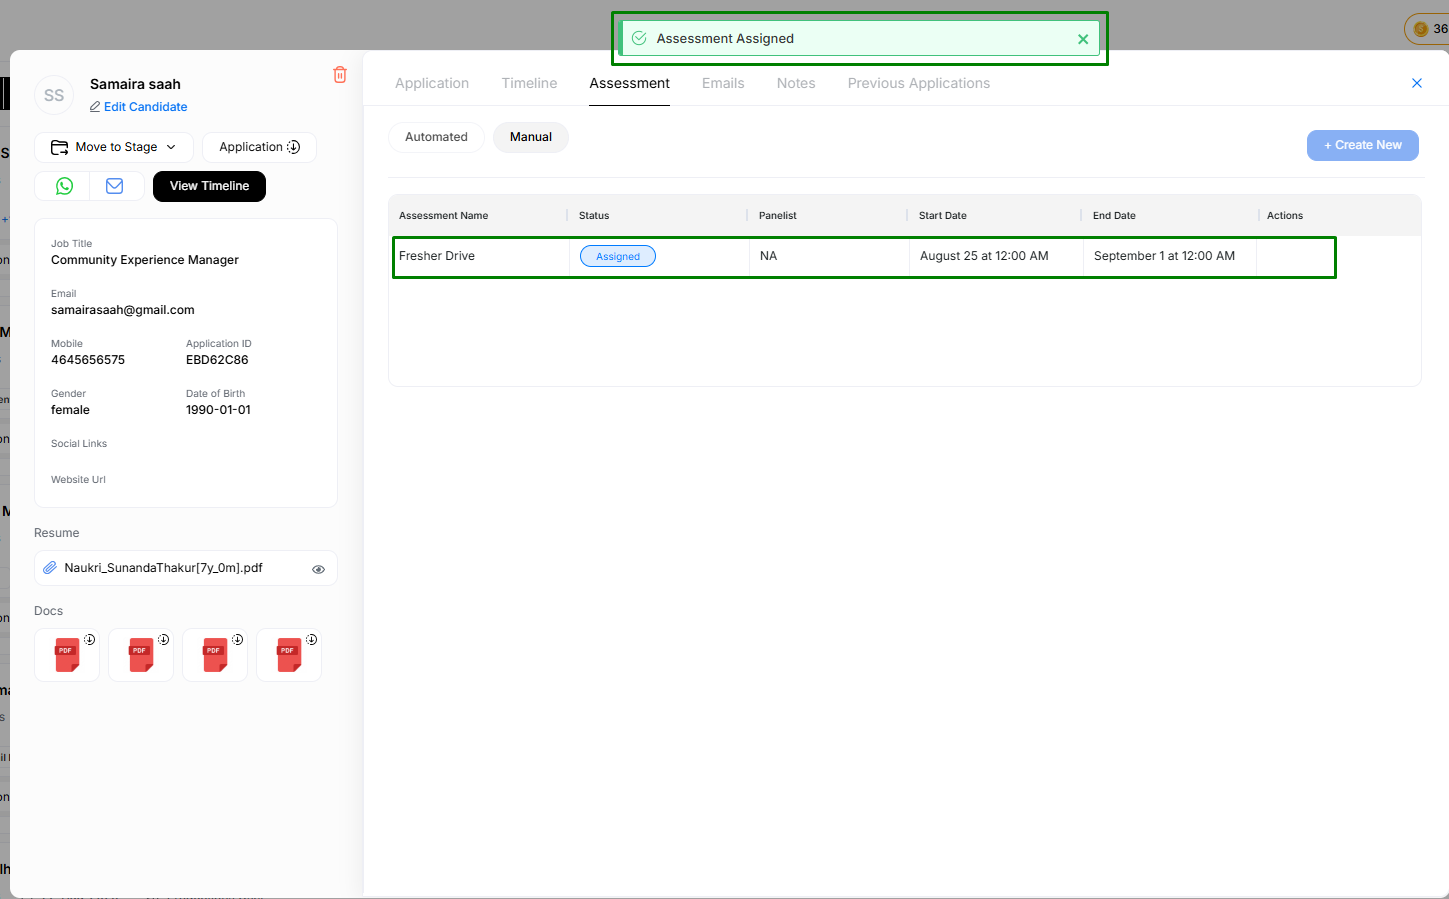
A success notification appears, and the assessment details (Name, Status, Panelist, Dates) are shown in the candidate’s Assessment tab.
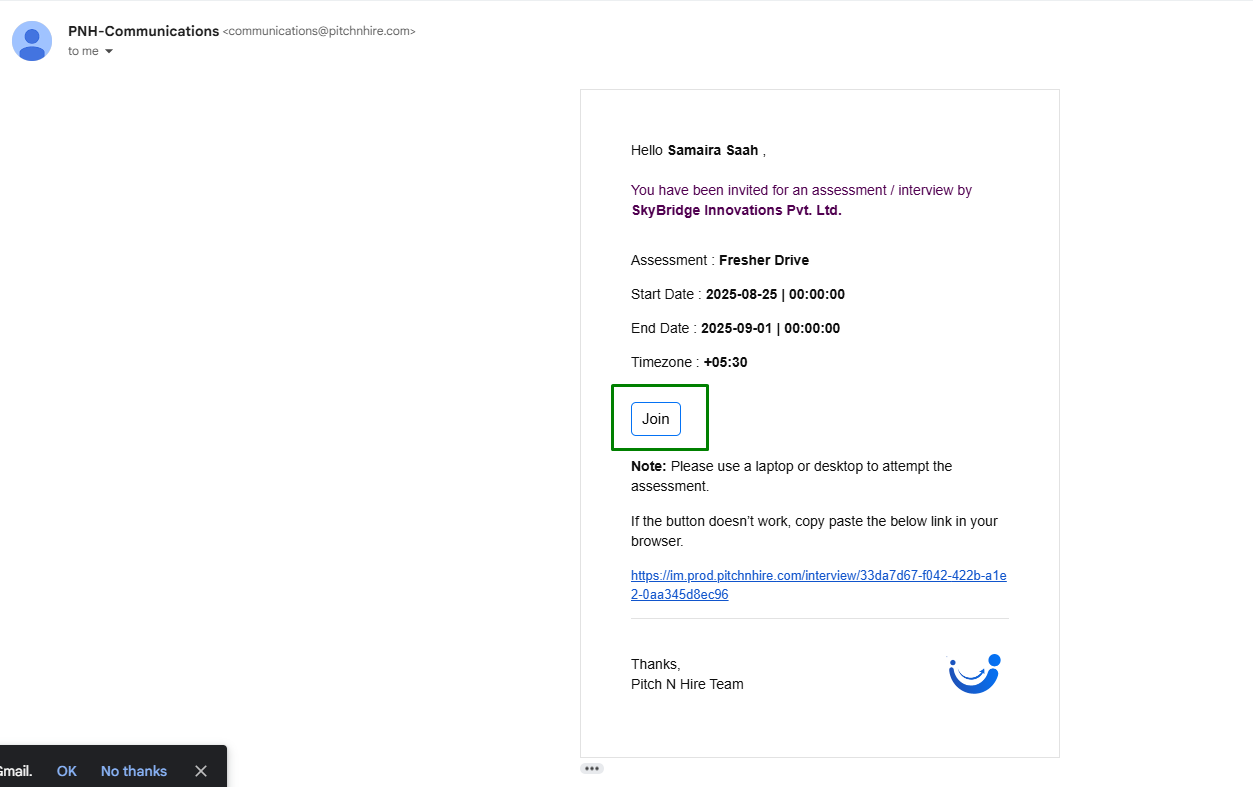
Candidate Experience
- The candidate receives an email notification with assessment details.
- Candidate needs to complete the test within the given schedule.
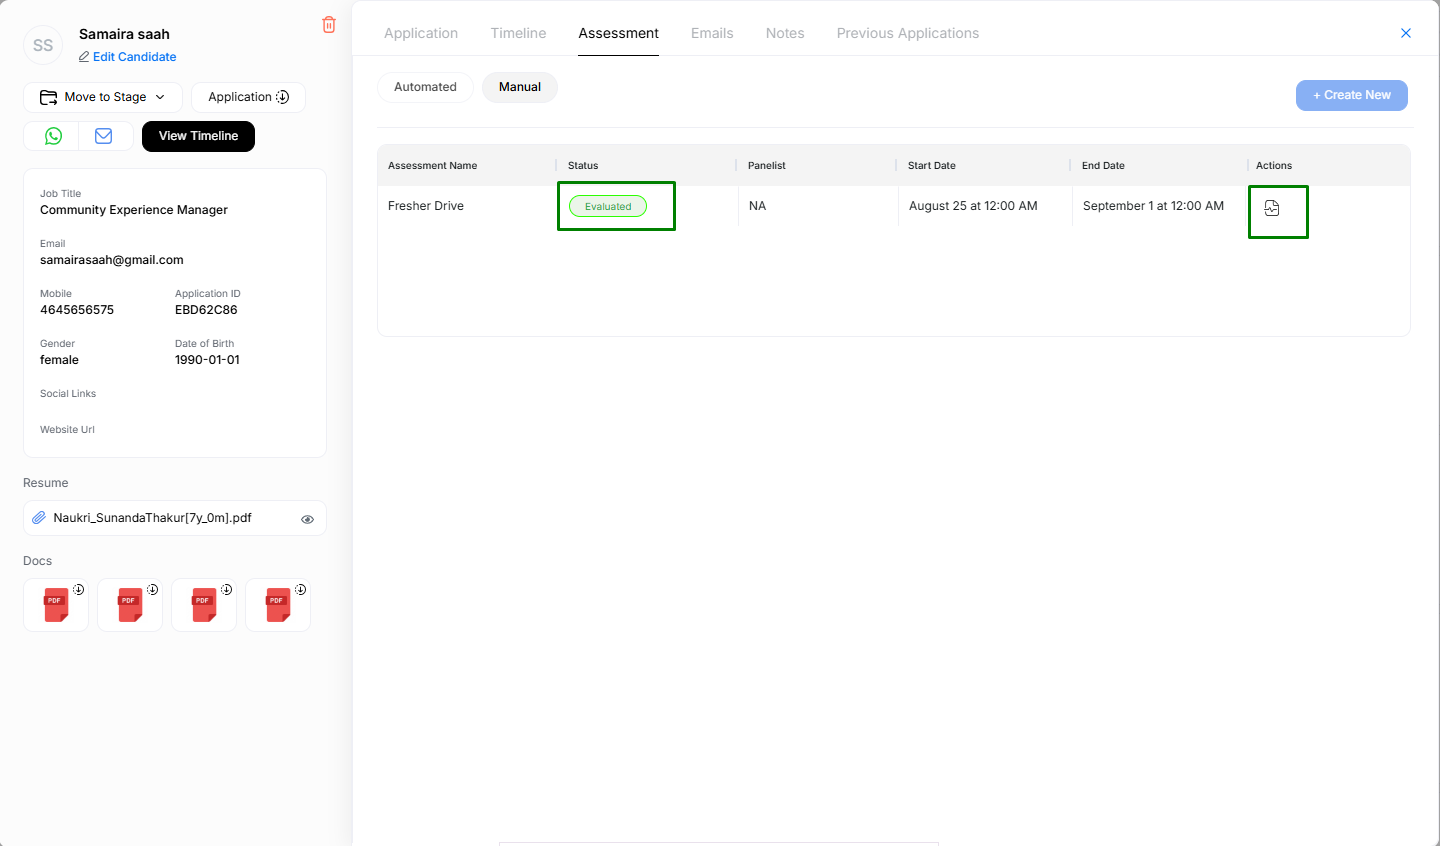
Post-Submission: Evaluating Results
Once the candidate submits the assessment:
- The Assessment Status changes to Evaluated.
- A Scorecard Button appears in the Assessment Panel.
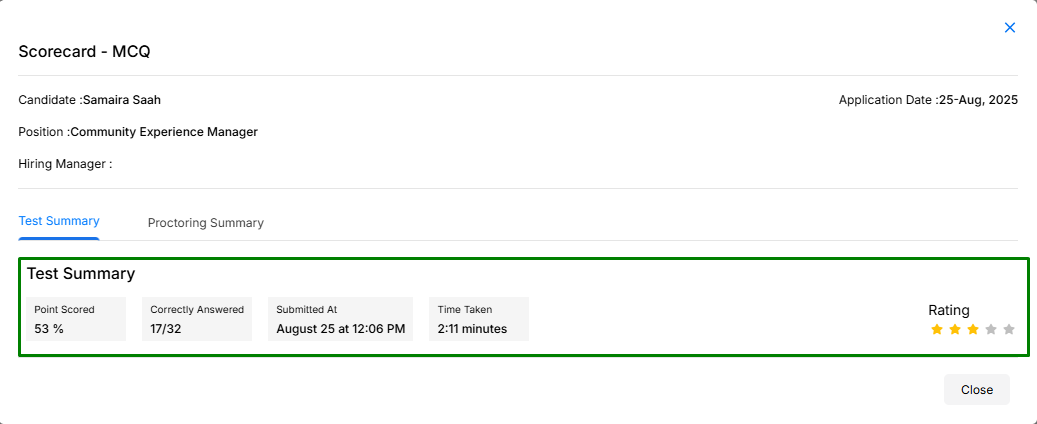
When recruiters click the Scorecard button, two summaries are displayed:
Test Summary
- Overall score achieved by the candidate.
- Breakdown of correct and incorrect answers.
- Completion time.
Proctoring Summary
- Number of tab switches detected.
- Number of faces detected during the assessment.
- Camera and screen captures to ensure test integrity.
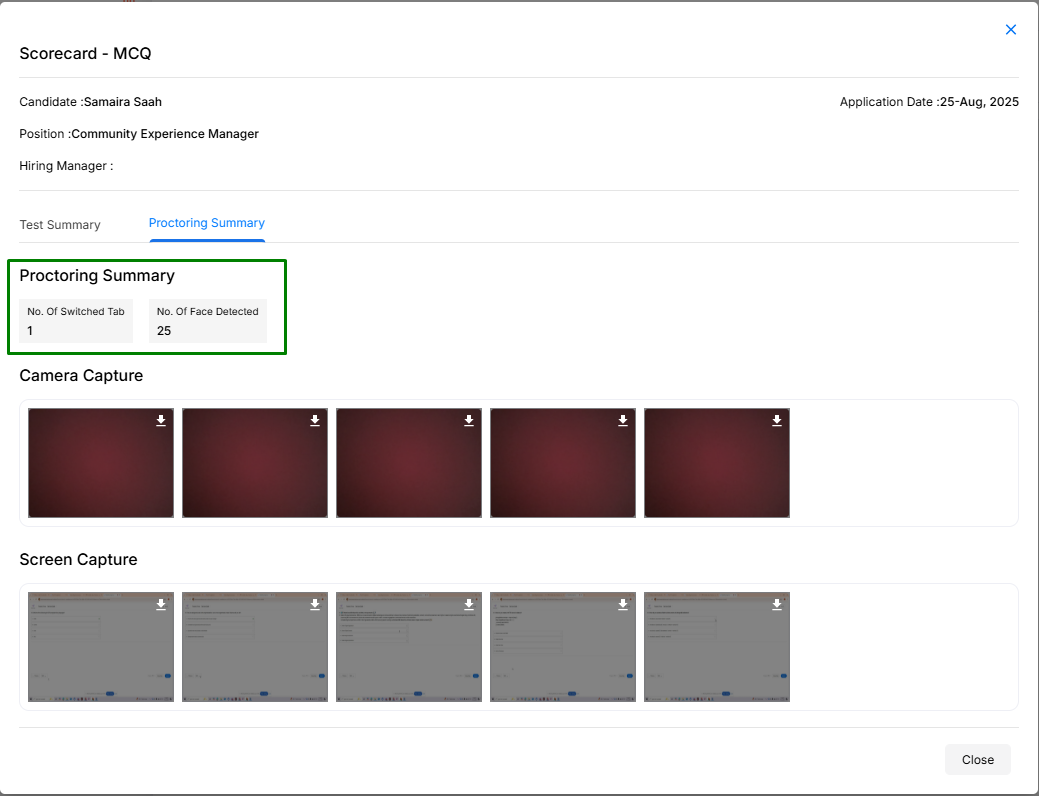
This ensures transparent and fair evaluation of candidates.