User Roles & Permissions
User Roles & Permissions is where you build and govern your hiring team. Invite colleagues, place each person in a role, and control exactly what each role can see and do through role-based access control (RBAC). Seats, invitations, and access are all managed from one User & Roles screen.
Overview
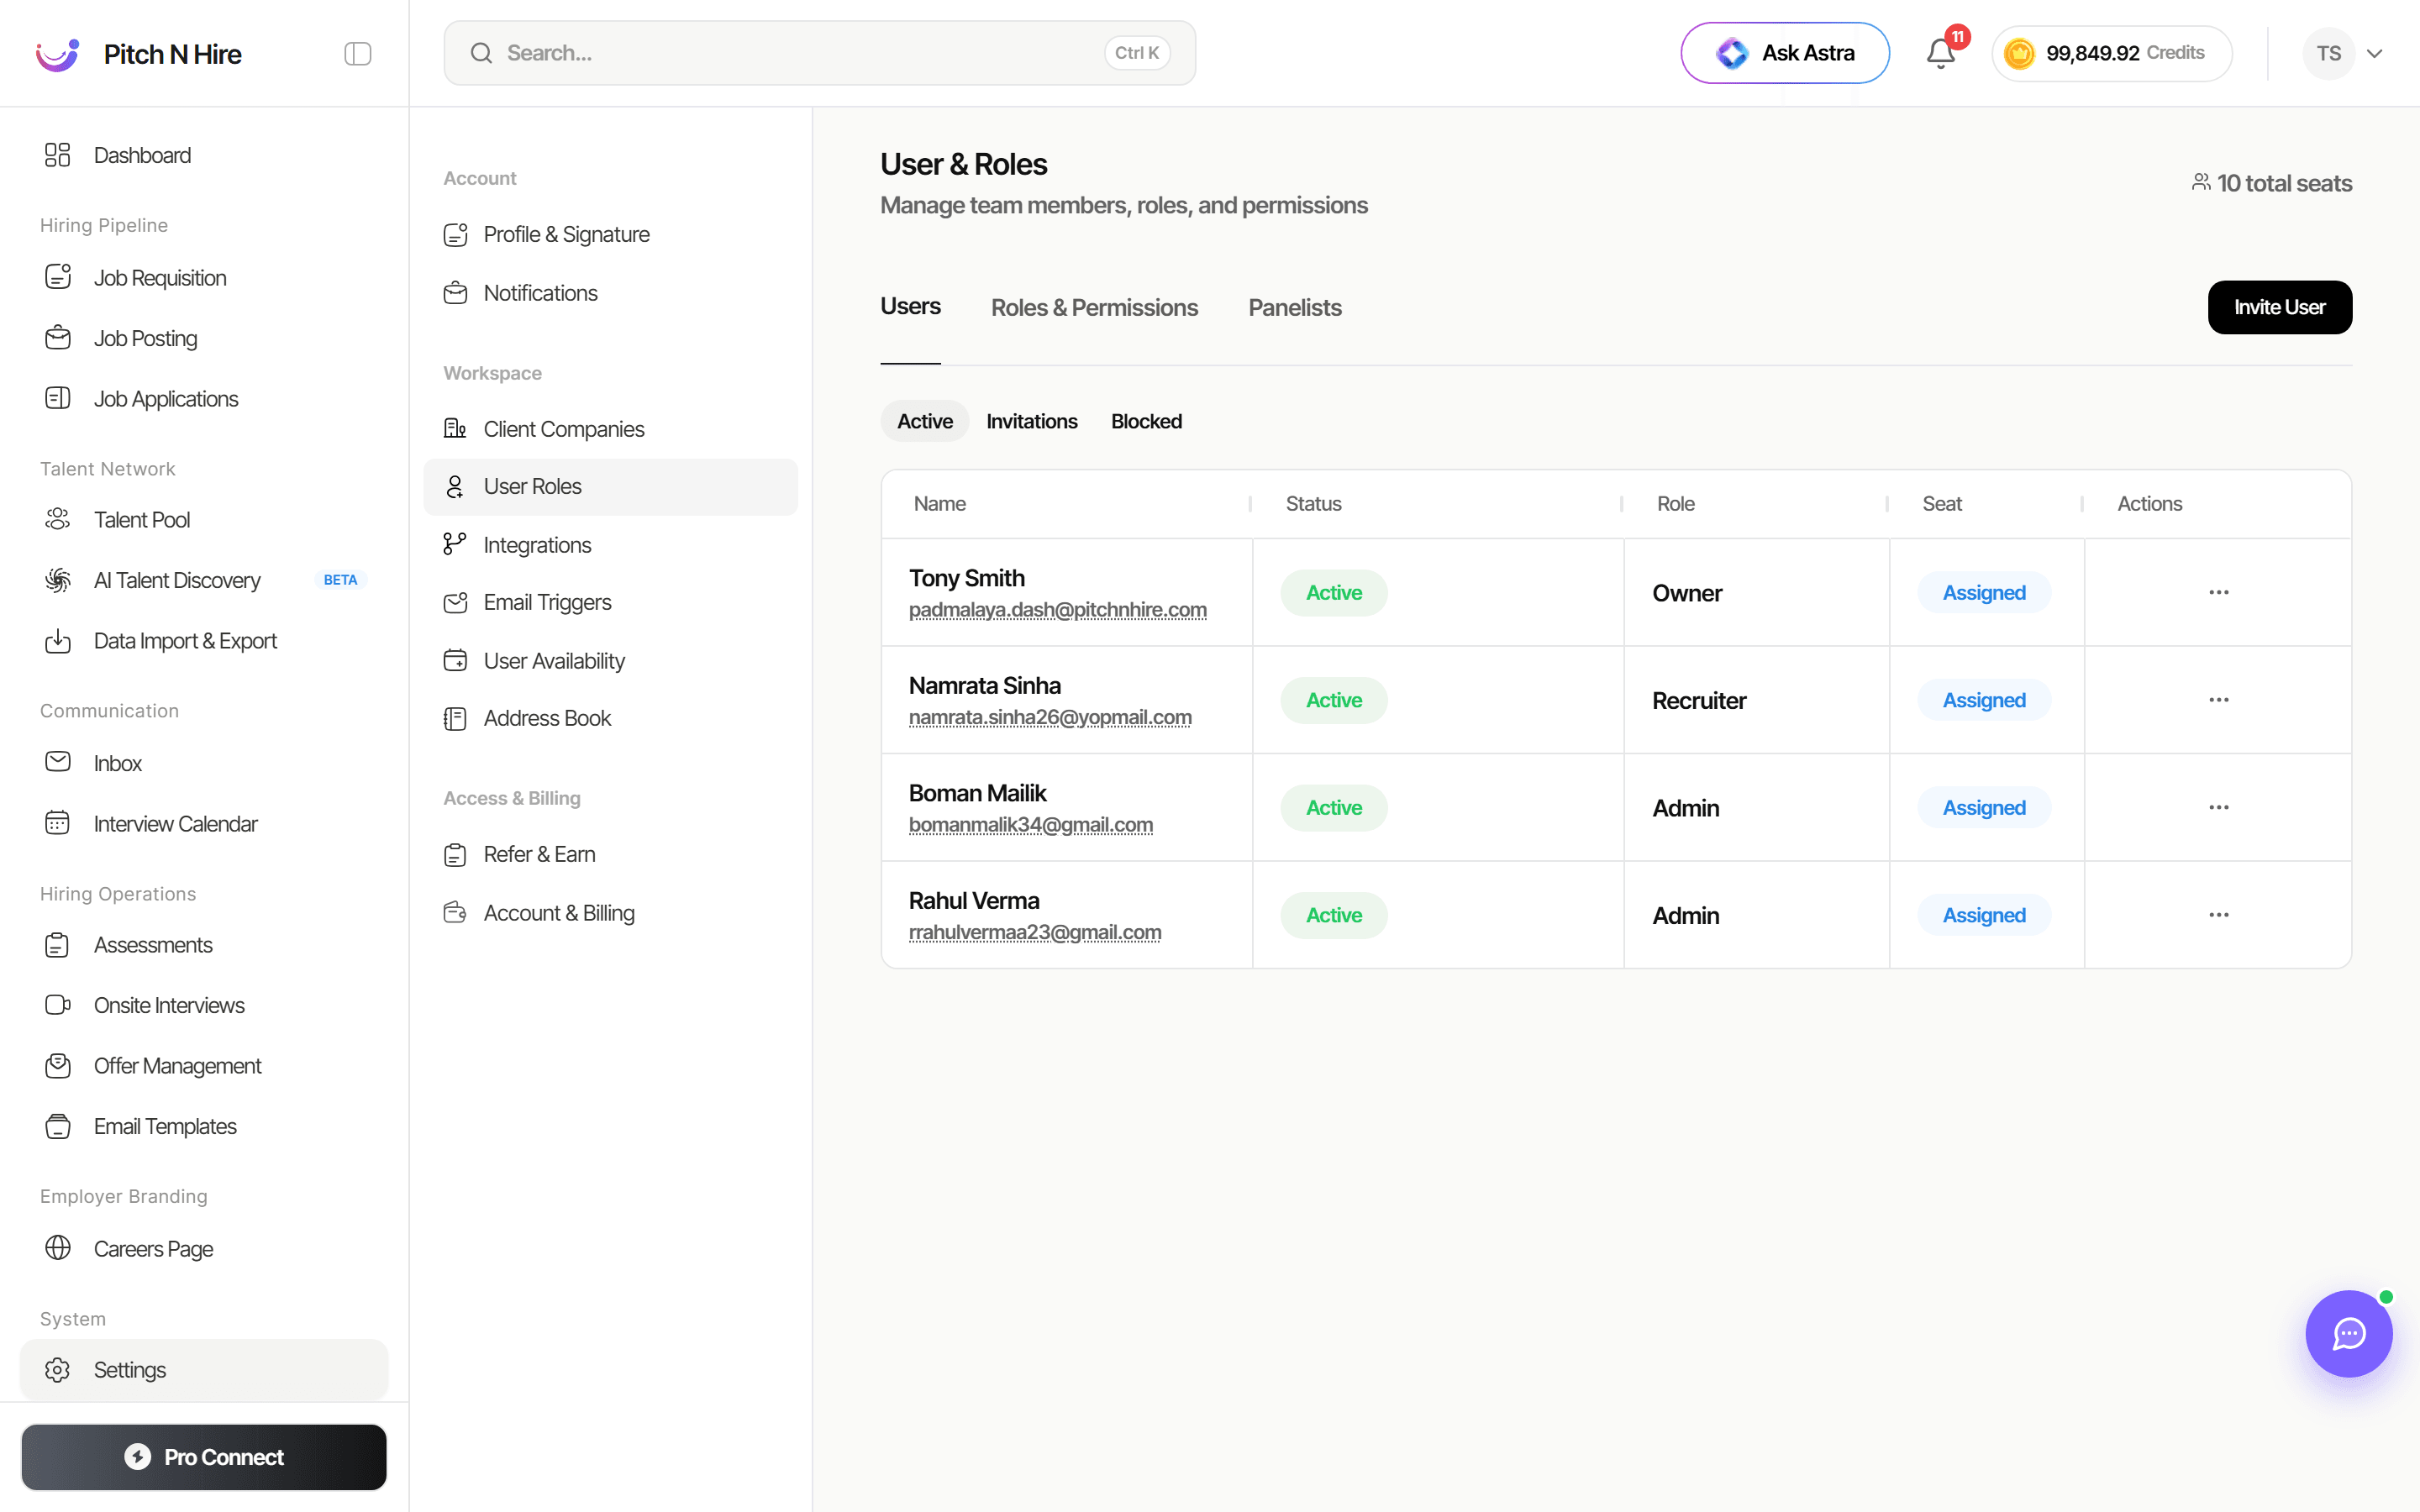
The screen is titled User & Roles with the subtitle “Manage team members, roles, and permissions.” A seat counter (for example 10 total seats) sits at the top right next to the Invite User button. Three tabs organise the page: Users, Roles & Permissions, and Panelists. The Users tab itself has Active, Invitations, and Blocked sub-views, and lists each member with their Name, Status, Role, Seat assignment and an actions (•••) menu.
Key features
- Invite User — add teammates by email from the top-right button.
- Seat tracking — a total-seats counter shows how many seats your plan includes.
- Three tabs — Users (team members), Roles & Permissions (define what roles can do), and Panelists (interviewers).
- User states — filter members by Active, Invitations (pending), and Blocked.
- Per-member detail — each row shows Name and email, a Status badge, the assigned Role, and Seat status (e.g. Assigned).
- Role-based access — permissions attached to a role determine which parts of the app each member can use.
Step-by-step
1. Invite a team member
Click Invite User at the top right. Enter the person’s email and choose the role to assign them. They appear under the Invitations sub-view of the Users tab until they accept, then move to Active.
2. Review your team
On the Users tab, use the Active, Invitations, and Blocked sub-views to see members in each state. Each row shows their Status (e.g. Active), their Role (e.g. Owner, Admin, Recruiter), and their Seat assignment.
3. Create or edit roles and permissions
Switch to the Roles & Permissions tab to define roles (such as Admin or Recruiter) and toggle the permissions each role grants. Members assigned to a role automatically inherit its access across the app.
4. Assign and manage panelists
Switch to the Panelists tab to manage interviewers who participate in interviews without needing full workspace access. For the full panelist workflow — inviting them and the dedicated panelist portal where they set availability and submit feedback — see Interview Panelists.
5. Manage an existing member
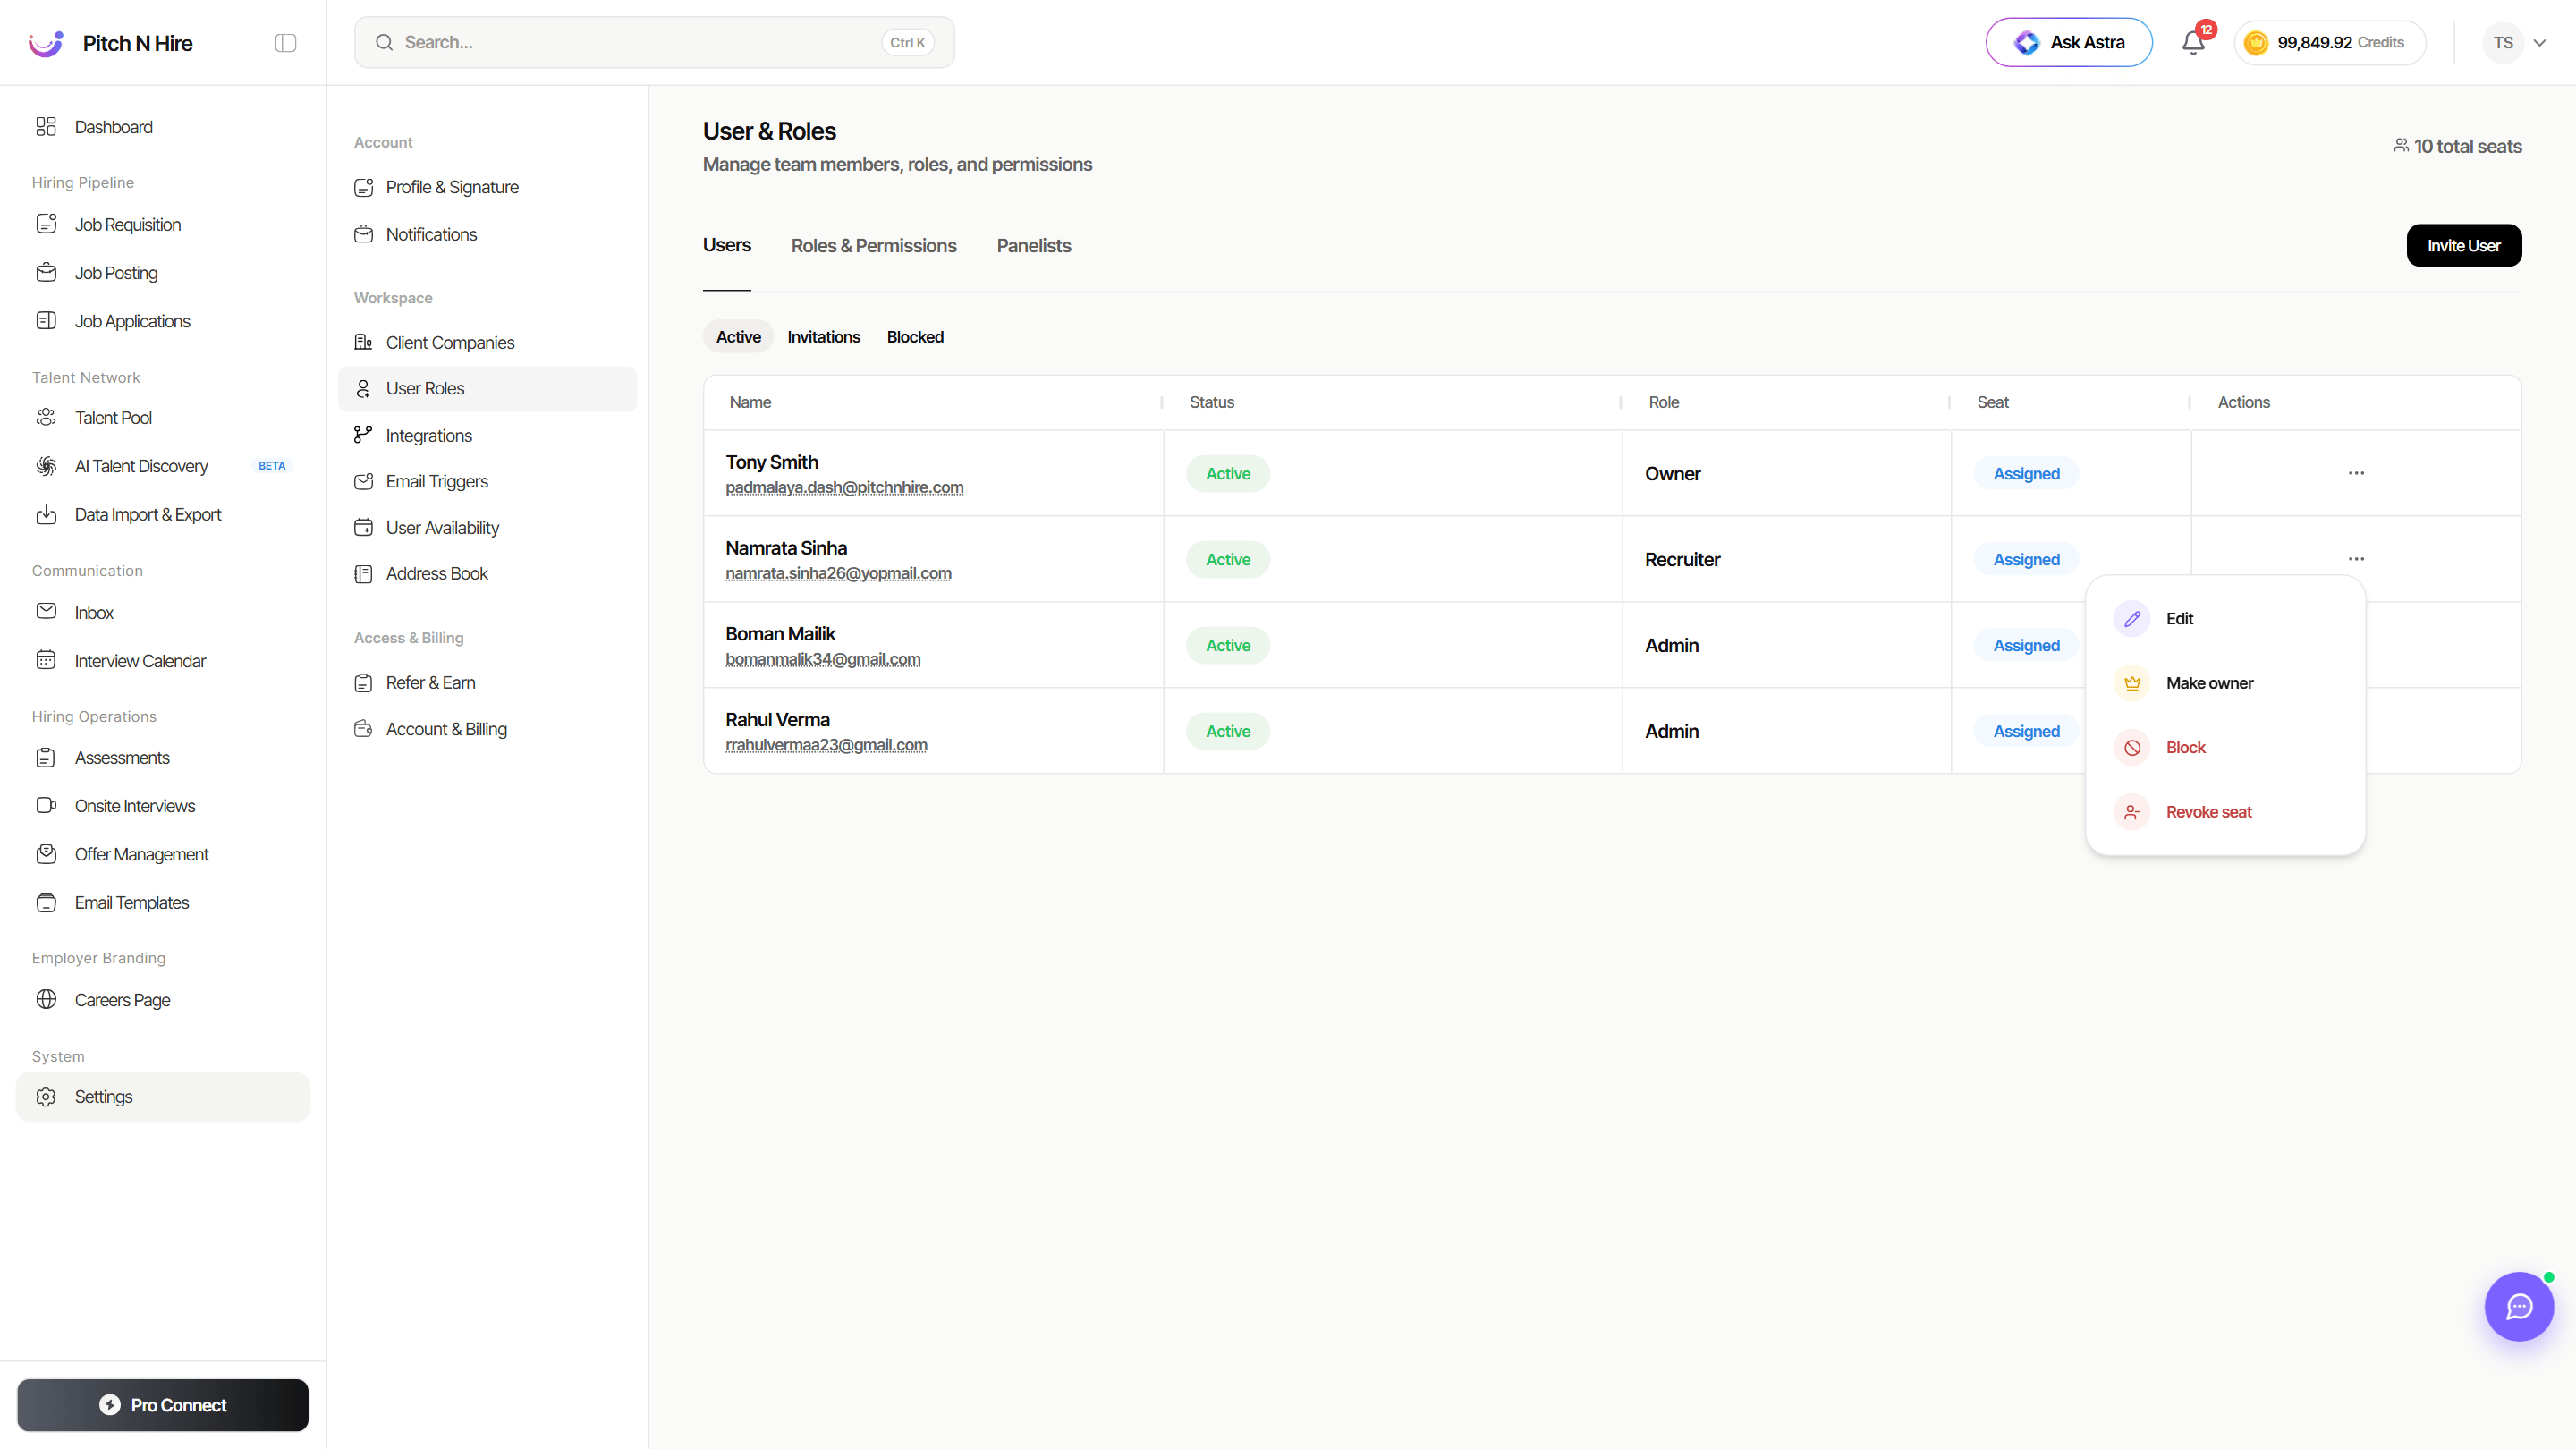
Use the actions (⋯) menu on any member row to manage that person:
- Edit — change their details or role.
- Make owner — transfer workspace ownership to them.
- Block — revoke their access to the workspace.
- Revoke seat — free up their seat (so it can be reassigned to someone else).
Managing seats
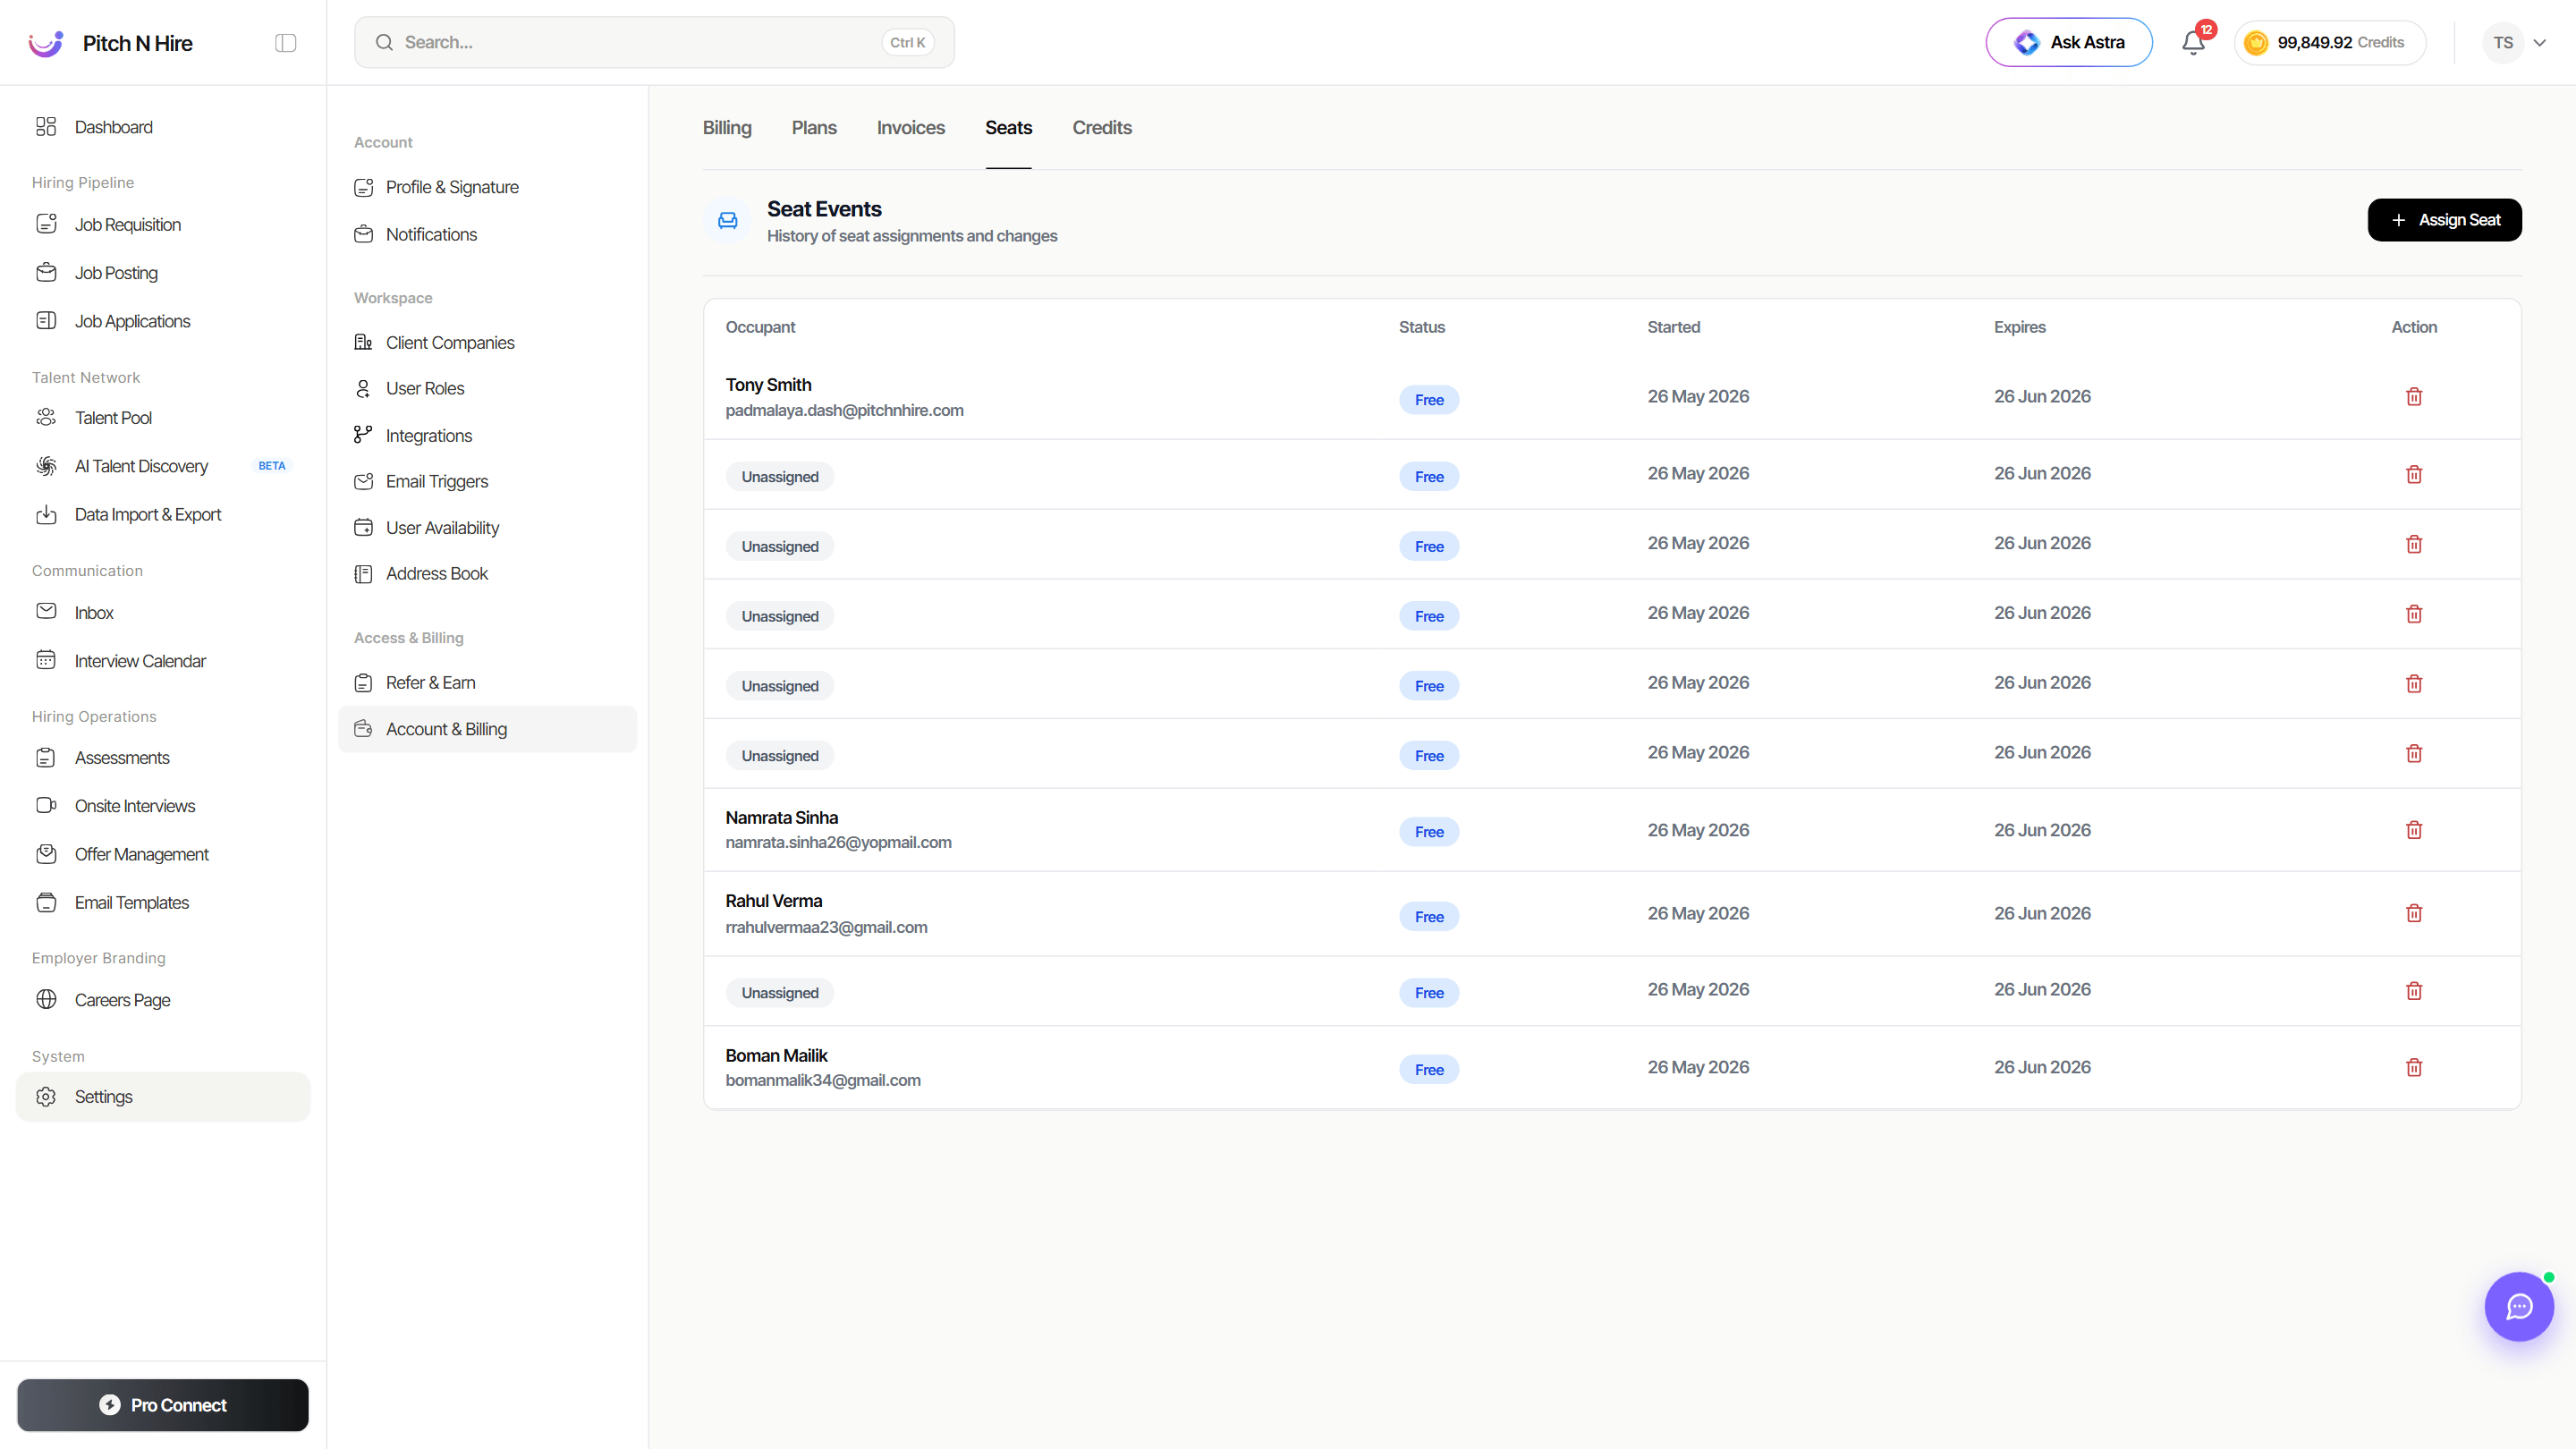
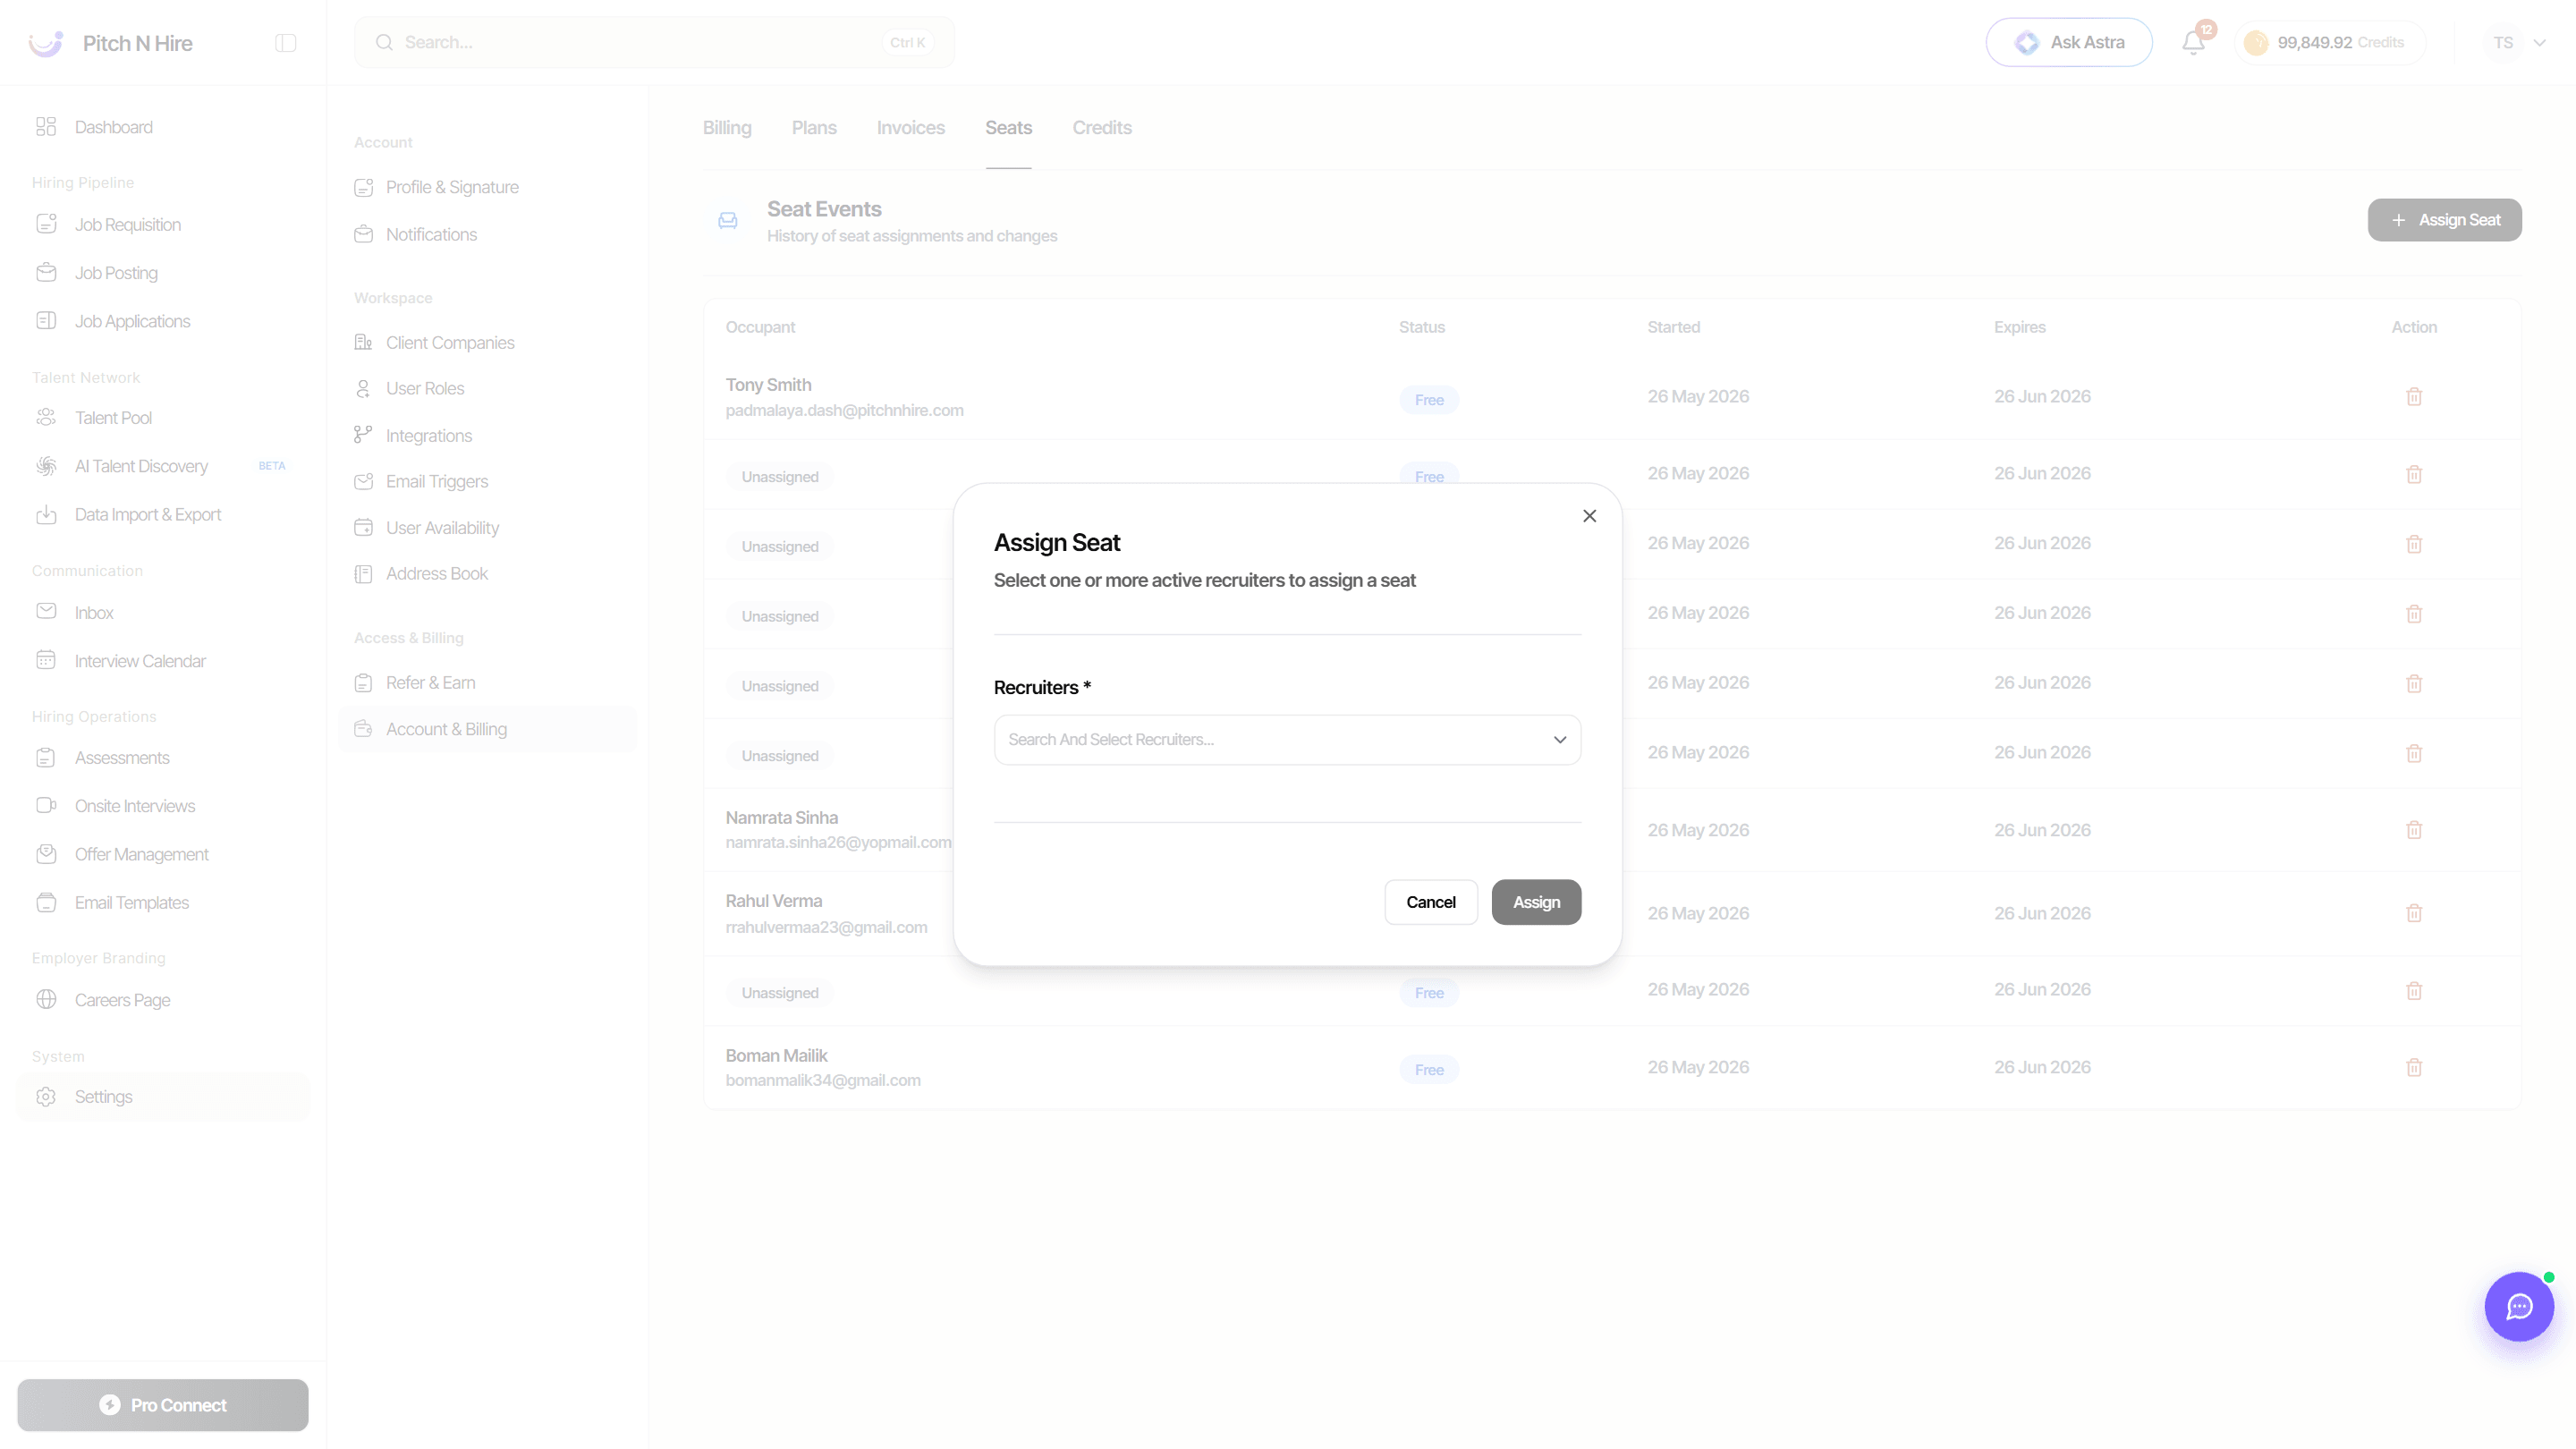
Seats are managed under Settings → Account & Billing → Seats. The Seat Events view is a history of seat assignments and changes, listing each Occupant, their Seat Type, seat Status (Free or Paid), when it Started and Expires, and a delete action to release the seat.
Seat types — Recruiter and Hiring Manager
Seats are bought and priced per type, and a seat is always drawn from the matching pool:
| Seat type | Who it’s for | Access |
|---|---|---|
| Recruiter | Your recruiting team, working candidates day to day. | Full access as granted by their role. |
| Hiring Manager | Line managers and interviewers who need to follow their own roles, not run the ATS. | Permission-based access to Jobs, Requisitions and Applications. |
A **Hiring Manager **, so you can bring the people who actually own the headcount into the hiring process — approving requisitions, reading applications, giving feedback — without paying for a full recruiter seat each.
Assign a seat to a different user
Click Assign Seat, choose the seat type (Recruiter or Hiring Manager), then search and select one or more active recruiters to give them a seat from that pool. Recruiters who already hold one are marked Has Seat, so you only spend seats on people who need them. Confirm with Assign.
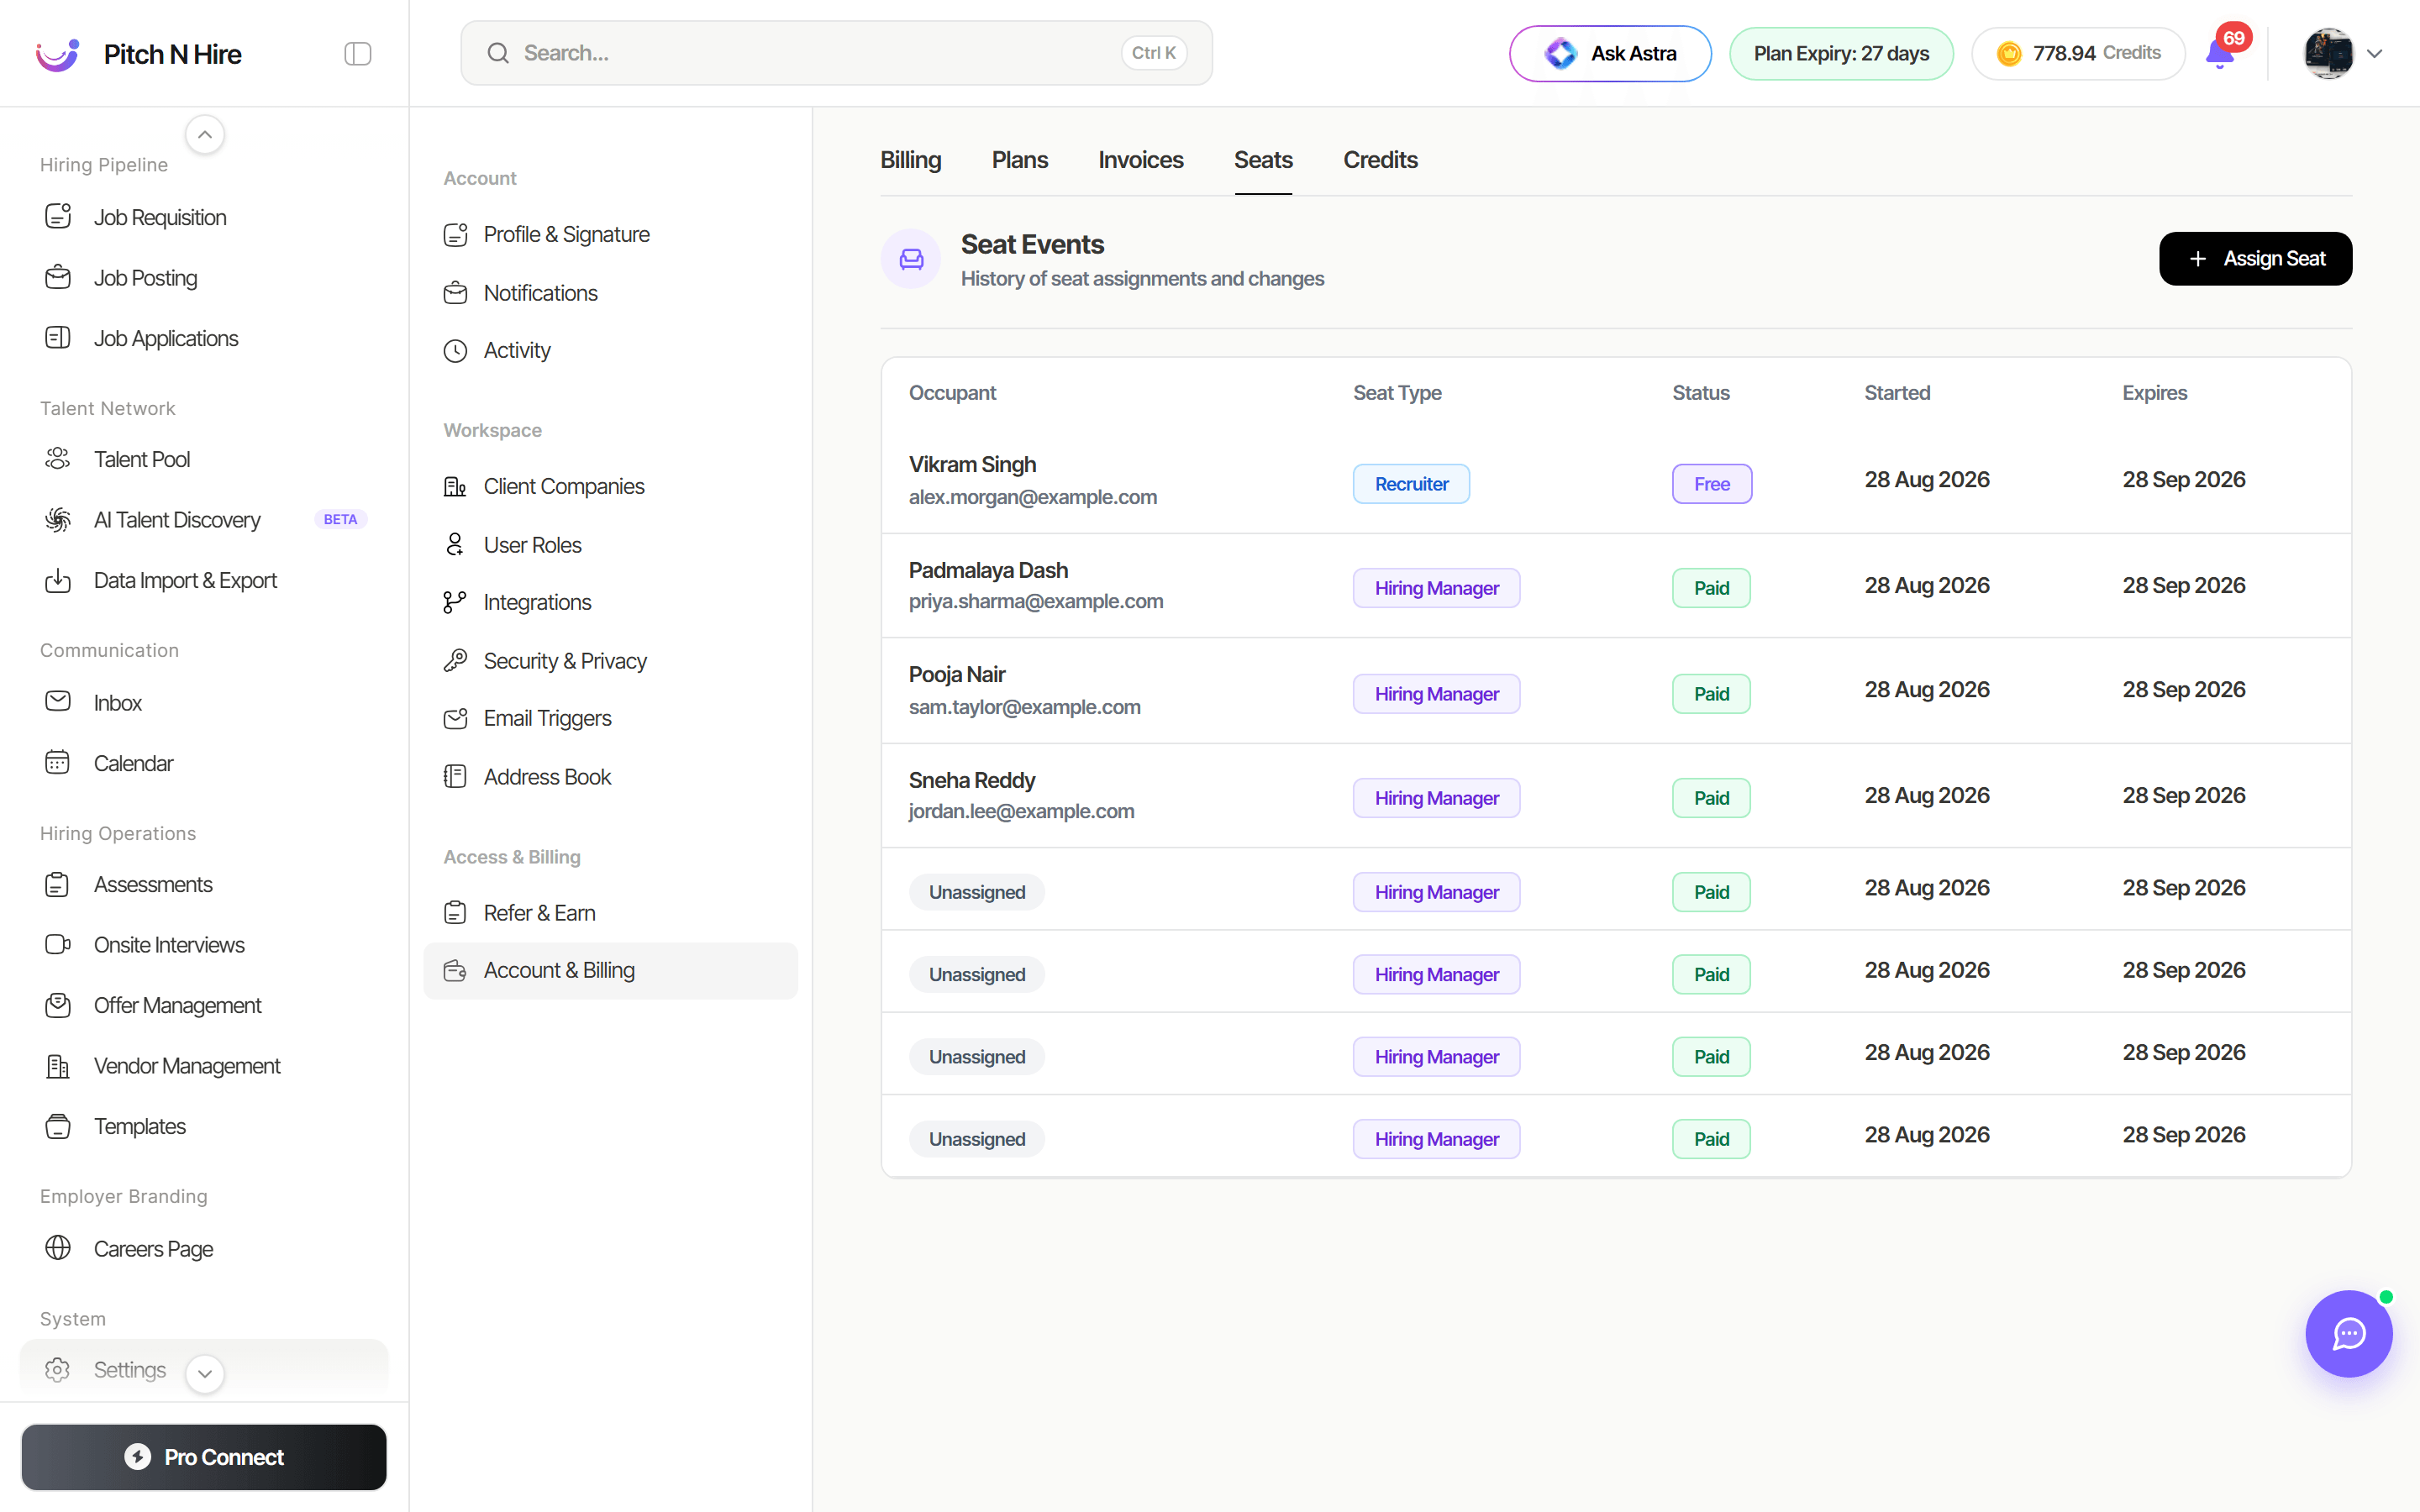 Seats you have bought but not yet handed out show as Unassigned in the Seat Events list, so you can always see what’s spare. Combined with Revoke seat on the User Roles screen, this lets you move a seat from one teammate to another whenever your team changes.
Tips
Common issues & fixes
- An invite never arrives — check the Invitations sub-view to confirm the invite was sent, and ask the recipient to check spam. Re-send from the member’s ••• menu if needed.
- A member can’t access a feature — verify their assigned role on the Users tab, then confirm that role grants the needed permission under Roles & Permissions.
- No seats available to invite — all plan seats are assigned; free a seat by removing a member, or add seats under Account & Billing.