Settings
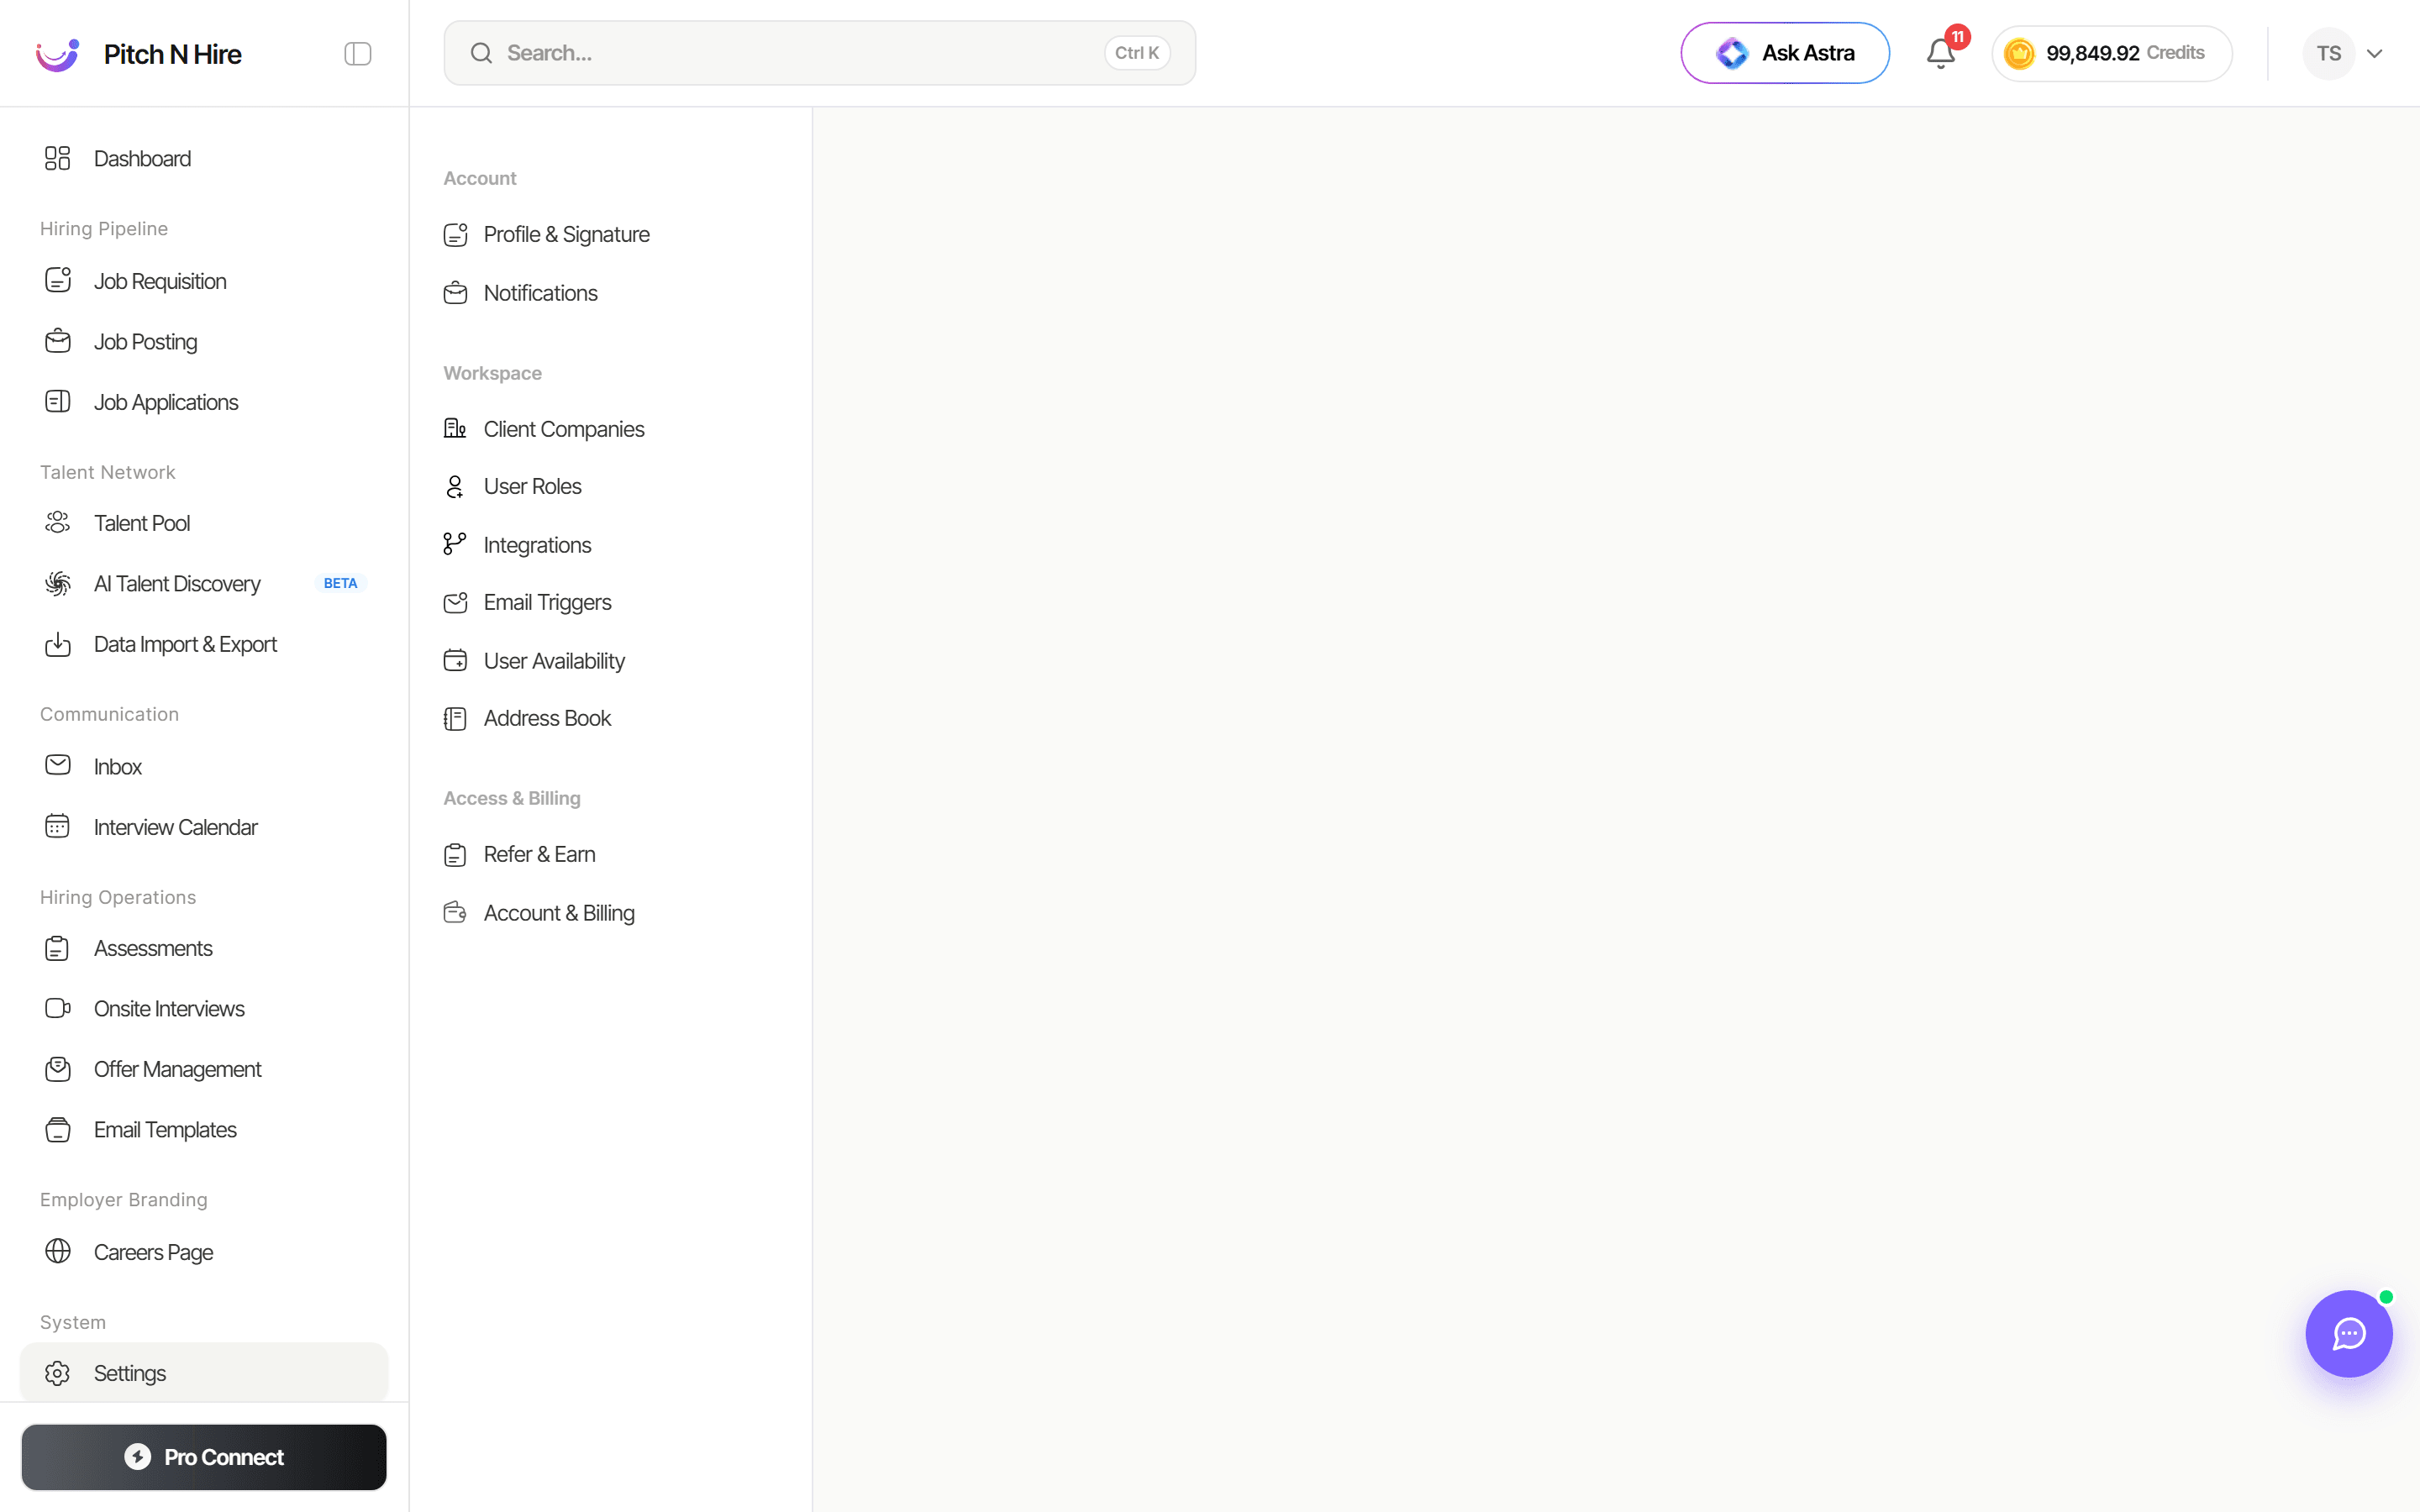
Settings is the central configuration hub for your Pitch N Hire workspace. From one screen you manage your personal profile and email signature, control notifications, organise client companies, invite teammates and set roles, connect your email and calendar, and review your plan and billing. Submenu items are grouped into Account, Workspace, and Access & Billing.
Overview
The Settings hub shows a submenu list grouped into three sections. Account holds Profile & Signature, Notifications and Activity. Workspace holds Client Companies, User Roles, Integrations, Security & Privacy (Single Sign-On and GDPR), Email Triggers and Address Book. Access & Billing holds Refer & Earn and Account & Billing. Selecting an item loads its panel in the main editing area.
Key features
- Grouped submenu — Account, Workspace, and Access & Billing keep related settings together.
- Permission-aware tabs — items you don’t have access to are hidden, and restricted panels show an “ask your admin” message.
- Self-service profile — update your name, email, phone, password and email signature.
- Granular notifications — per-event email and in-app toggles with custom lead times.
- Workspace management — manage client companies, teammates and roles, and connect email/calendar and job portals.
- Single sign-on — let your team sign in with Google or Microsoft work accounts, restricted to your company domain, with an option to require SSO.
- GDPR & candidate consent — set a data retention period, delete expired candidate data automatically, publish a privacy notice, and track consent requests.
- Plan and billing in one place — review your plan, seats, invoices and credits under Account & Billing.
Step-by-step
Profile & Signature
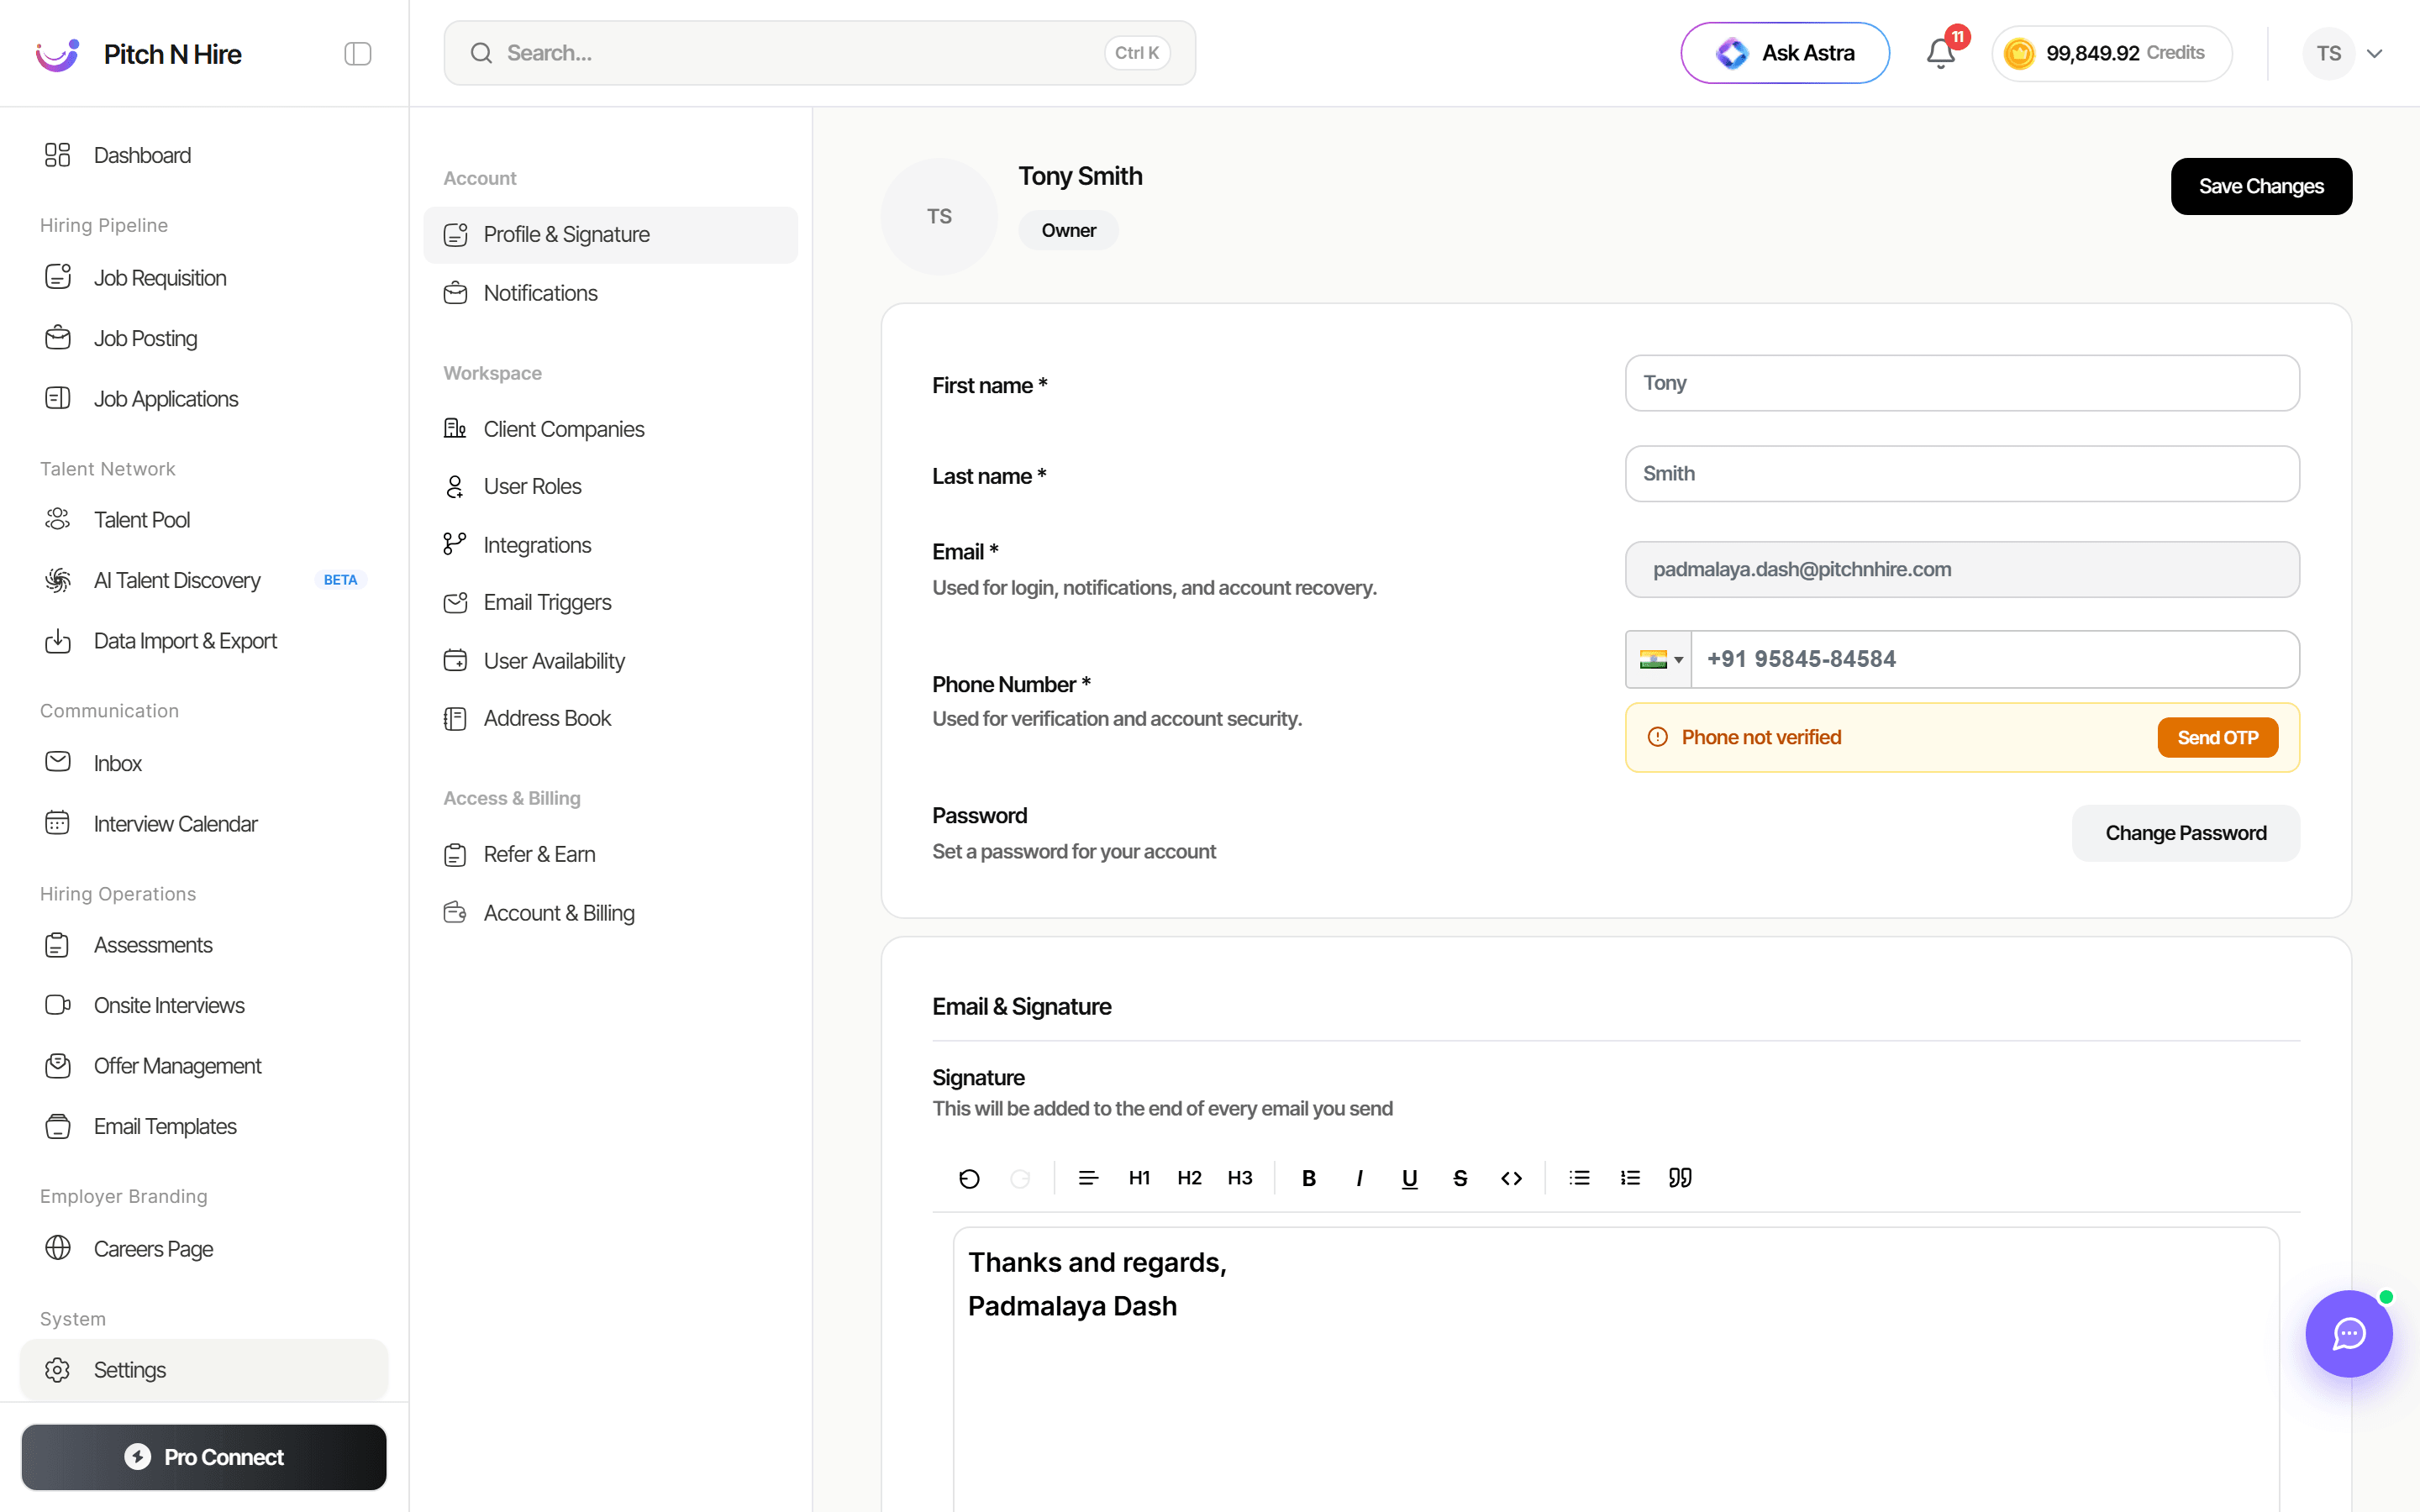
Open Profile & Signature under Account. Edit your First name, Last name, Email (used for login, notifications and recovery), and Phone Number (with a Send OTP verification action). Use Change Password to set a new password, and add an Email & Signature block that is appended to every email you send. Click Save Changes to persist.
Notifications
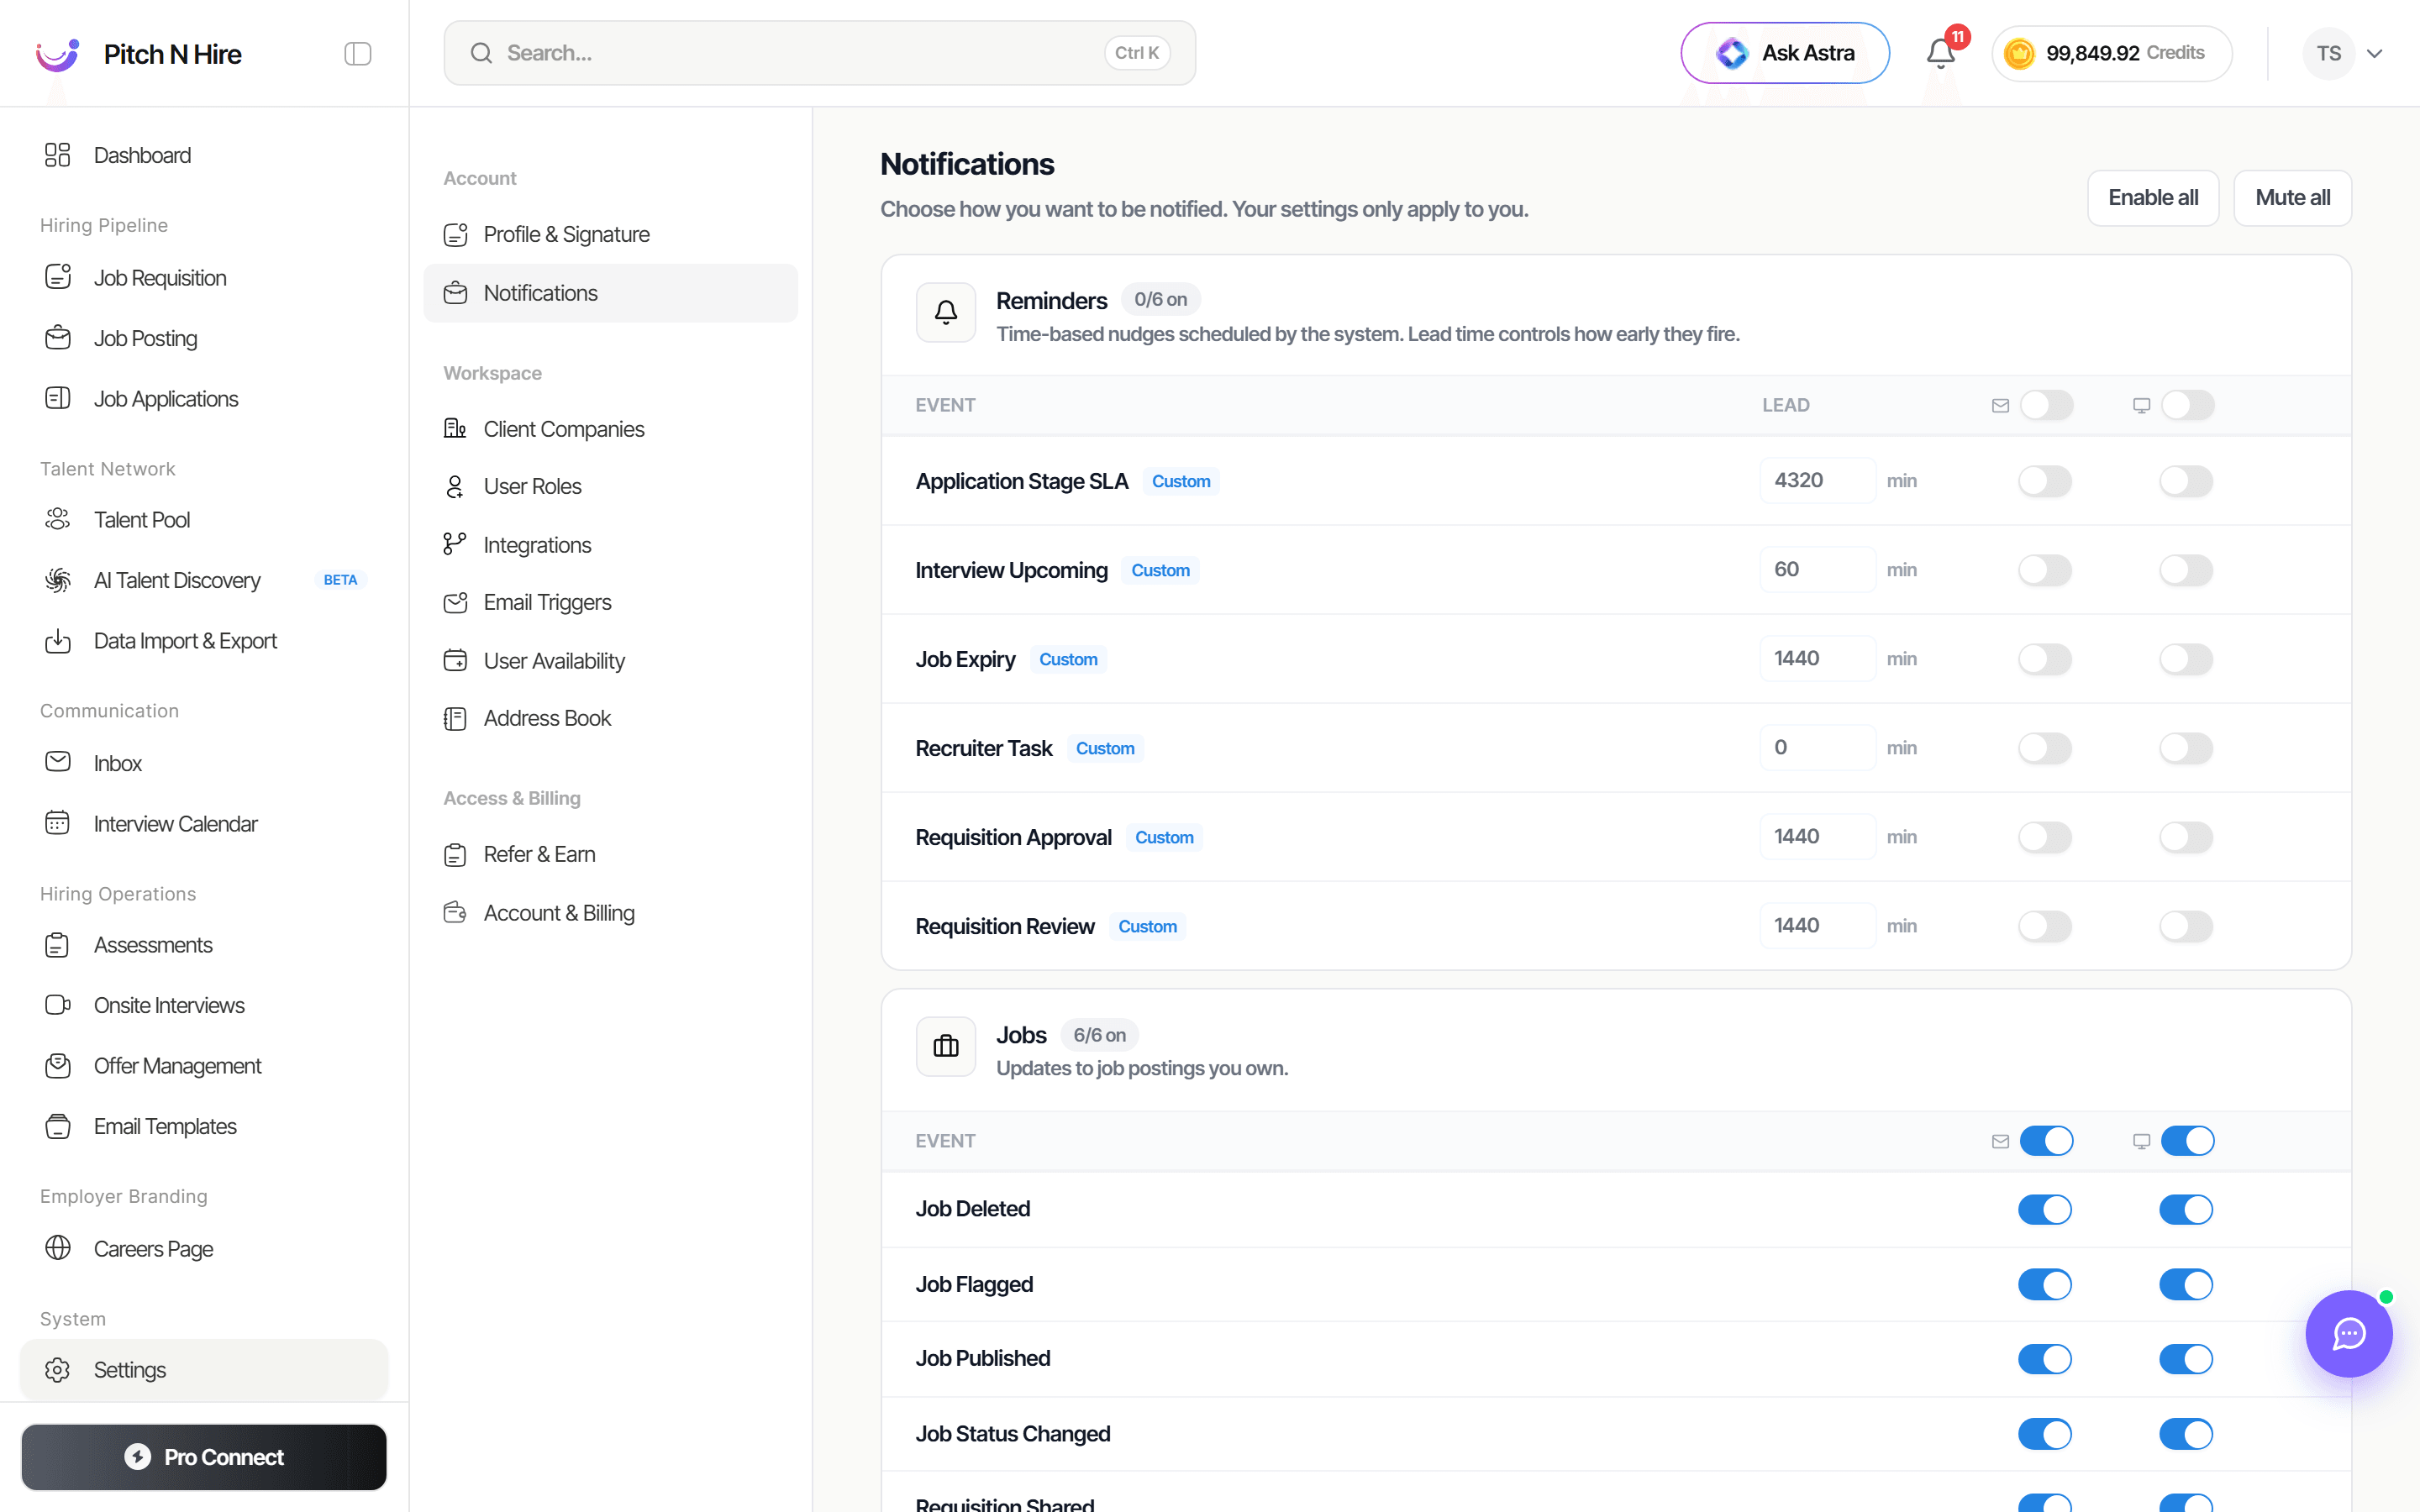
Open Notifications under Account. Choose how you want to be notified — settings apply only to you. Events are grouped (for example Reminders and Jobs), each with per-event email and in-app toggles. Reminder events also accept a lead time (in minutes) controlling how early they fire. Use Enable all or Mute all at the top to set everything at once.
Client Companies
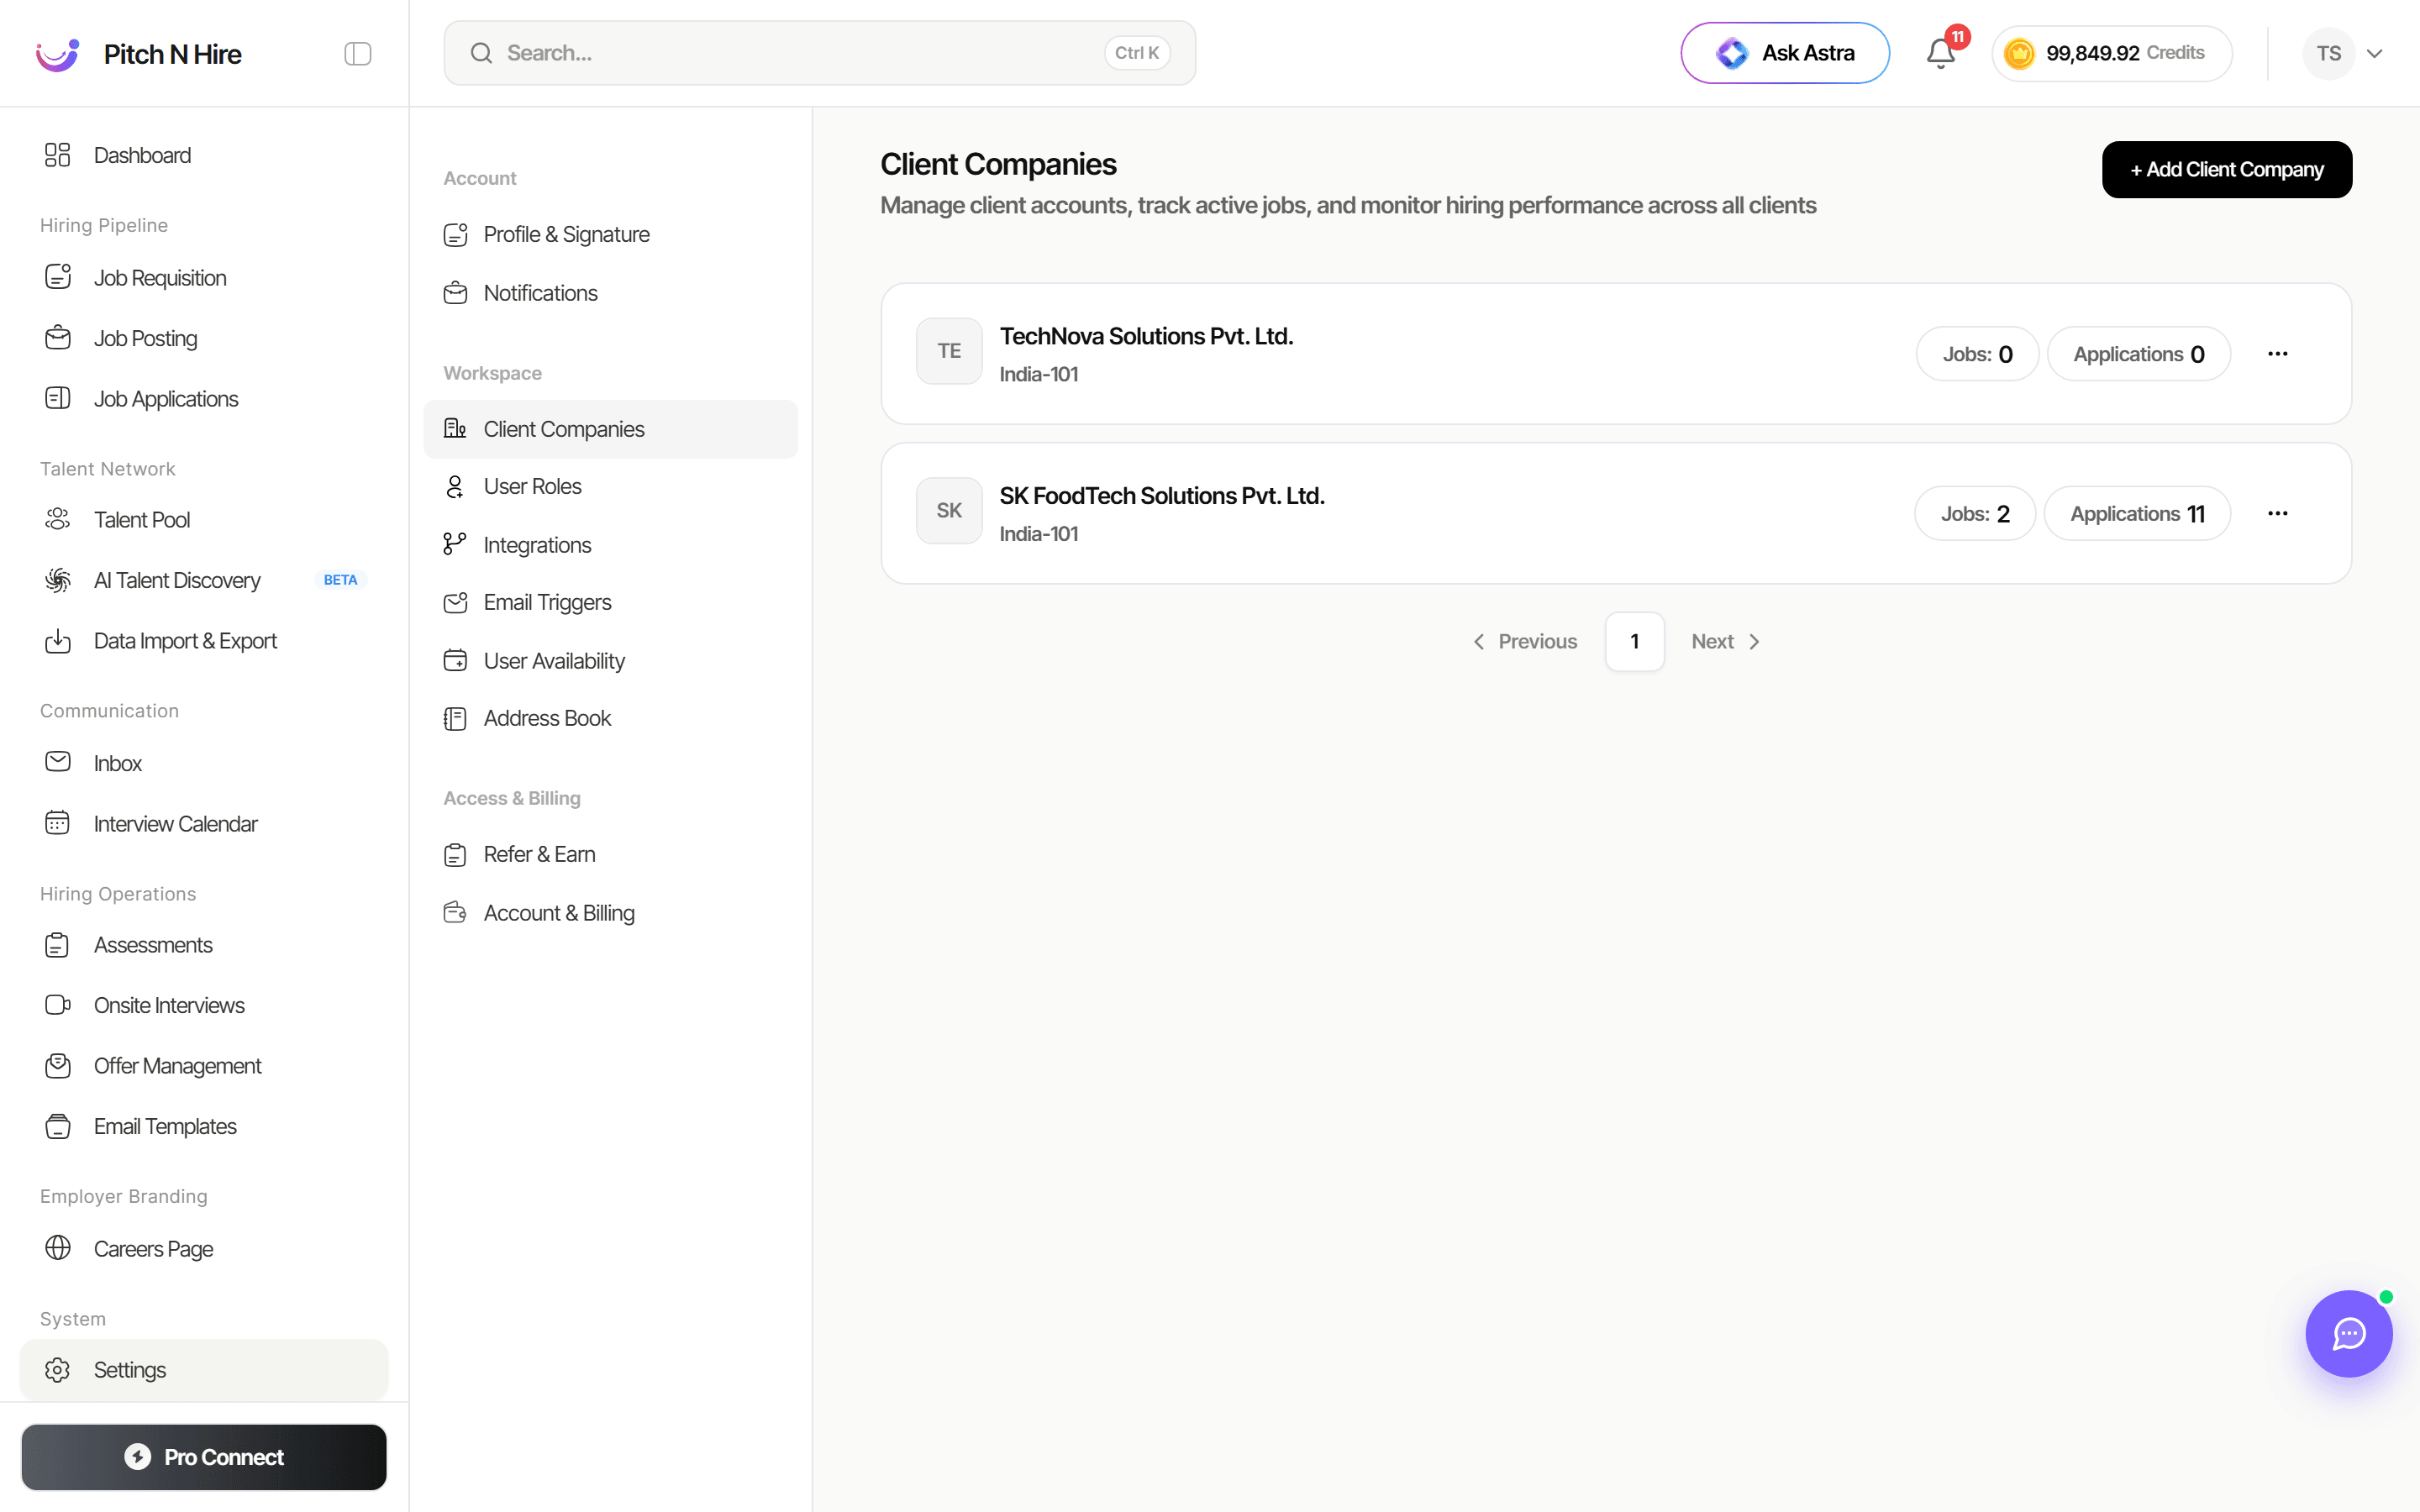
Open Client Companies under Workspace to manage client accounts, track active jobs, and monitor hiring performance across all clients. Each client appears as a row with its location, a Jobs count and an Applications count, plus a context (•••) menu. Use + Add Client Company to create a new one.
User Roles
Open User Roles under Workspace to invite team members, assign roles, and manage permissions. This opens the User & Roles screen with Users, Roles & Permissions, and Panelists tabs. See the dedicated User Roles & Permissions page for full details.
Integrations
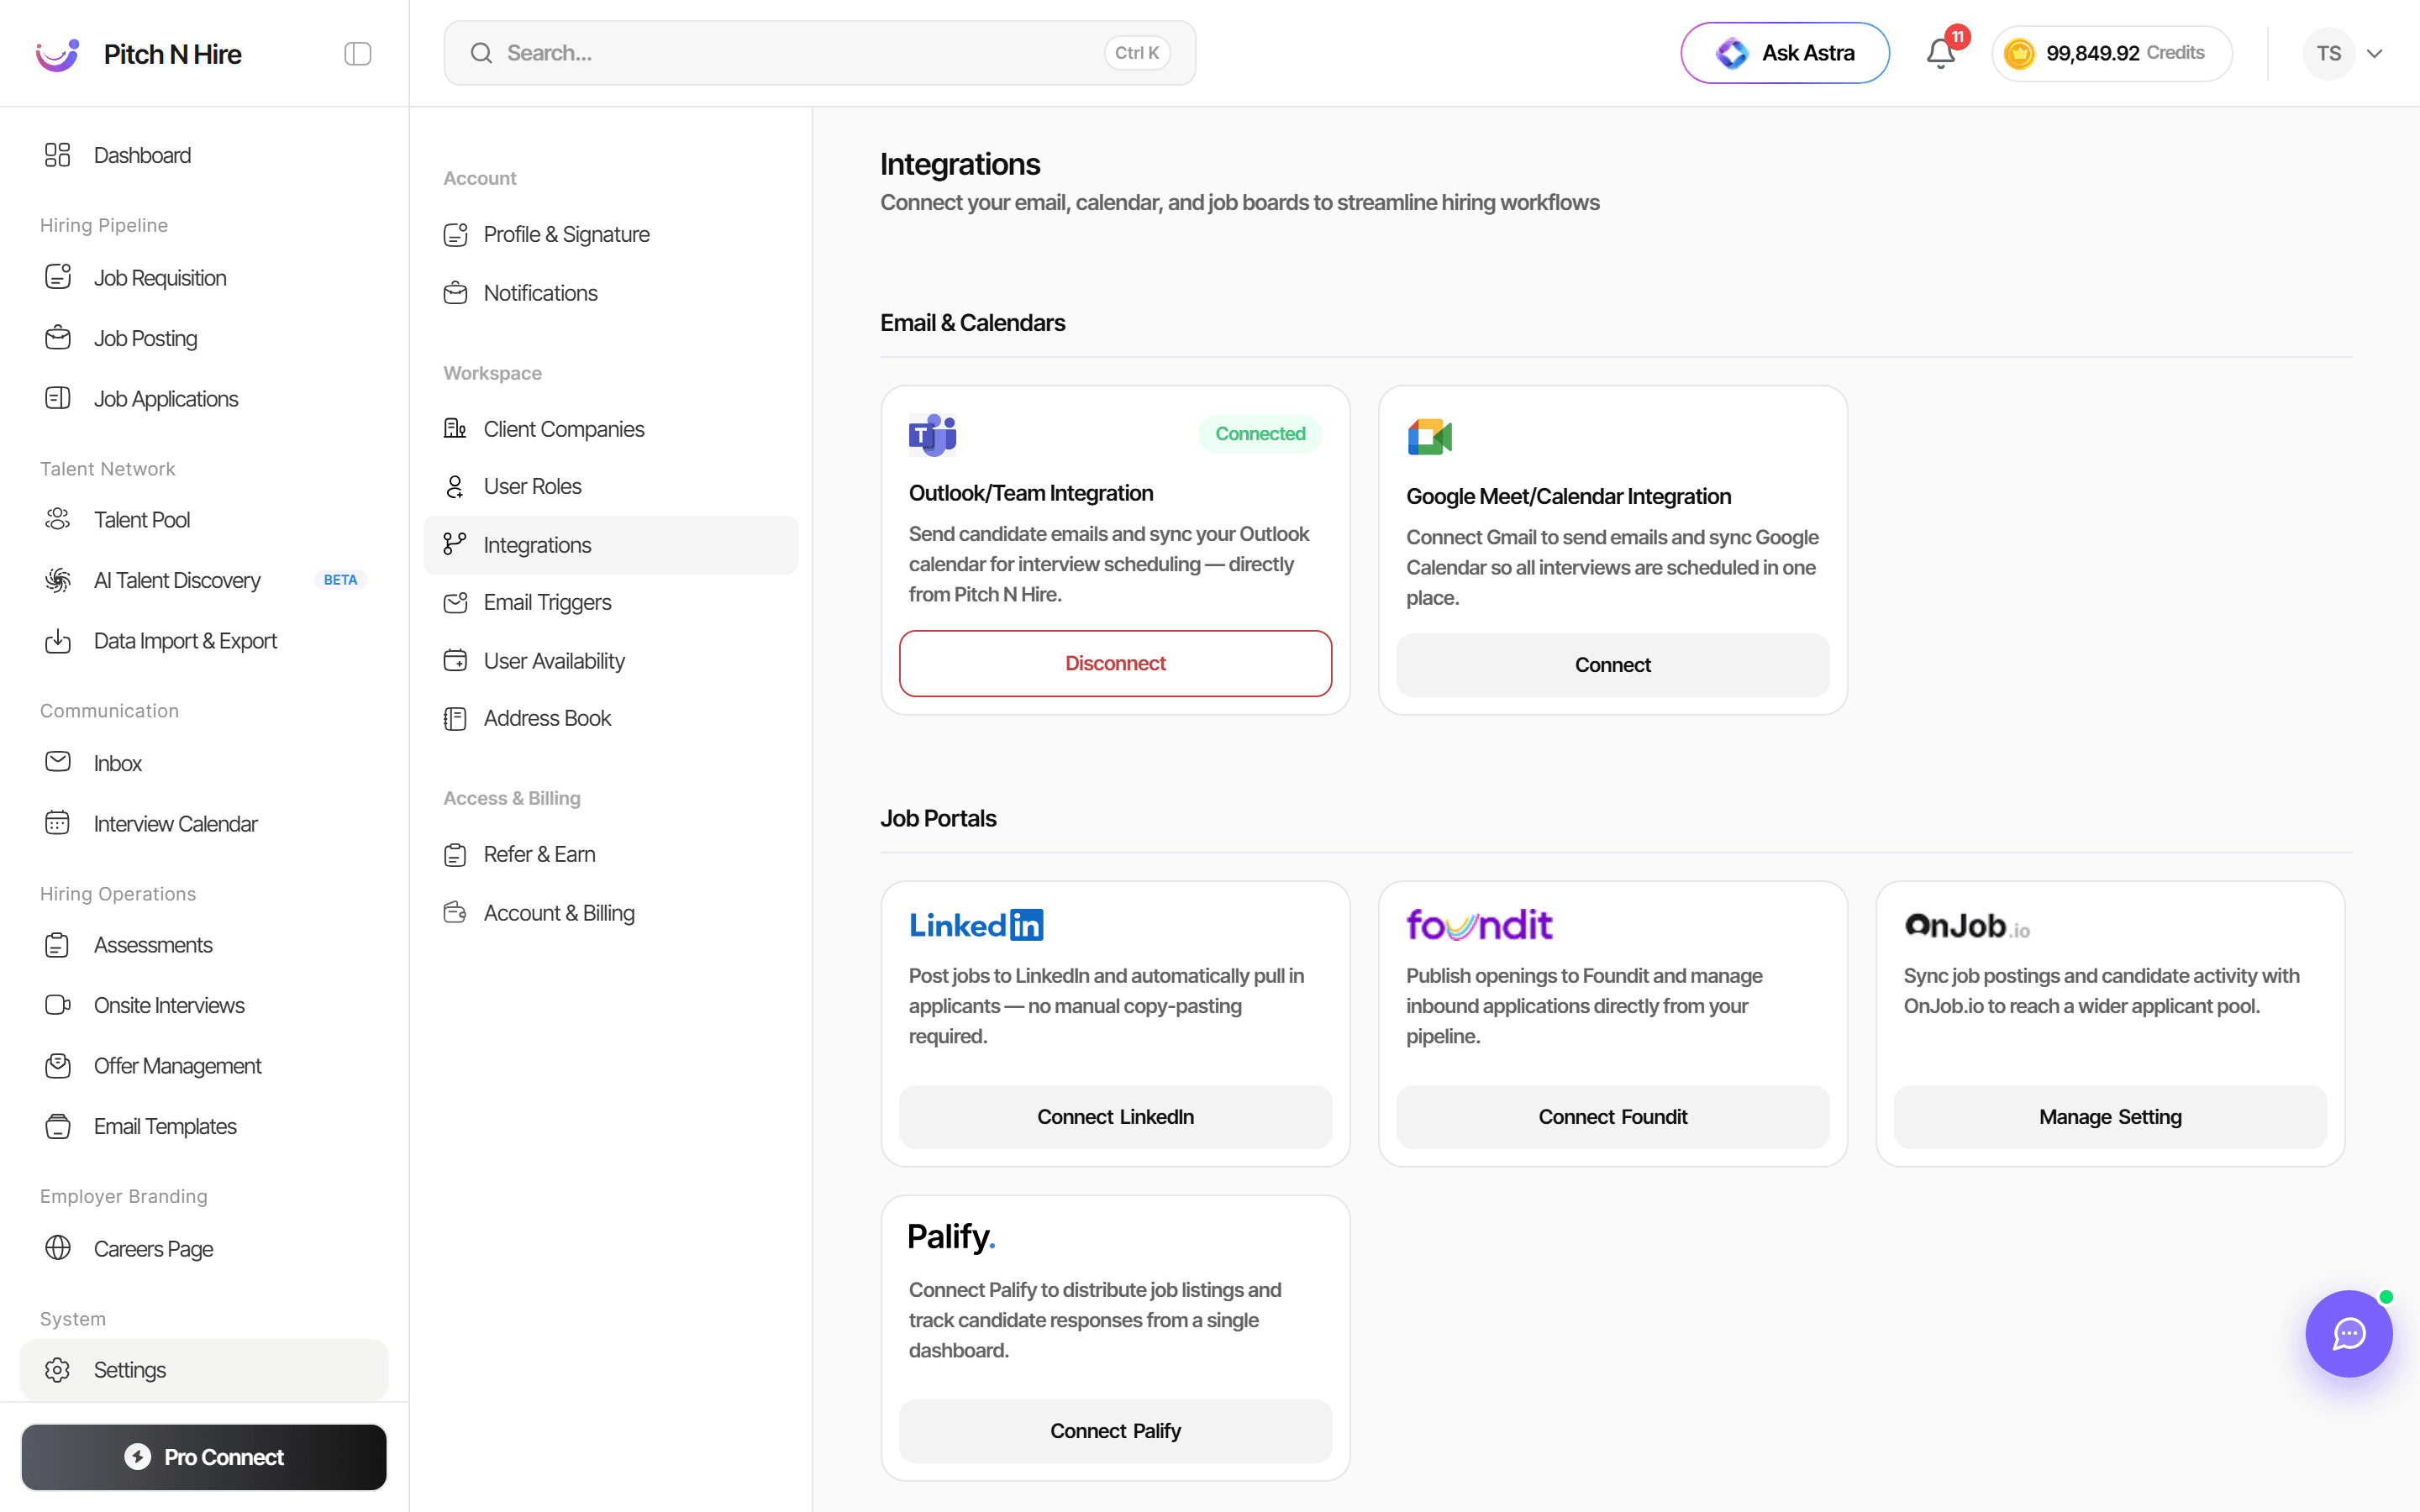
Open Integrations under Workspace to connect your email, calendar, and job boards. The Email & Calendars section offers Outlook/Teams Integration and Google Meet/Calendar Integration (each shows Connect or, once linked, a Connected status with Disconnect). The Job Portals section lets you connect LinkedIn, Foundit, OnJob, and Palify to distribute postings and pull in applicants.
Security & Privacy
Open Security & Privacy under Workspace (app.pitchnhire.com/account?submenu=sso). It has two tabs: Single Sign-On and GDPR.
Single Sign-On (SSO)
The Single Sign-On tab lets your team sign in with their Google or Microsoft work accounts instead of a separate password. SSO is restricted to your verified company domain — only work emails on that domain can sign in this way.
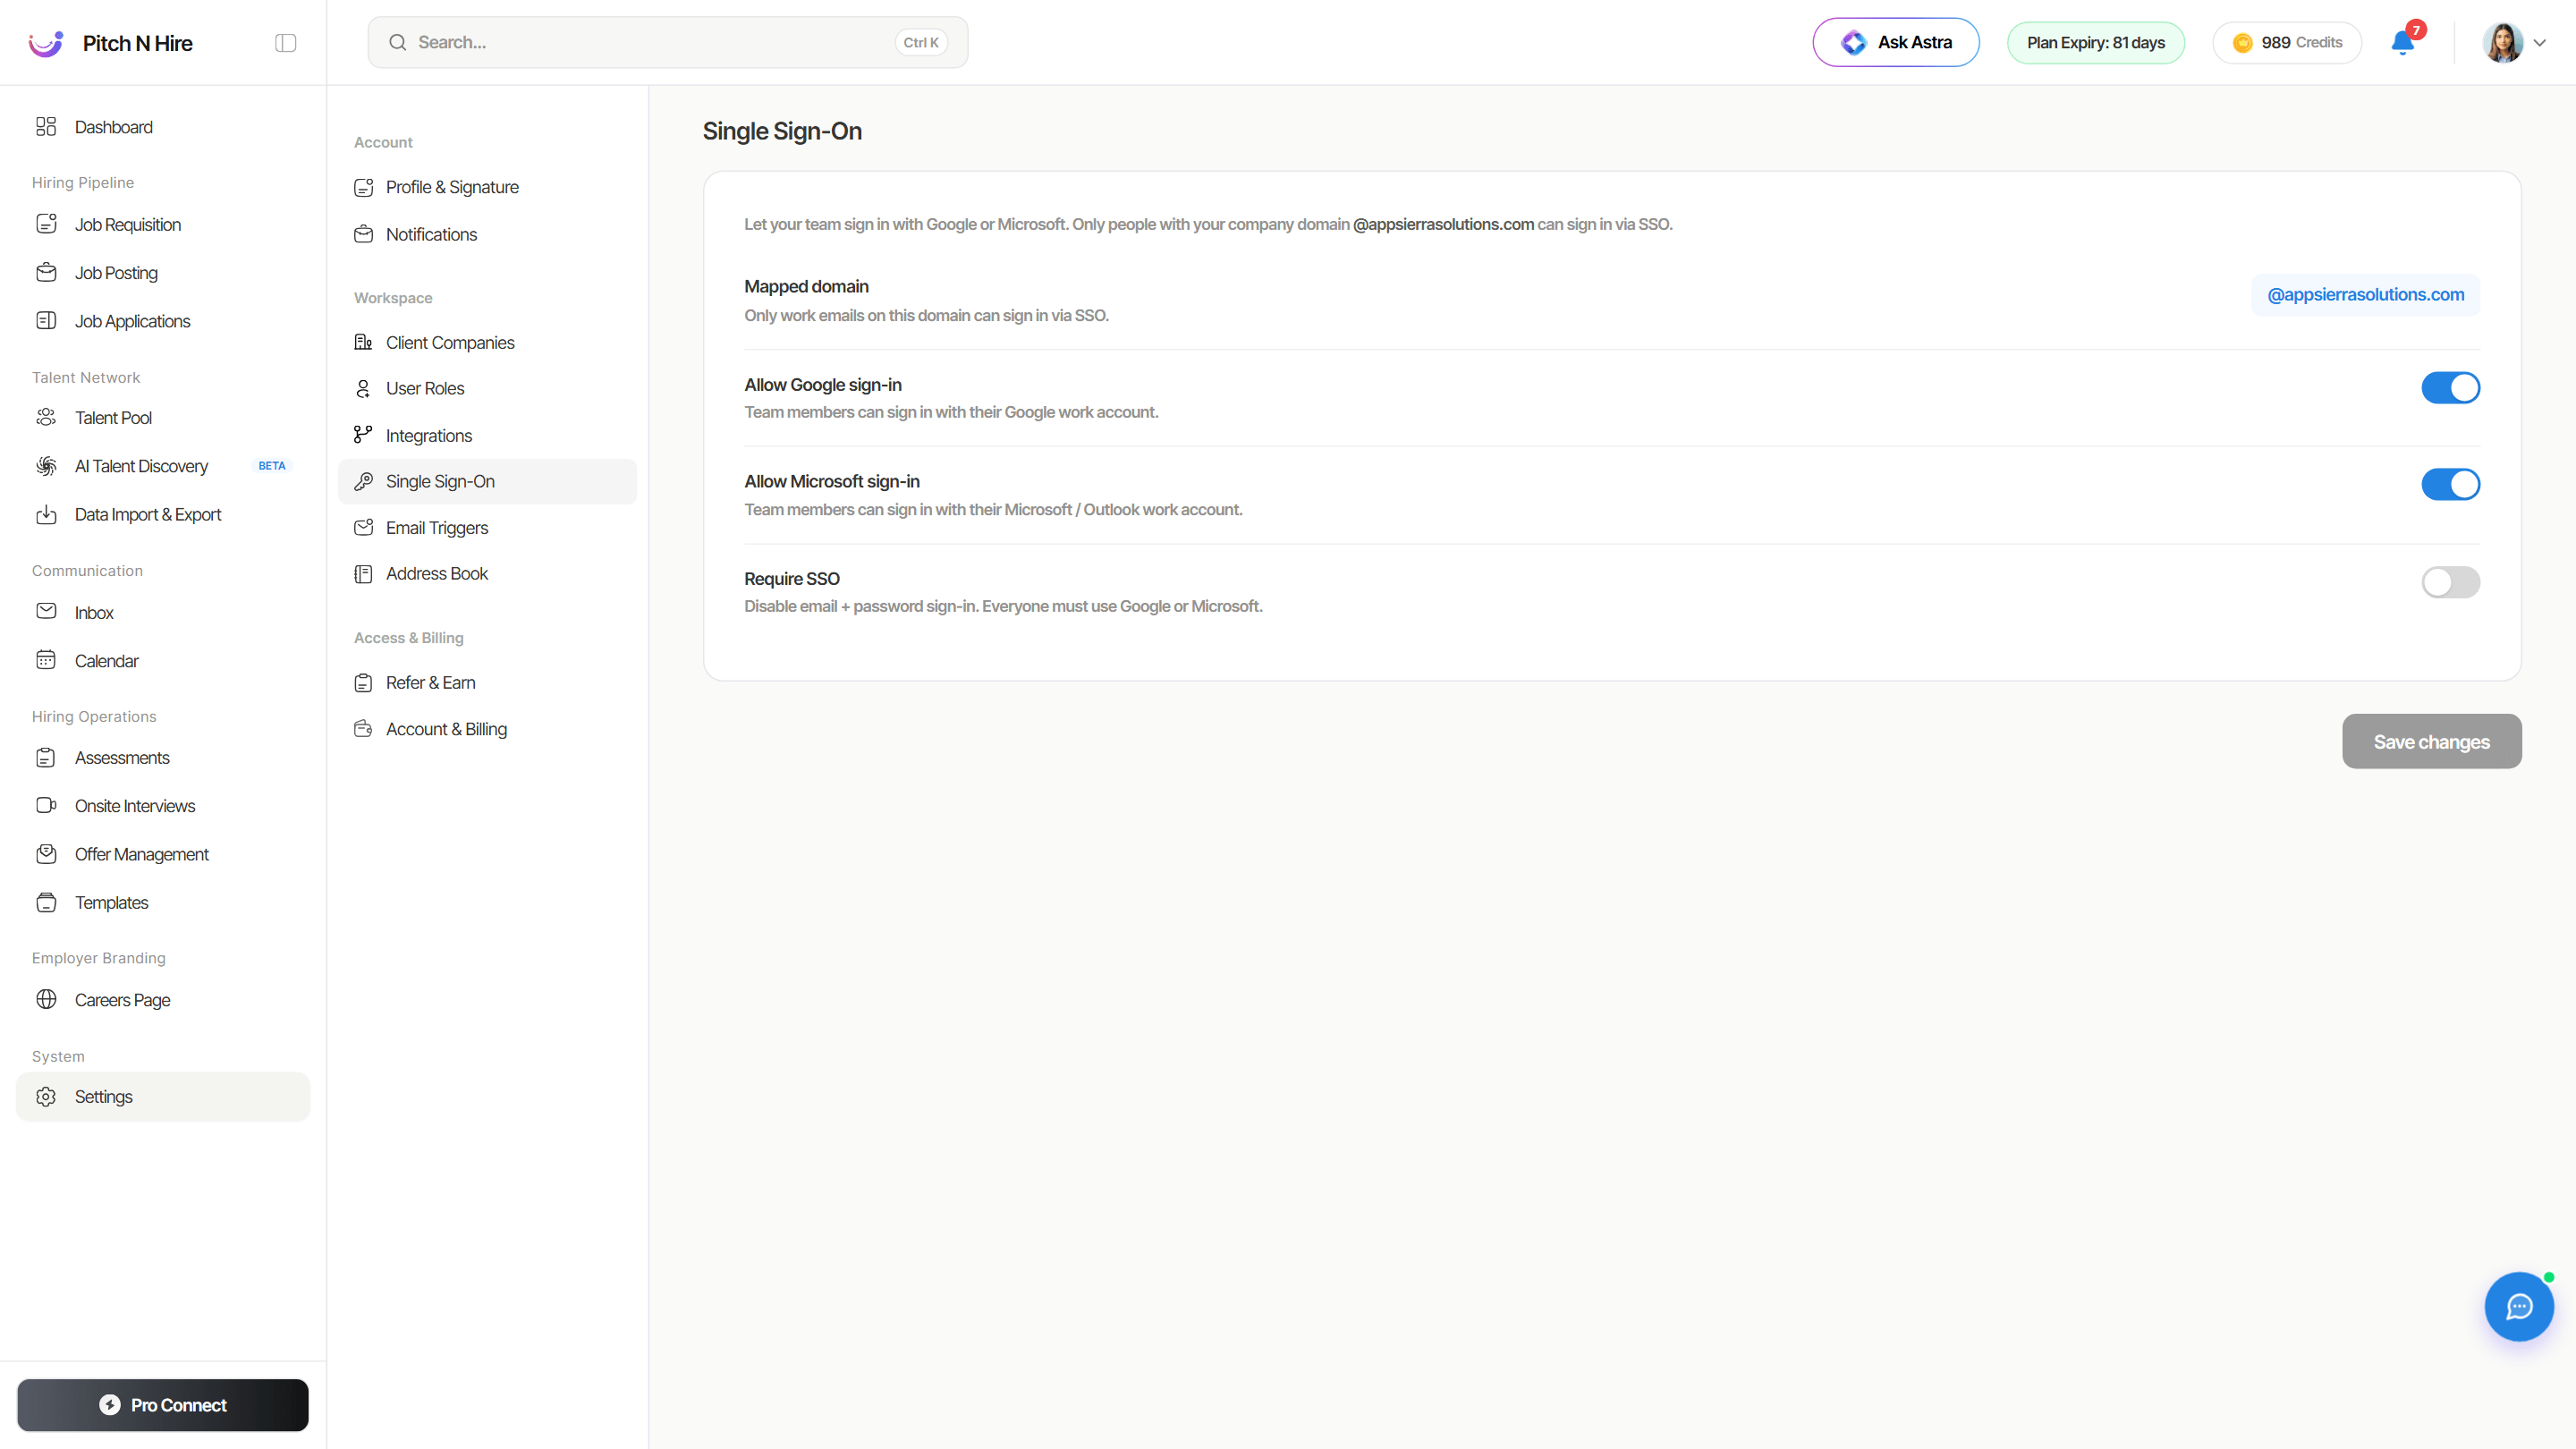
The page has four controls and a Save changes button (it stays disabled until you change something):
- Mapped domain — the company domain SSO is locked to (for example
@yourcompany.com). Only work emails on this domain can sign in via SSO. If it shows Not set, set your company domain in company settings first to enable domain-restricted SSO. - Allow Google sign-in — when on, team members can sign in with their Google work account.
- Allow Microsoft sign-in — when on, team members can sign in with their Microsoft / Outlook work account.
- Require SSO — when on, email + password sign-in is disabled and everyone must use Google or Microsoft. You must enable at least one provider before you can require SSO.
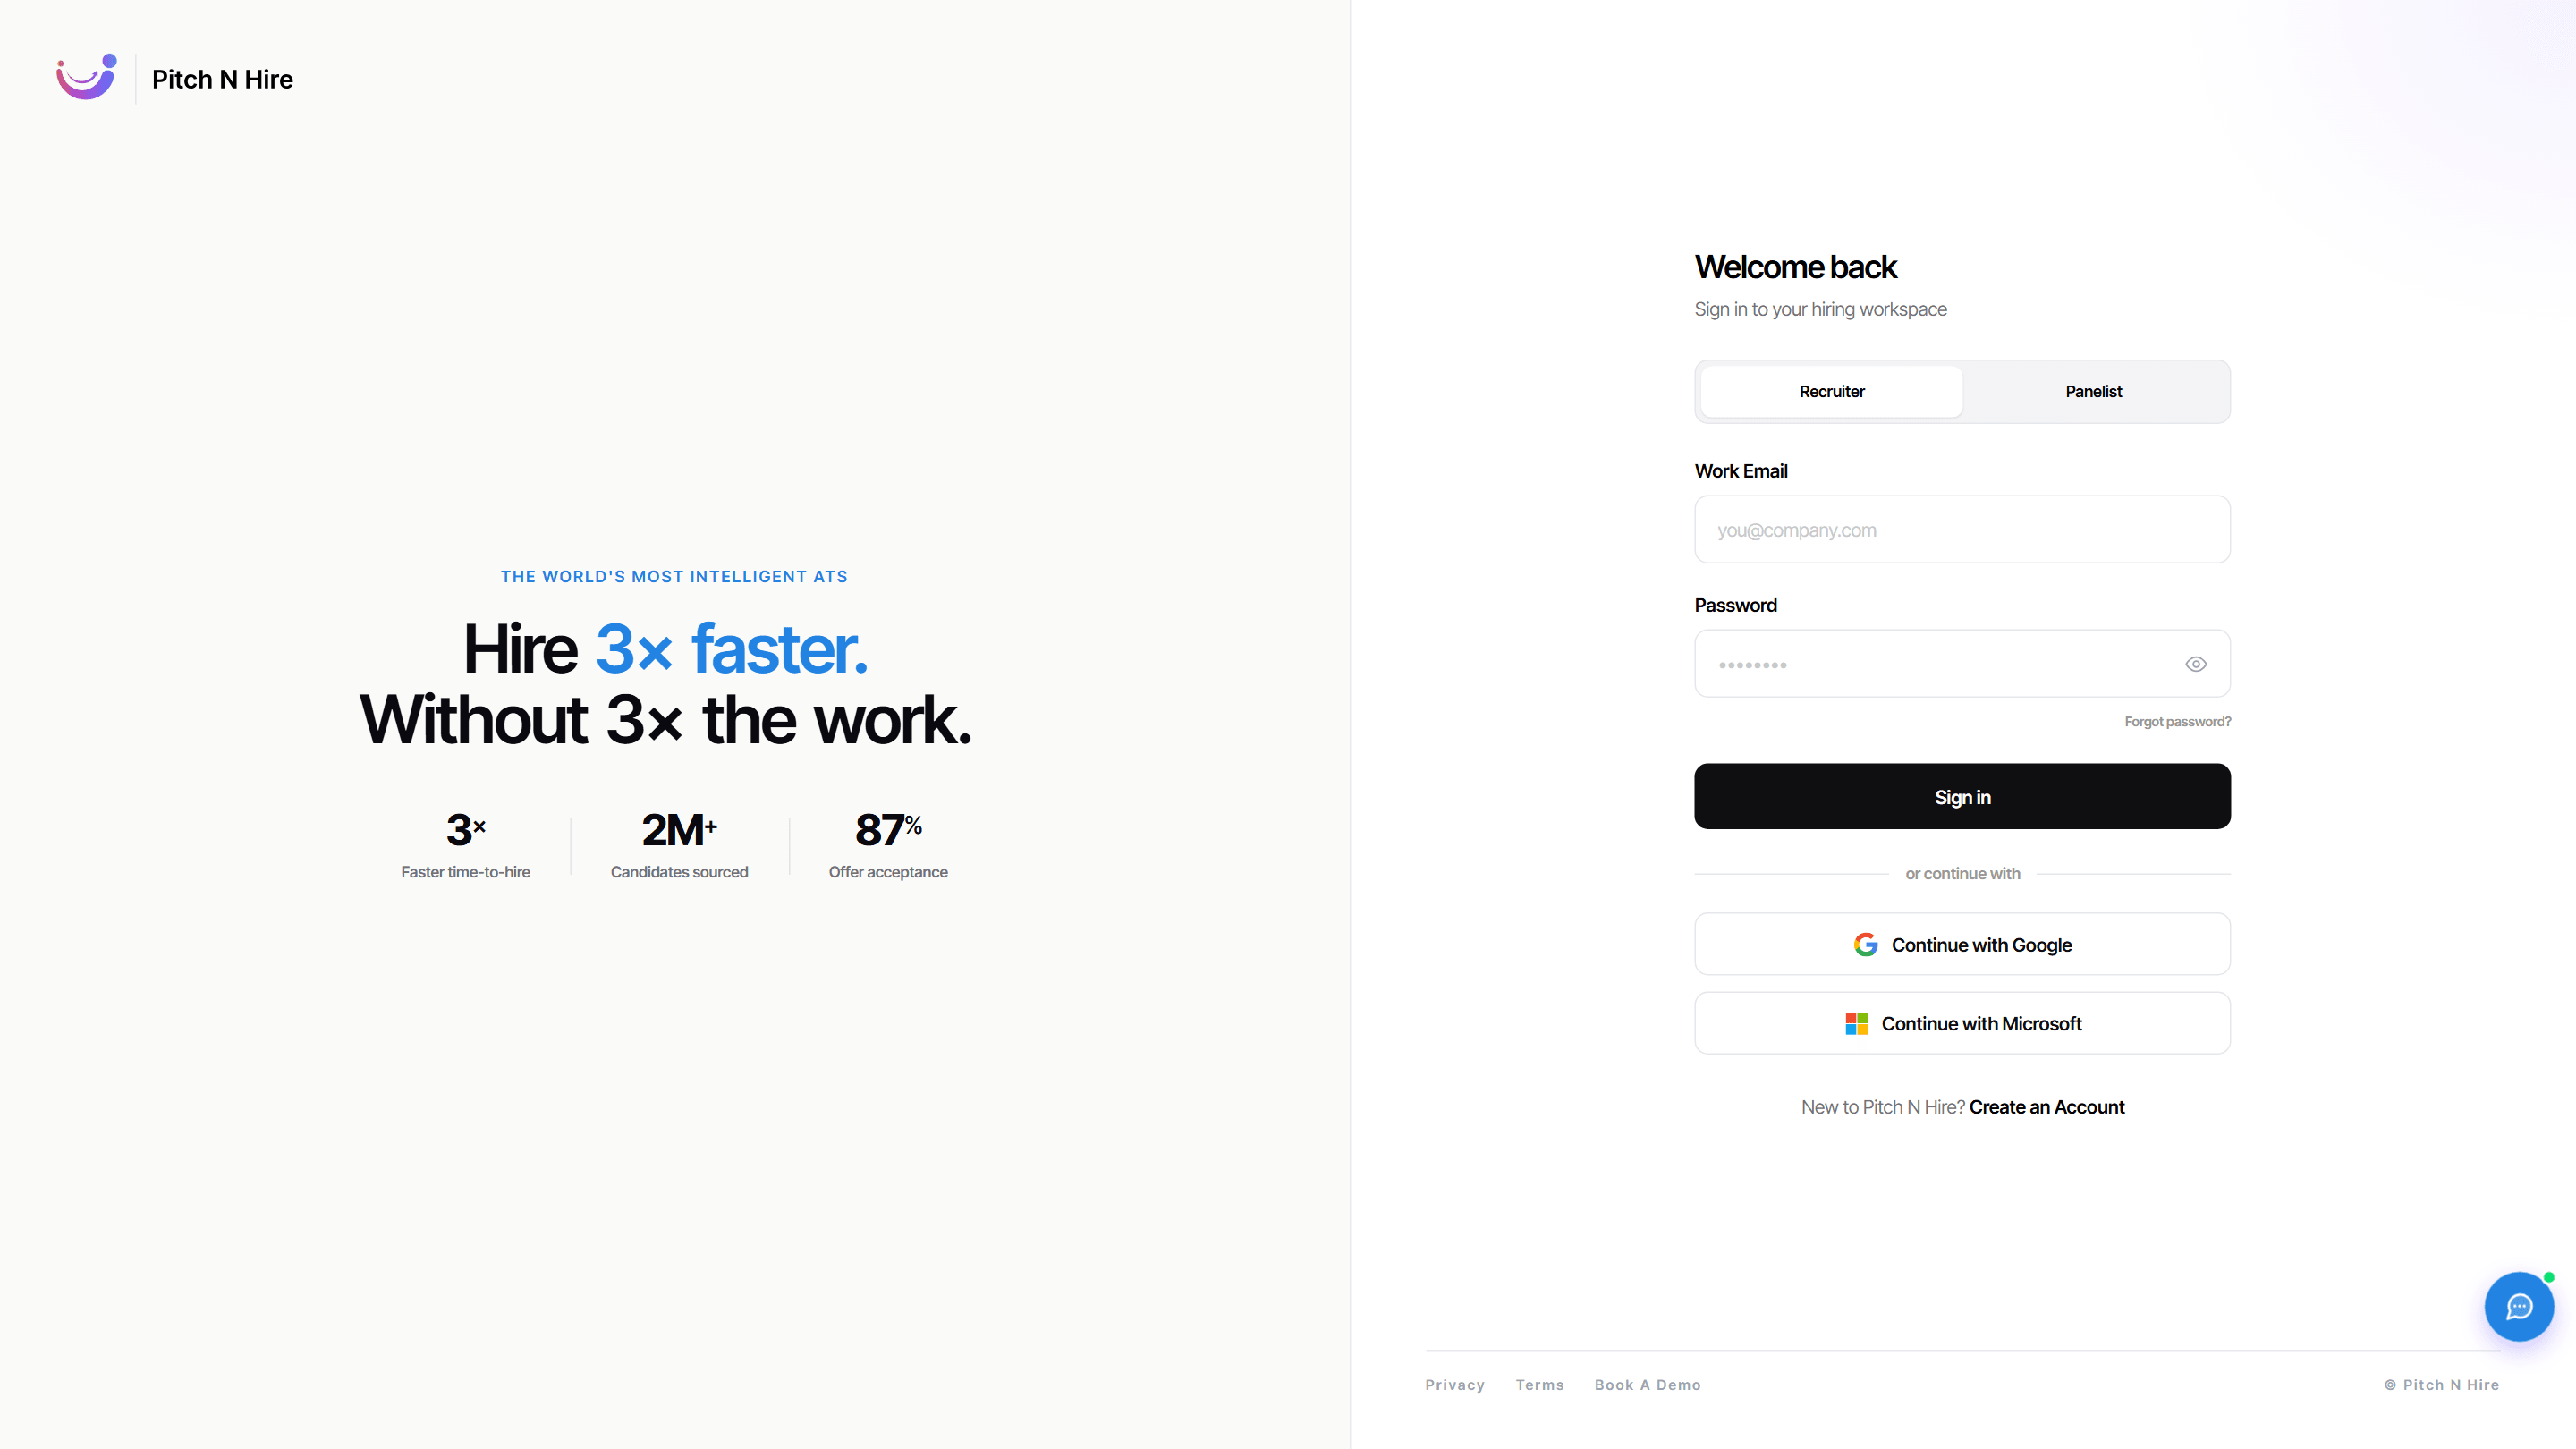
Once a provider is enabled, your team sees Continue with Google and Continue with Microsoft buttons on the sign-in screen:
GDPR
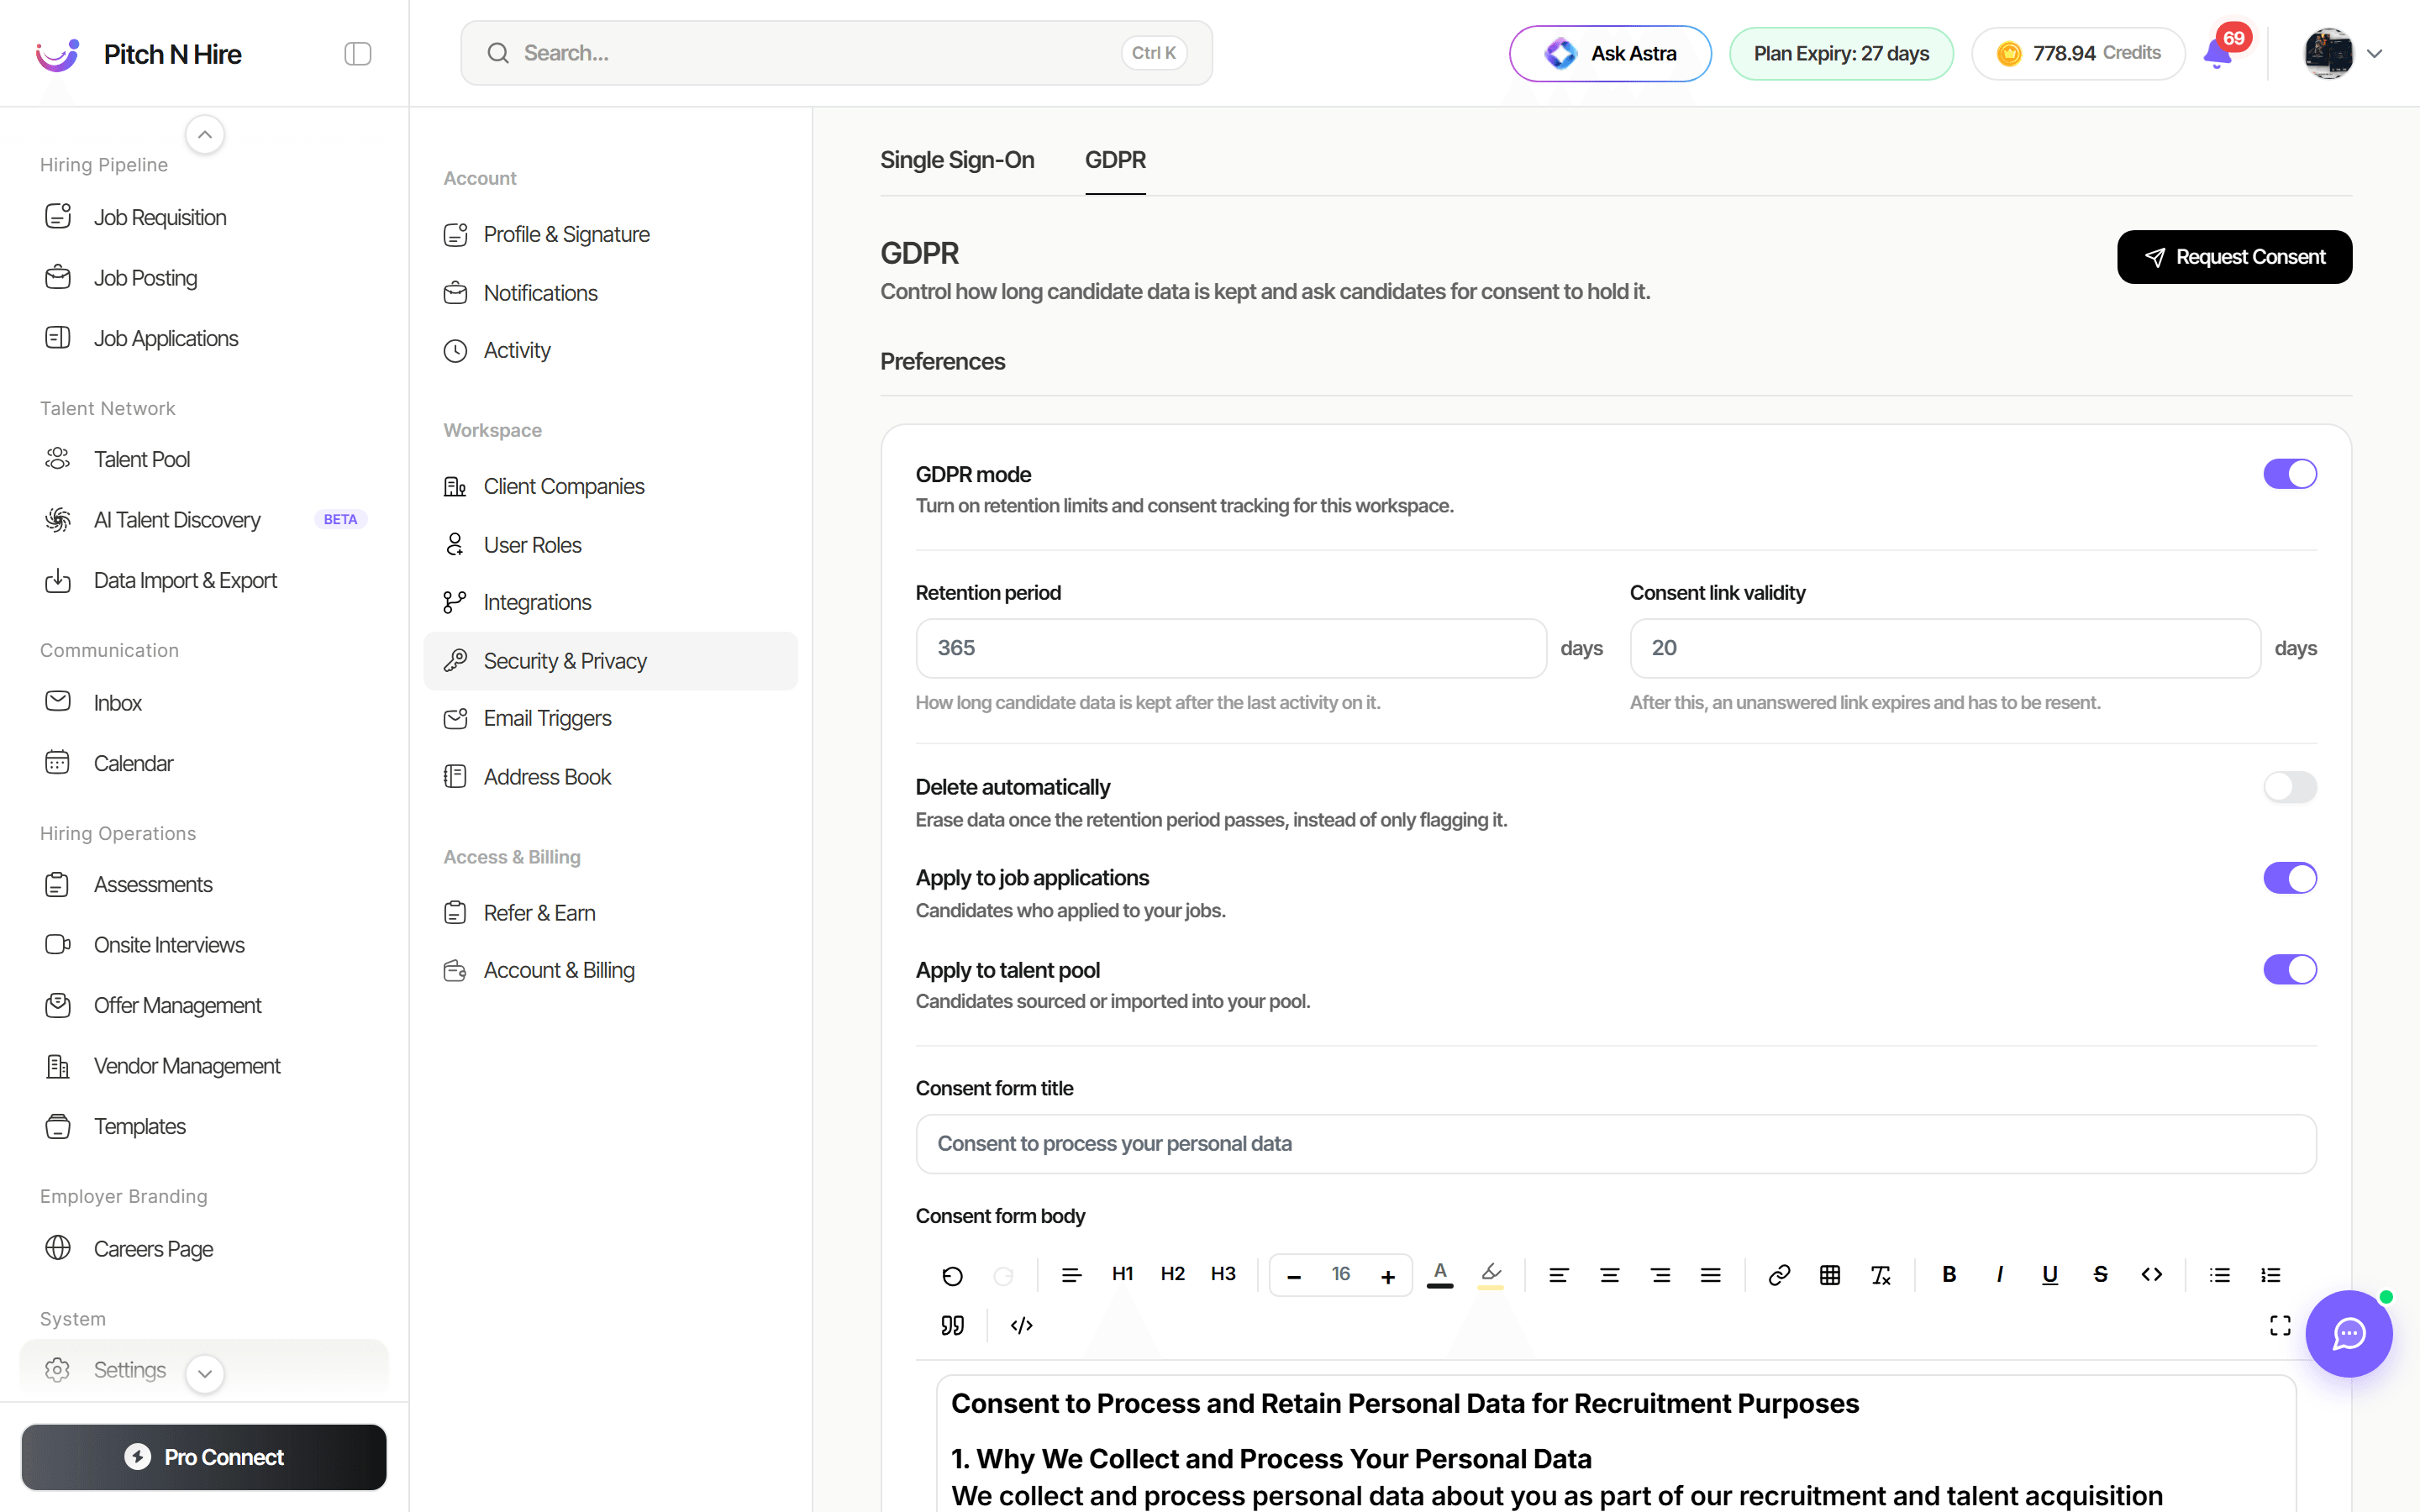
The GDPR tab holds your candidate-privacy controls: a retention period for candidate data, automatic deletion when it expires, an editable consent form and privacy notice, a data-protection disclaimer appended to candidate emails, and a Consent Requests log tracking who was asked for consent and how they replied.
Full details: GDPR & Candidate Consent.
Account & Billing
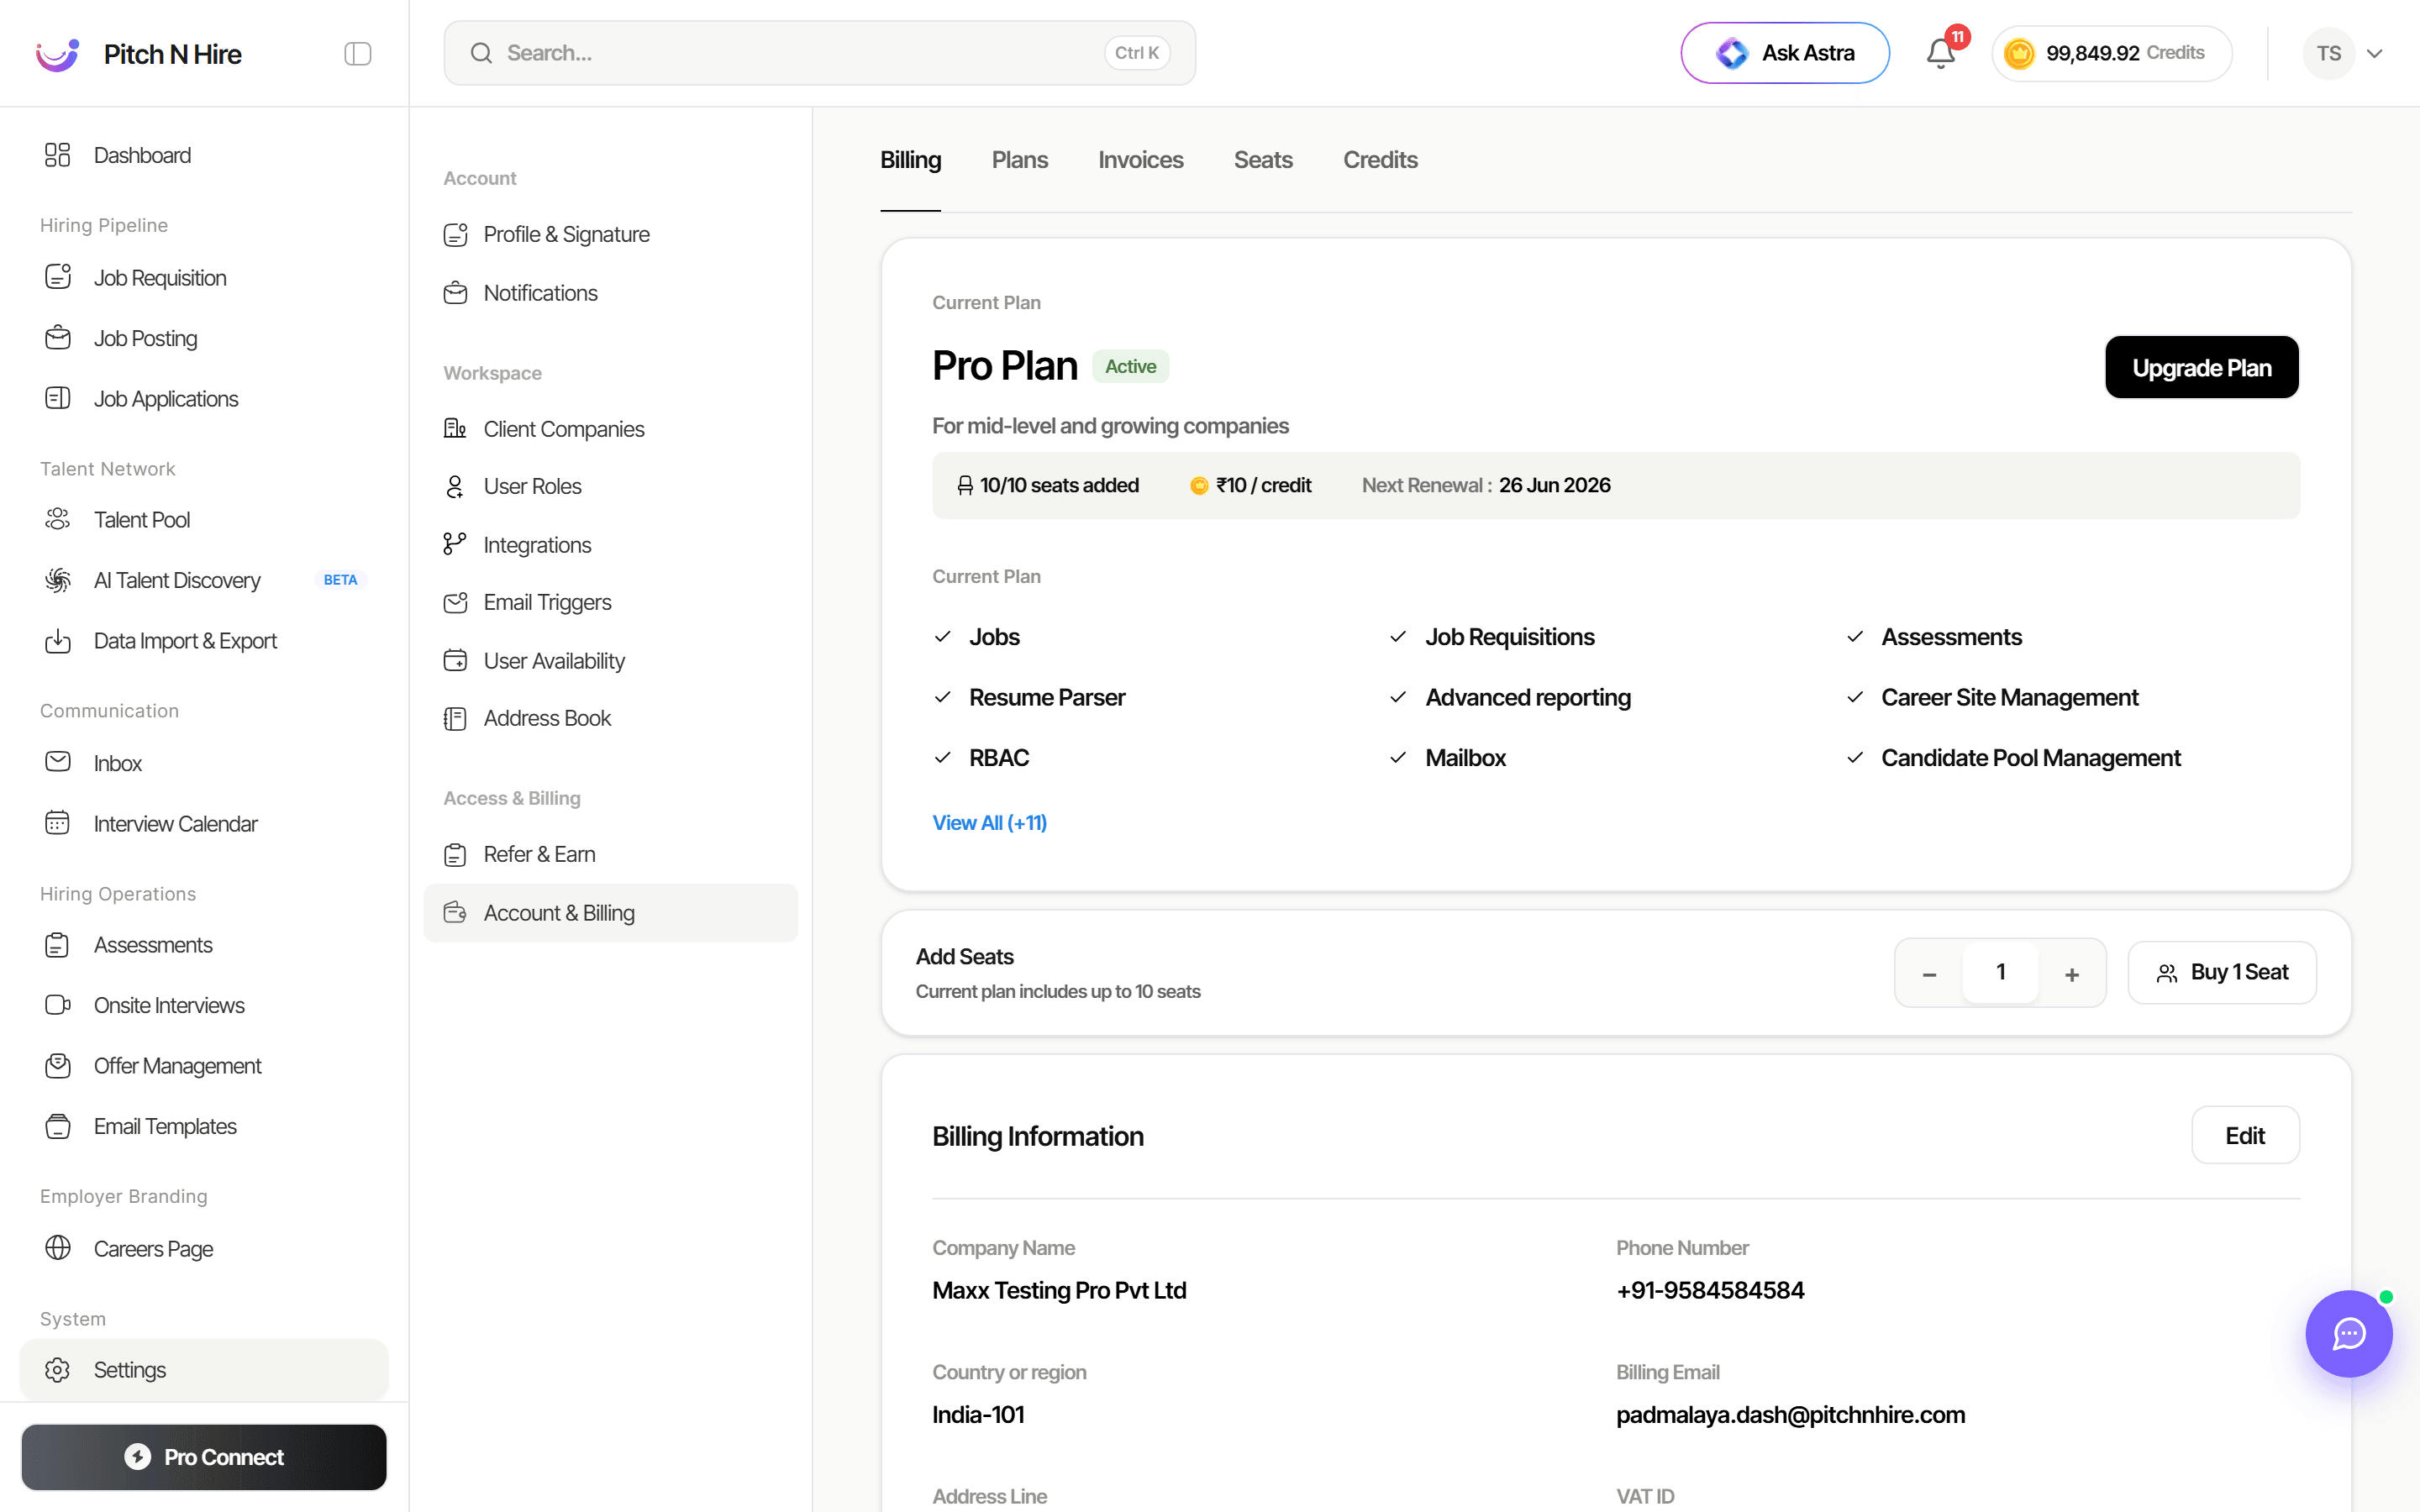
Open Account & Billing under Access & Billing. This screen has Billing, Plans, Invoices, Seats, and Credits tabs. The Billing tab shows your Current Plan (with status, seats used, renewal date and included features), an Add Seats control with Buy 1 Seat, an Upgrade Plan button, and your Billing Information.
Tips
Common issues & fixes
- Phone shows “Phone not verified” — click Send OTP on the Profile page and enter the code to verify your number.
- Save Changes seems to do nothing — confirm required fields (marked with
*) are filled; the form won’t save with a missing name or email. - An integration won’t connect — make sure you complete the provider’s sign-in/consent prompt and grant the requested access; insufficient permissions will cause the connection to fail.
- Can’t turn on Require SSO — enable Allow Google sign-in and/or Allow Microsoft sign-in first; SSO can’t be required with no provider enabled.
- Mapped domain shows “Not set” — SSO is domain-restricted, so set your company domain in company settings before enabling sign-in providers.
- A teammate can’t sign in with SSO — their work email must be on the mapped company domain; personal or off-domain accounts are rejected.