Data Import & Export
Data Import & Export is the central hub for moving candidate data in and out of Pitch N Hire. From a single screen you can review the history of every CSV import, every resume parser run, and every data export — each with its status, row counts, and timestamps — and kick off a new import with the Add Candidates button. It’s where you go to confirm a batch landed cleanly or to investigate one that didn’t.
Overview
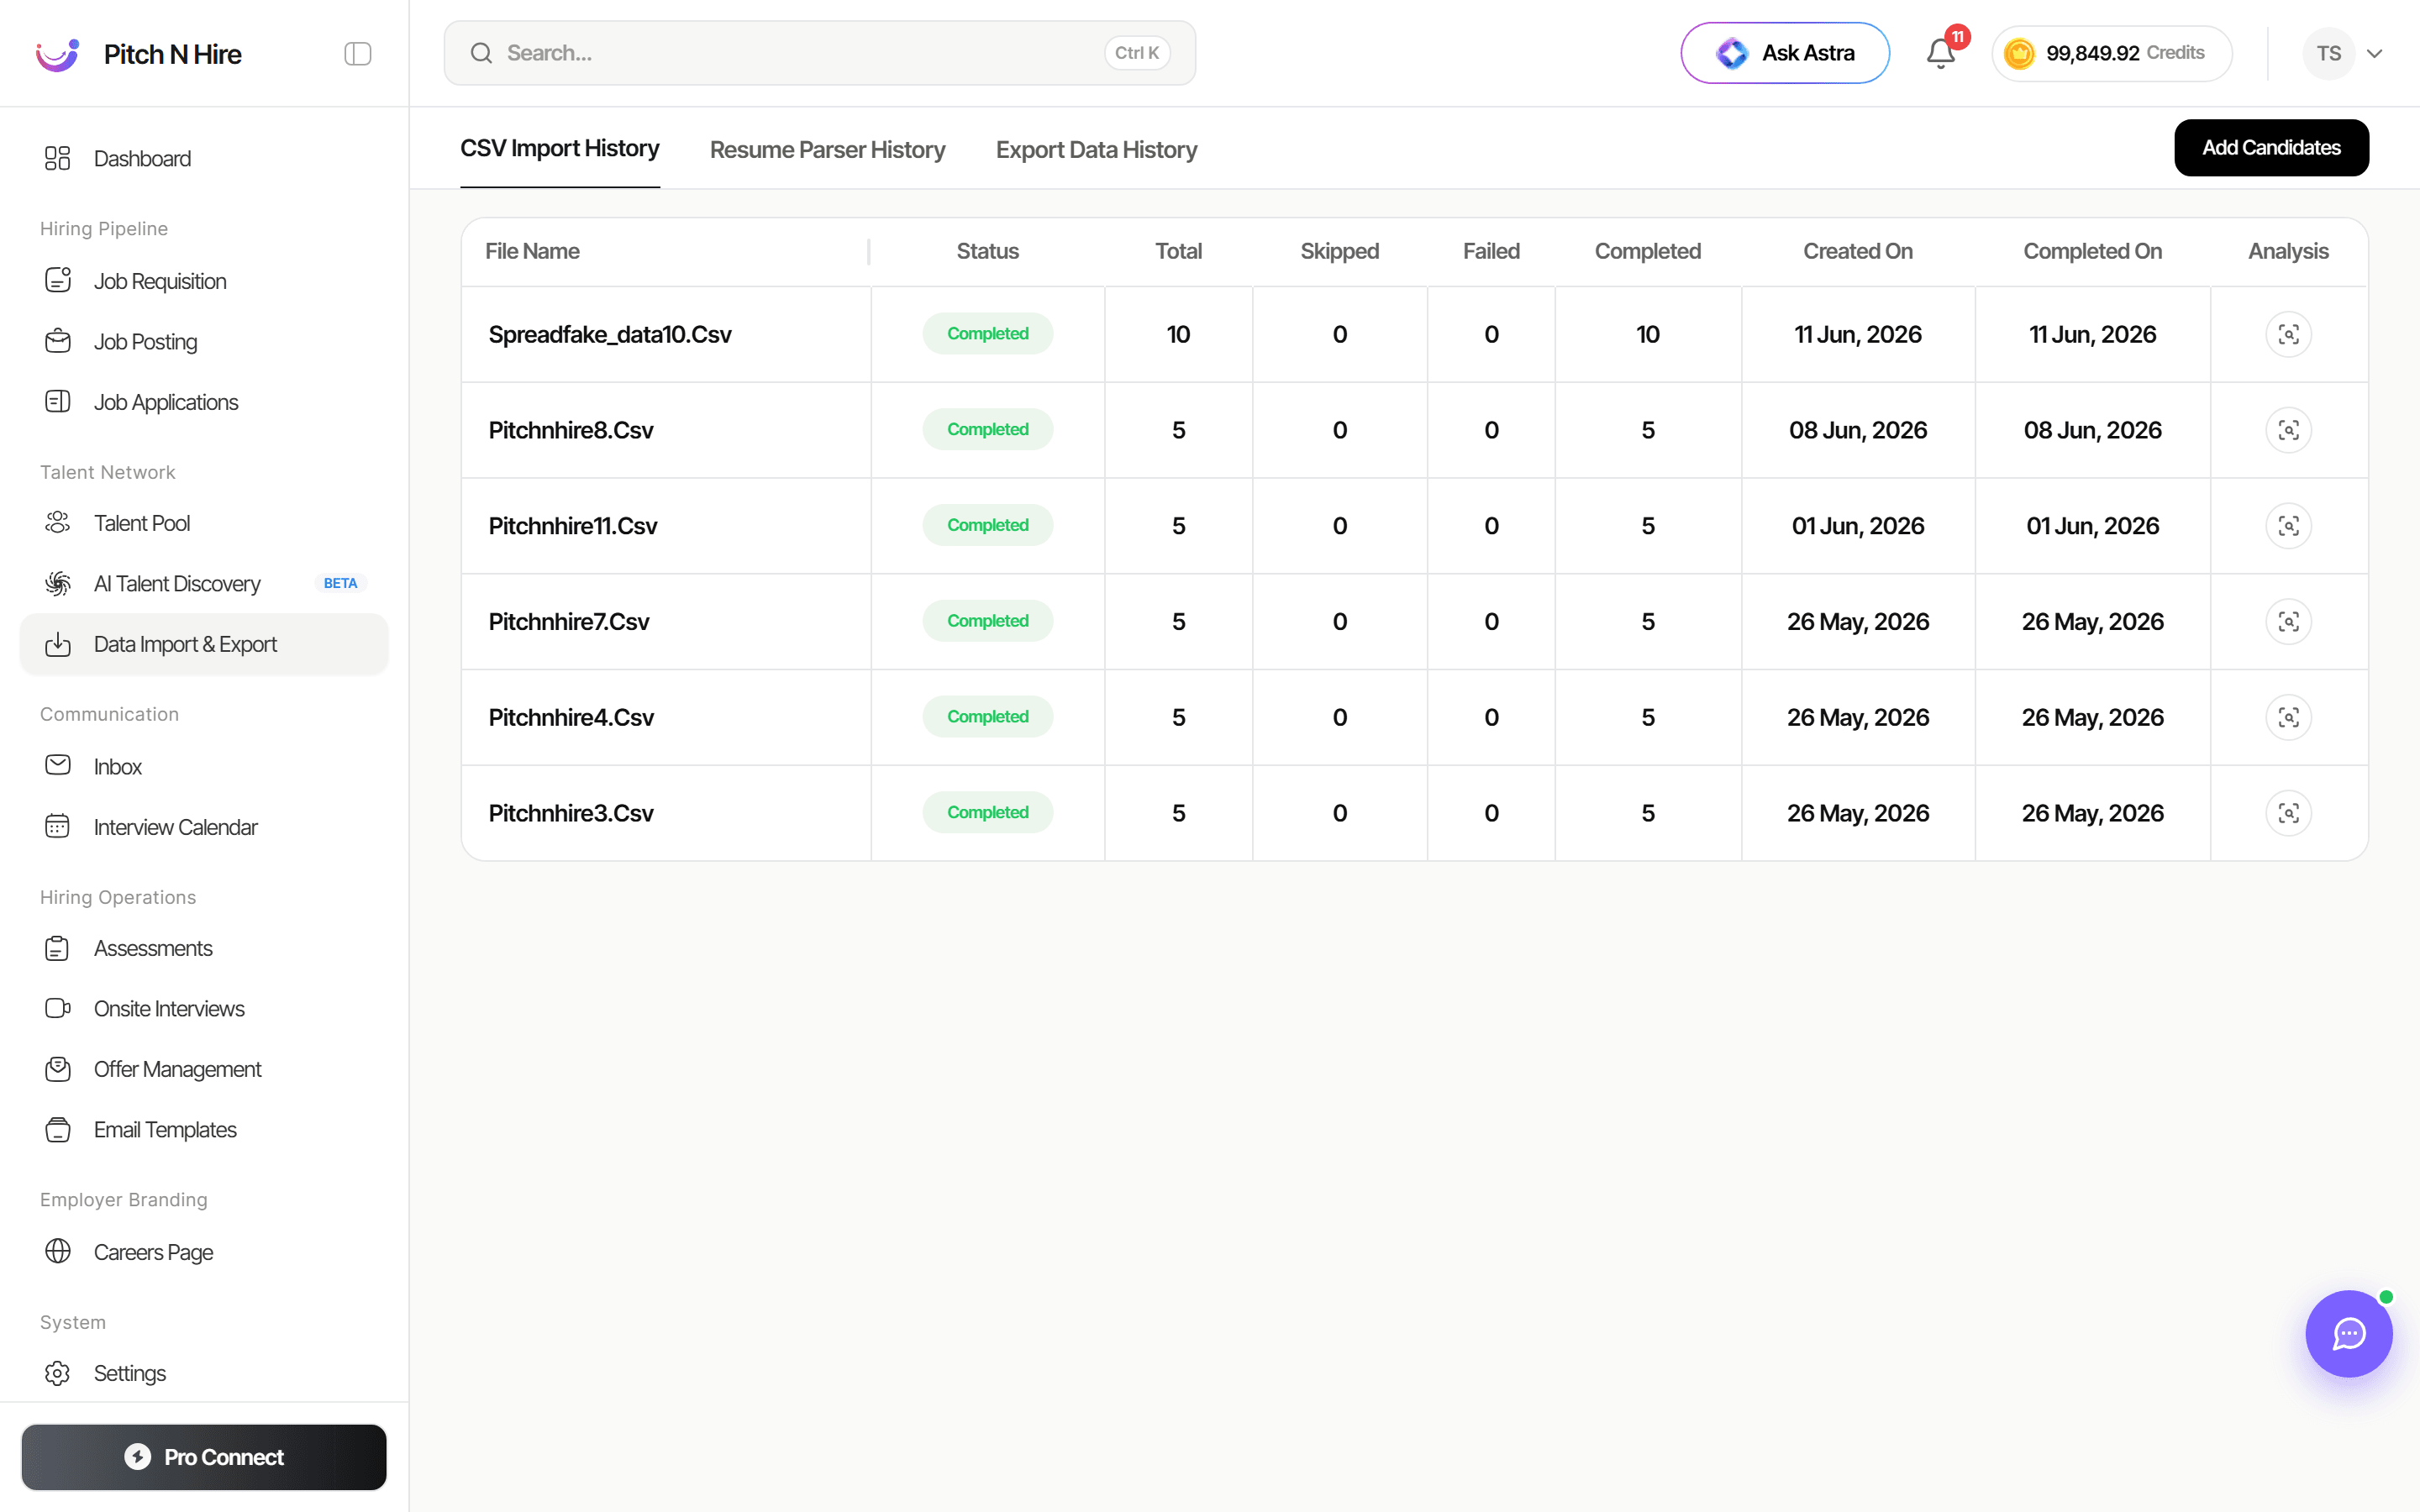
The hub is organised into three tabs across the top — CSV Import History, Resume Parser History, and Export Data History — with an Add Candidates button in the top-right corner. The active tab shows a table of past jobs. For imports, each row lists the File Name, where it was Imported To (for example Talent Pool), a Status badge (Completed, Processing, Failed or Reverted), the Rows breakdown (total · done · skipped · failed), who it was Imported By, and the Created On and Completed On dates — with per-row Actions at the end.
Key features
- CSV Import History — a record of every spreadsheet/CSV import, with per-file status and counts.
- Resume Parser History — a log of resume-parsing runs so you can confirm which resumes were processed.
- Export Data History — a record of data exports you’ve generated from Pitch N Hire.
- Per-job detail columns — File Name, Imported To, Status, Rows (total / done / skipped / failed), Imported By, Created On, Completed On and Actions.
- Status badges — at-a-glance state for each job (Completed, Processing, Failed, Reverted).
- Add Candidates — start a new import directly from the hub.
- Revert — undo an import that went wrong, removing the candidates it created (see Revert an import).
When to use each tab
| Tab | Use it to… |
|---|---|
| CSV Import History | Confirm a spreadsheet import finished and see how many rows were completed, skipped, or failed. |
| Resume Parser History | Verify which resumes were parsed into candidate records and review their outcomes. |
| Export Data History | Find and re-check data you’ve exported out of Pitch N Hire. |
Step-by-step
- Open Talent Network → Data Import & Export from the sidebar.
- Choose a tab depending on what you’re checking — CSV Import History, Resume Parser History, or Export Data History.
- Scan the table to find the job by File Name and check its Status badge.
- Read the Rows breakdown — total · done · skipped · failed — to see how the import resolved.
- Compare Created On and Completed On to confirm when the job ran and finished.
- Use the Analysis action on a row to dig into the details of that import.
- To bring in more candidates, click Add Candidates in the top-right to begin a new import.
Revert an import
If an import went wrong — the wrong file, badly mapped columns, or a resume extraction that produced junk records — you don’t have to clean it up by hand. Every import row carries a Revert action that undoes it.
- Open Talent Network → Data Import & Export and find the import in CSV Import History or Resume Parser History.
- Click Revert on that row.
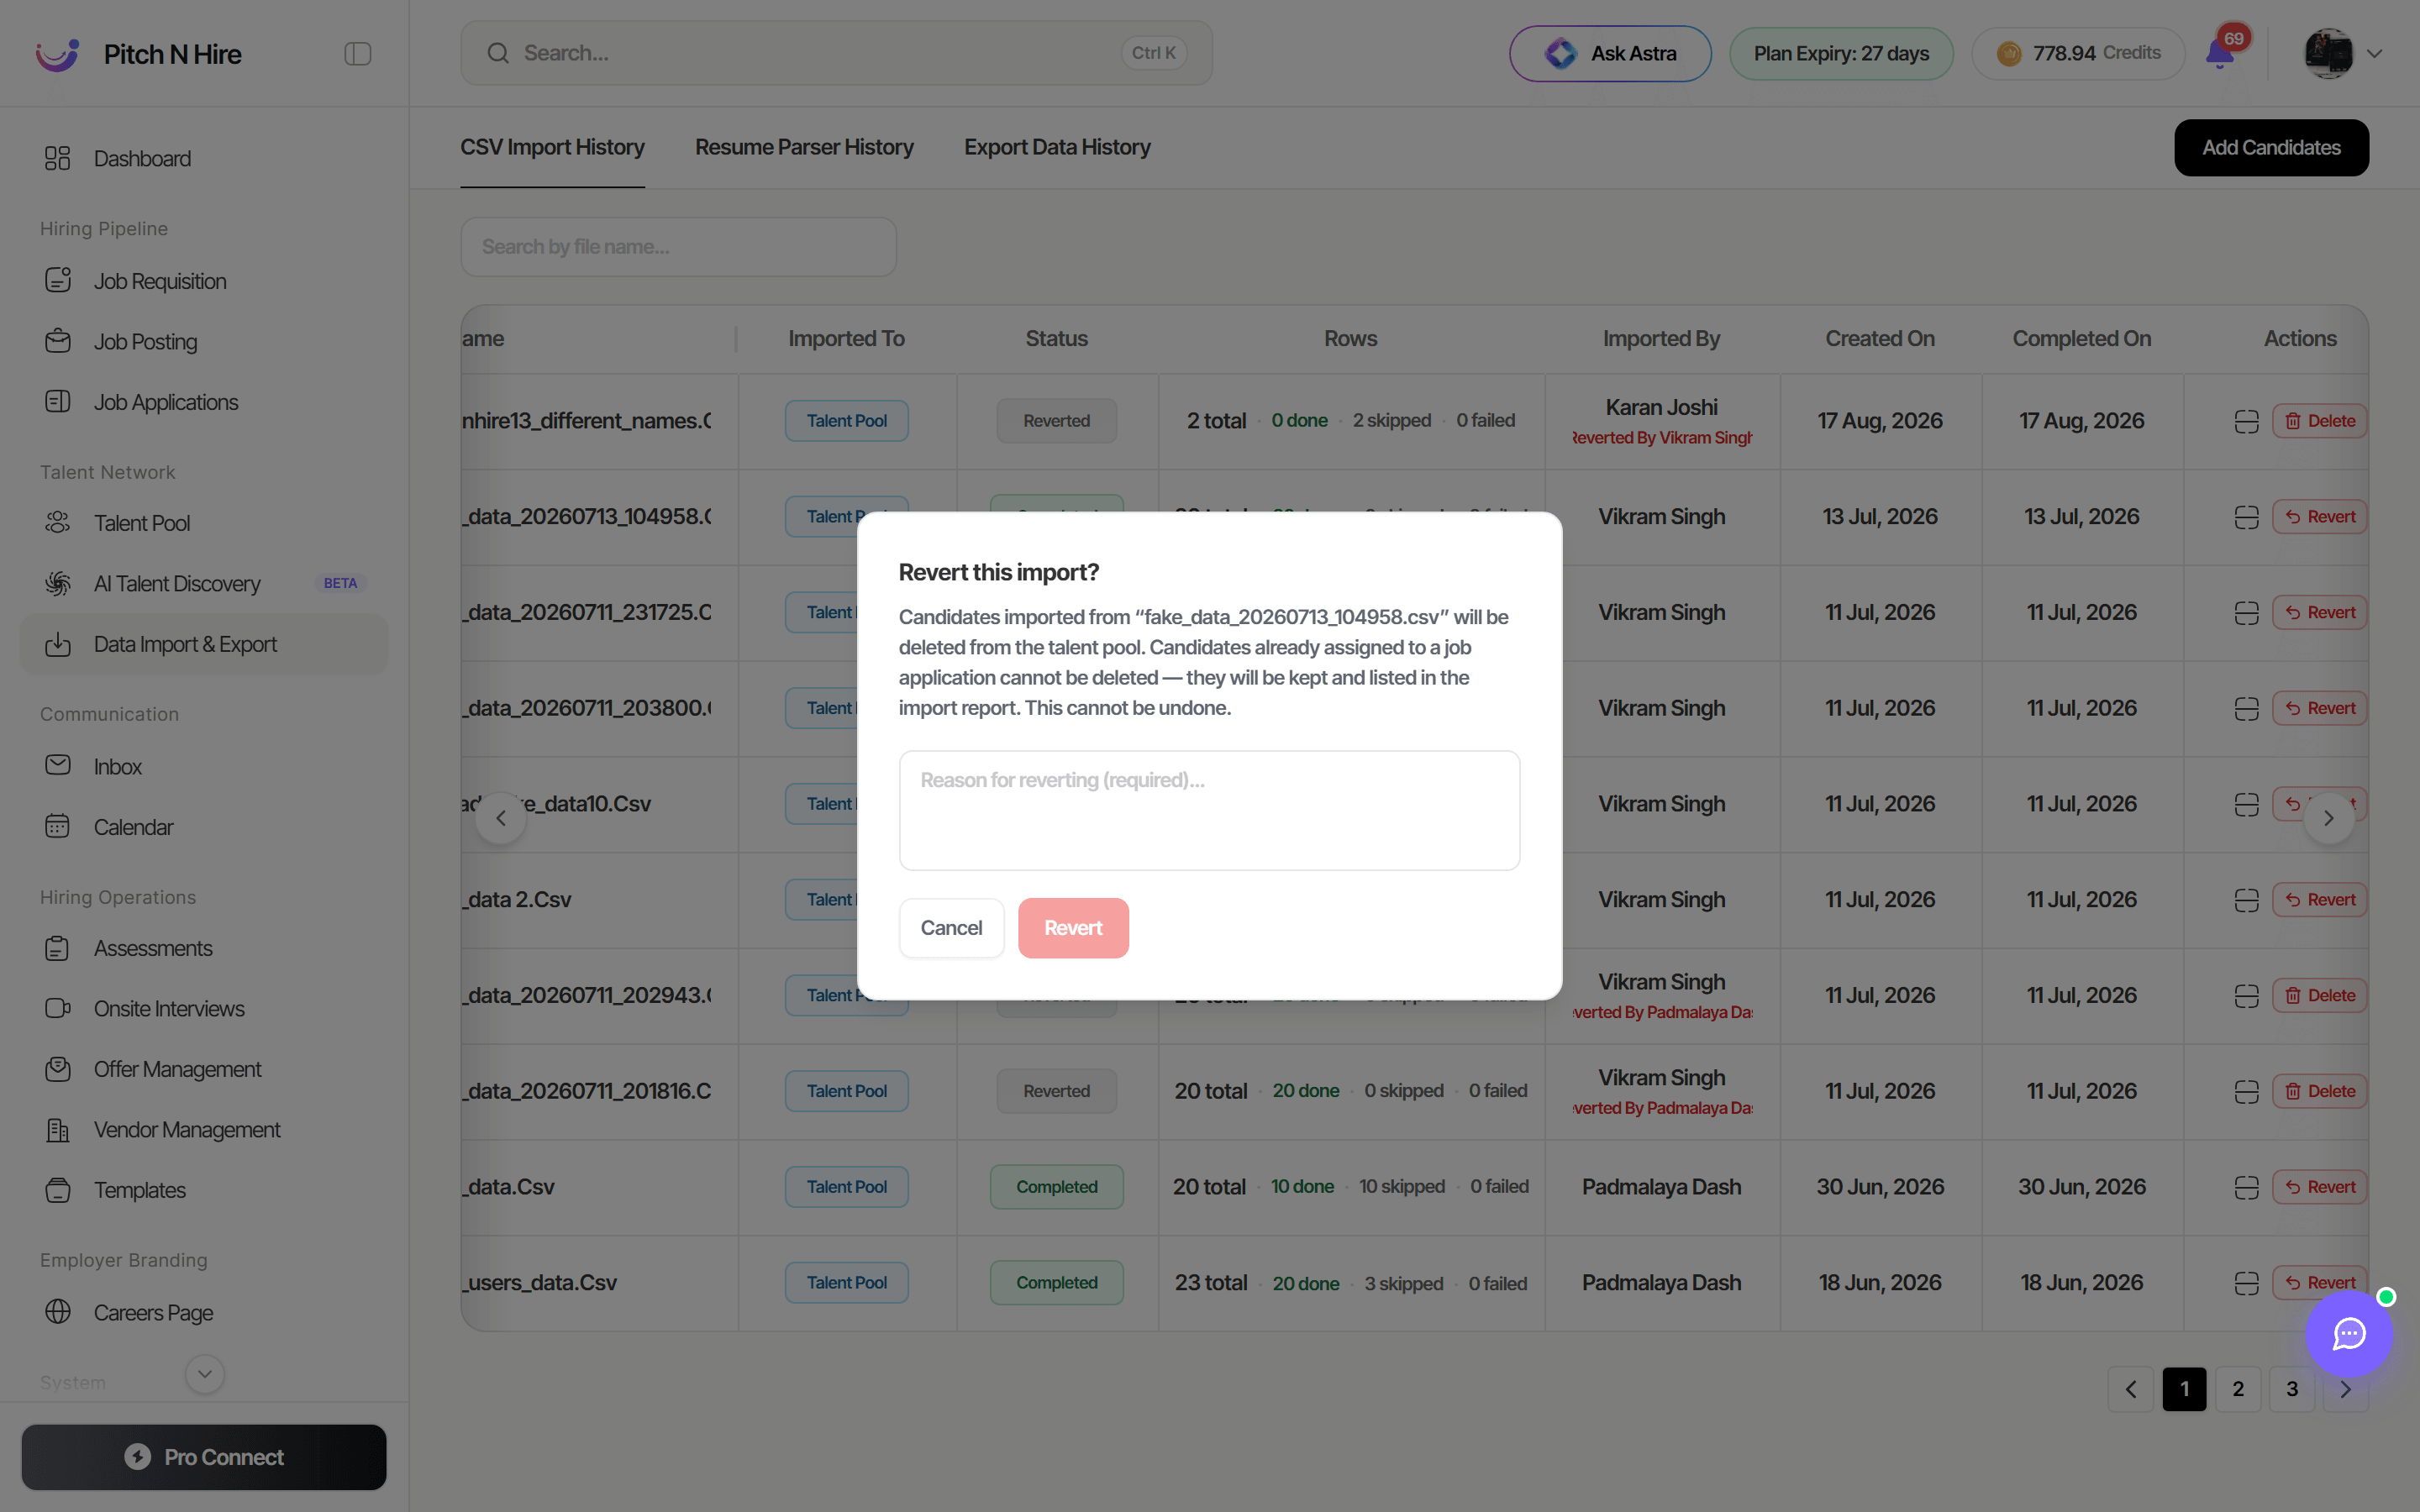
- The confirmation dialog names the file and explains what will happen.
- Enter a reason for reverting — it’s required, and it’s kept on the record.
- Confirm with Revert.
What a revert does — and doesn’t do
- Candidates created by that import are deleted from your talent pool.
- Candidates who have since been assigned to a job application are kept. They can’t be deleted, and they’re listed back to you in the import report — so a revert can never remove someone you’re actively hiring.
- The import’s status changes to Reverted, and the row records who reverted it, when, the reason, and how many candidates were kept. Hover the Reverted by label to see all of it.
- Rows in the detail view are annotated with
reverted:ornot reverted:so you can see exactly what happened to each record.